Linux | Ubuntuのインストール方法

保有するノートパソコンが古く,使っていなかったので,Linuxの勉強を目的に,当該ノートパソコンにUbuntu 22.04 LTSをインストールした.
Ubuntuのダウンロード方法
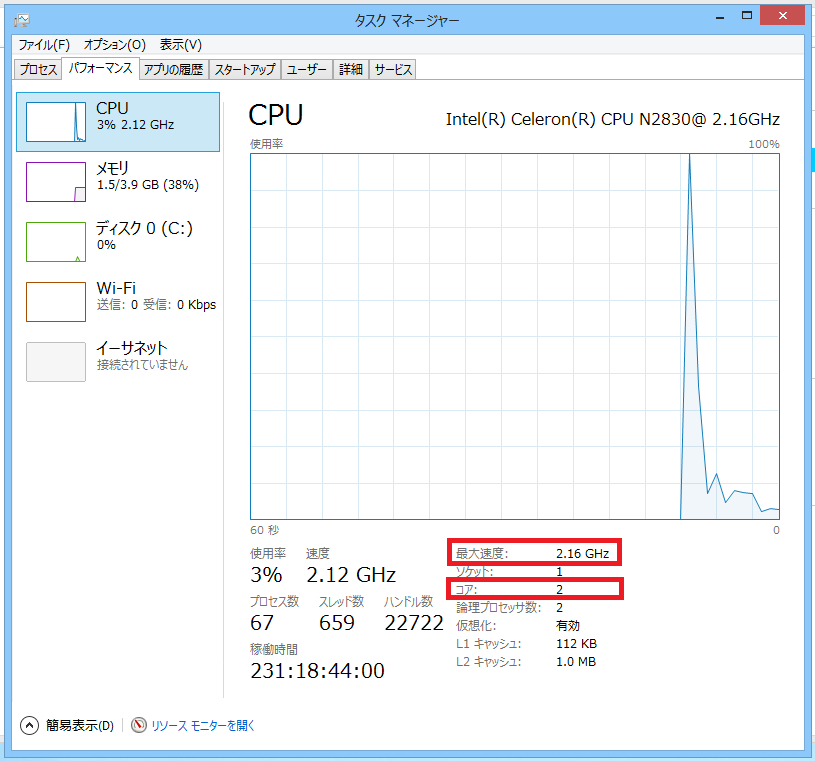
私のノートパソコンのスペックは以下になる.
- PC名:Acer Aspire E3-111
- OS:Windows 8
- CPUの最大速度:2.16 GHz
- コア数:2
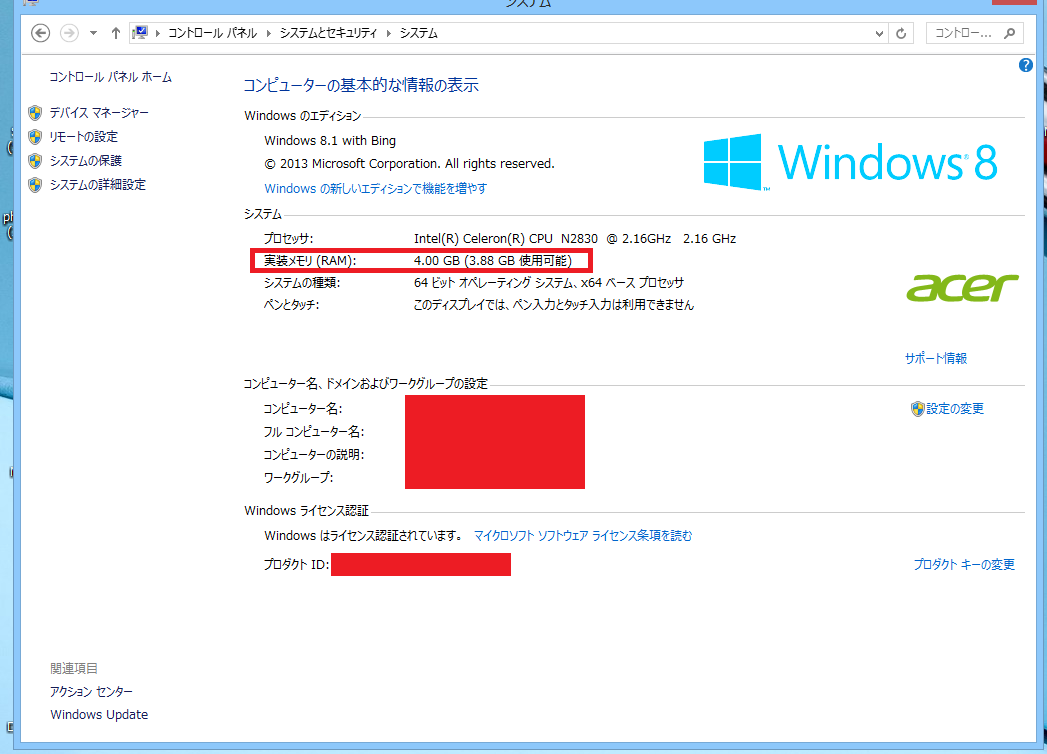
- 実装メモリ(RAM):4.00 GB
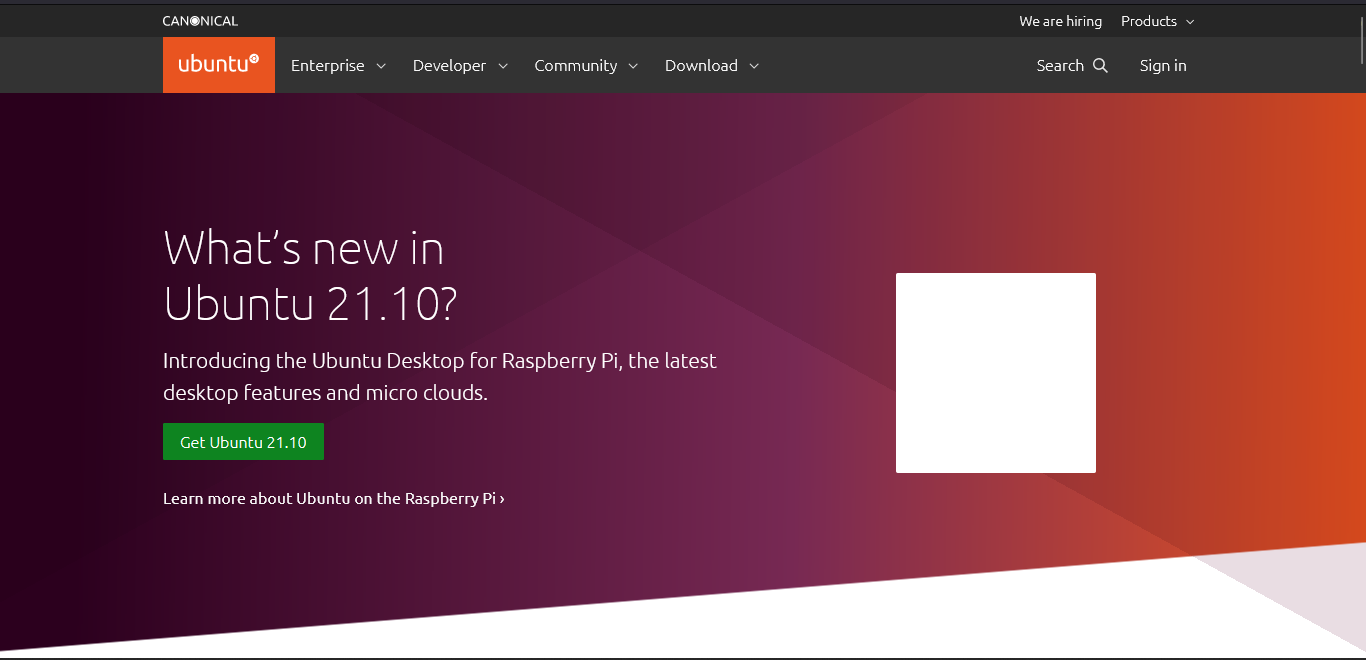
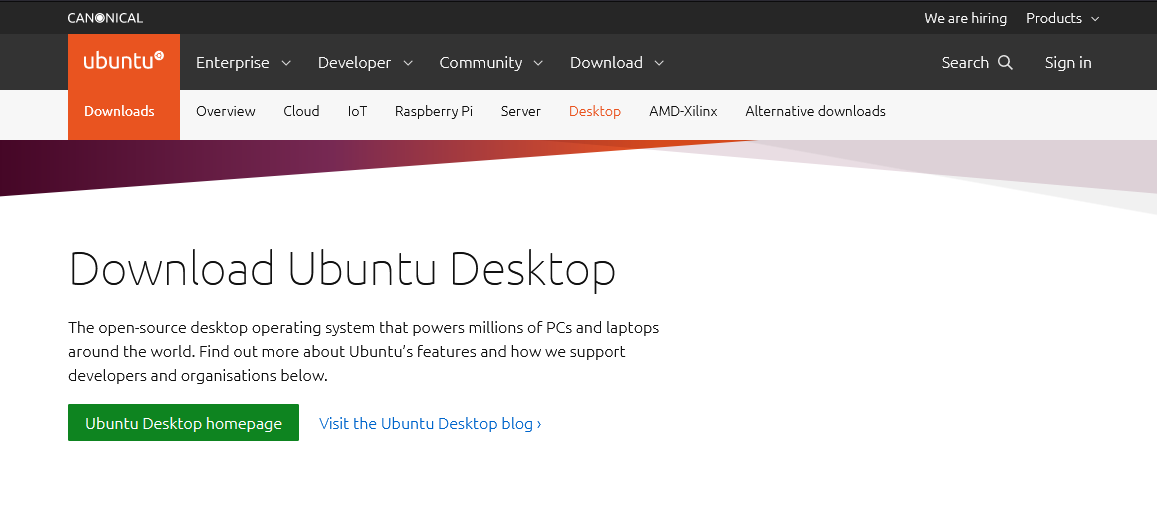
以下ubuntuのホームページにアクセスすると,ブラウザが以下画面に遷移する.
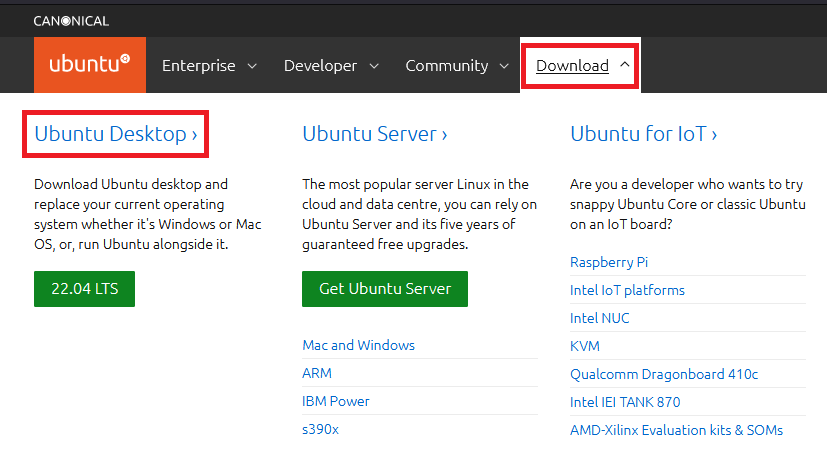
以下"Download"をクリックし,"Ubuntu Desktop"をクリックする.
以下画面に遷移するので,スクロールダウンする.
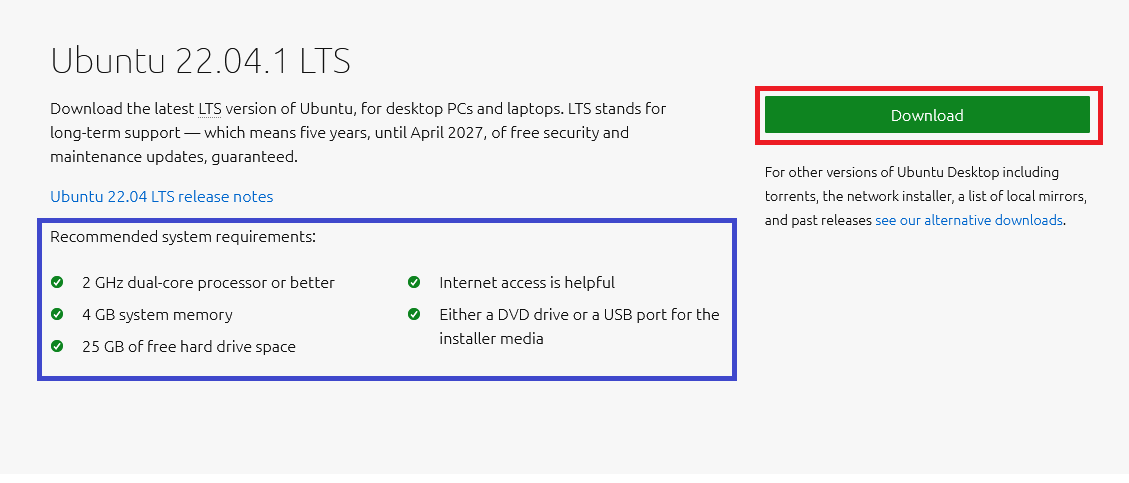
以下画面に移動するので,赤枠の"Download"をクリックする.なお,青枠はUbuntu 22.04.1 LTSをダウンロードするのに必要なPCのスペックとなり,概要は以下となる.
- 2 GHzのデュアルコアプロセッサー(コア2個以上)
- 4 GBのシステムメモリー(実装メモリー)
- 25 GBのハードドライブの空き容量
私のノートパソコンのスペックは上記にて記載した通り,以下となり,ハードドライブの容量も問題ないため,Ubuntuのインストールはスペック面から問題ない.
- CPUの最大速度:2.16 GHz
- コア数:2
- 実装メモリ(RAM):4.00 GB
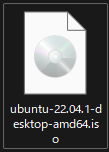
以下のように約3.5GBのisoファイルをダウンロードすることができた.
Ubuntuのisoファイルの書き込み方法
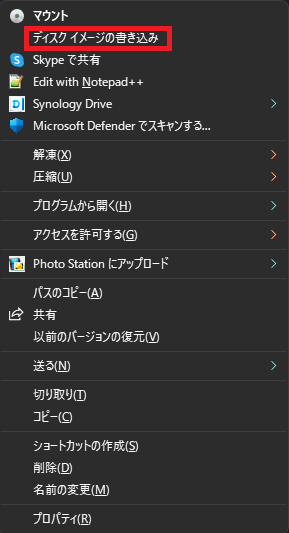
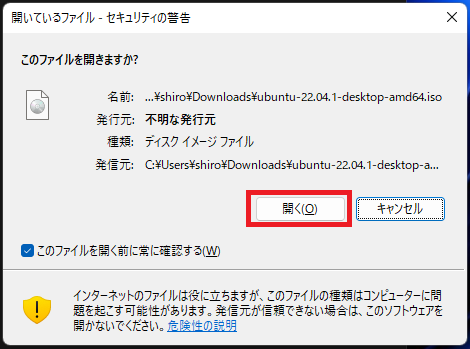
Windows 11では,上記でダウンロードしたisoファイルを右クリックすると,以下画面が表示されるので,"その他のオプションを表示"を選択する.

以下一覧が表示されるので,"ディスクイメージの書き込み"をクリックする.
以下画面が現れるので,"開く"をクリックする.
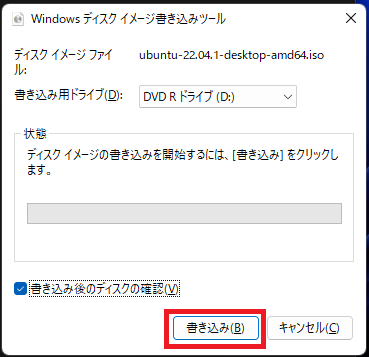
以下画面に移動するので,"書き込み後のディスクの確認"にチェックを入れる.この時点で,空のDVD-Rを入れた外付けのDVDドライブをノートパソコンにセットする.その後,"書き込み"をクリックする.私の場合,15分ほどでDVD-RにUbuntuの書き込みが完了した.
ノートパソコンでのBIOSの設定
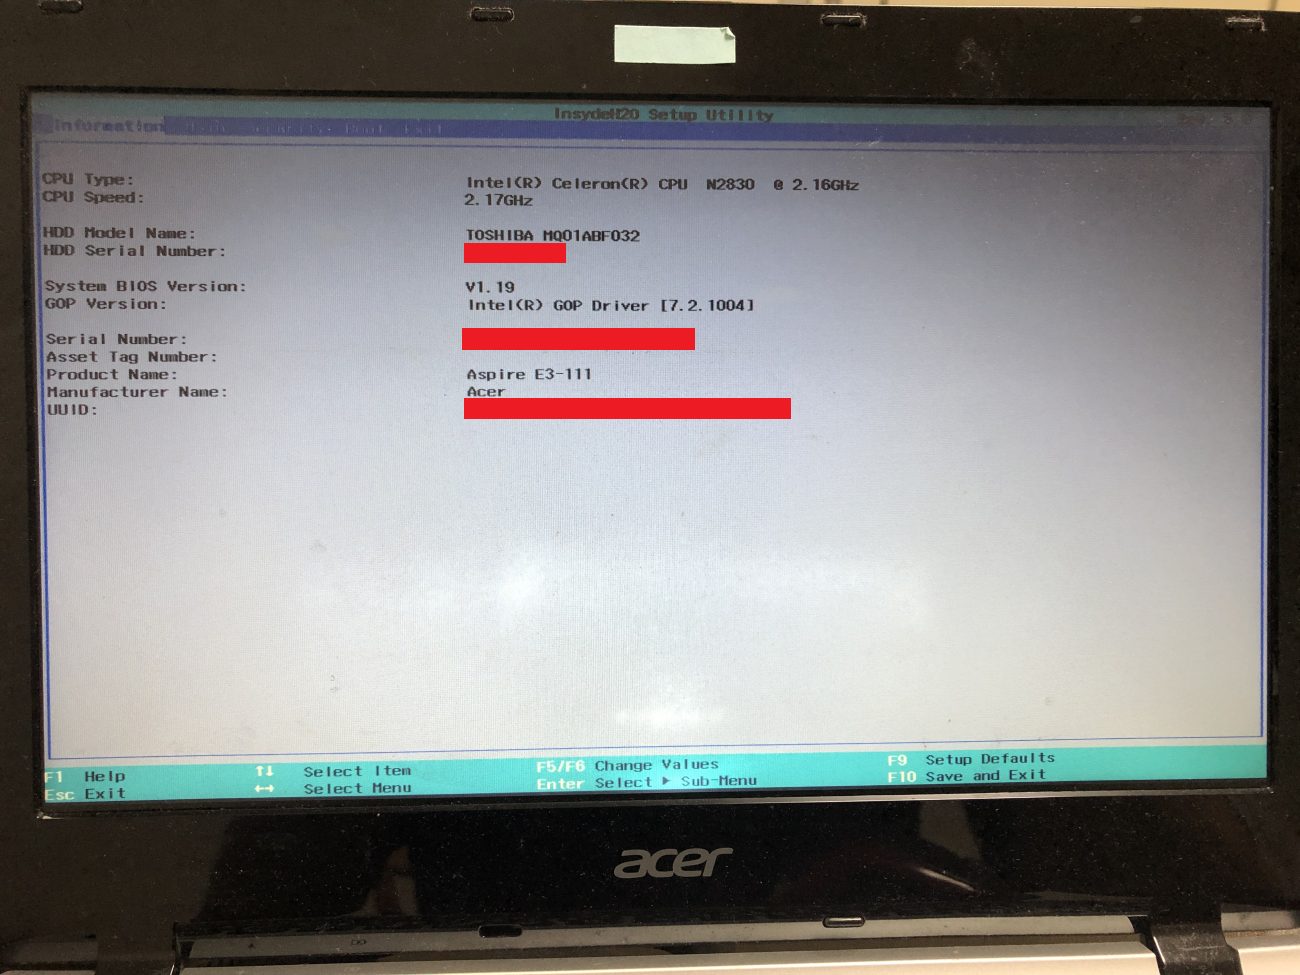
Windows 8が入っているノートパソコンのBIOSを開く。私の場合、ACER Aspire E3-111のため、ノートパソコンが立ち上がる際、F2ボタンを連打することによって以下のようにBIOSが開く。現状、"Information"タブの詳細を確認できる。ノートパソコンの右矢印でタブを移動する。
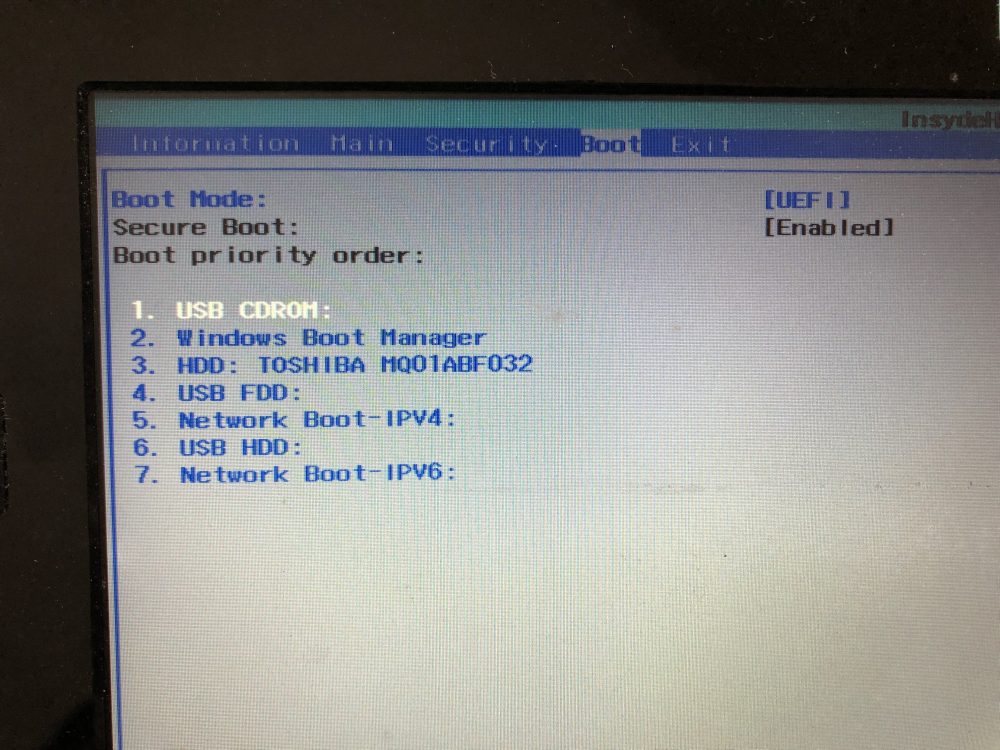
“Boot"タブの詳細を確認できる。現状、ノートパソコンが起動する際の順番が1~7にて確認できる。6の"USB CDROM"を1に変更する。そのため、F6キーを押し、上矢印で移動させる。
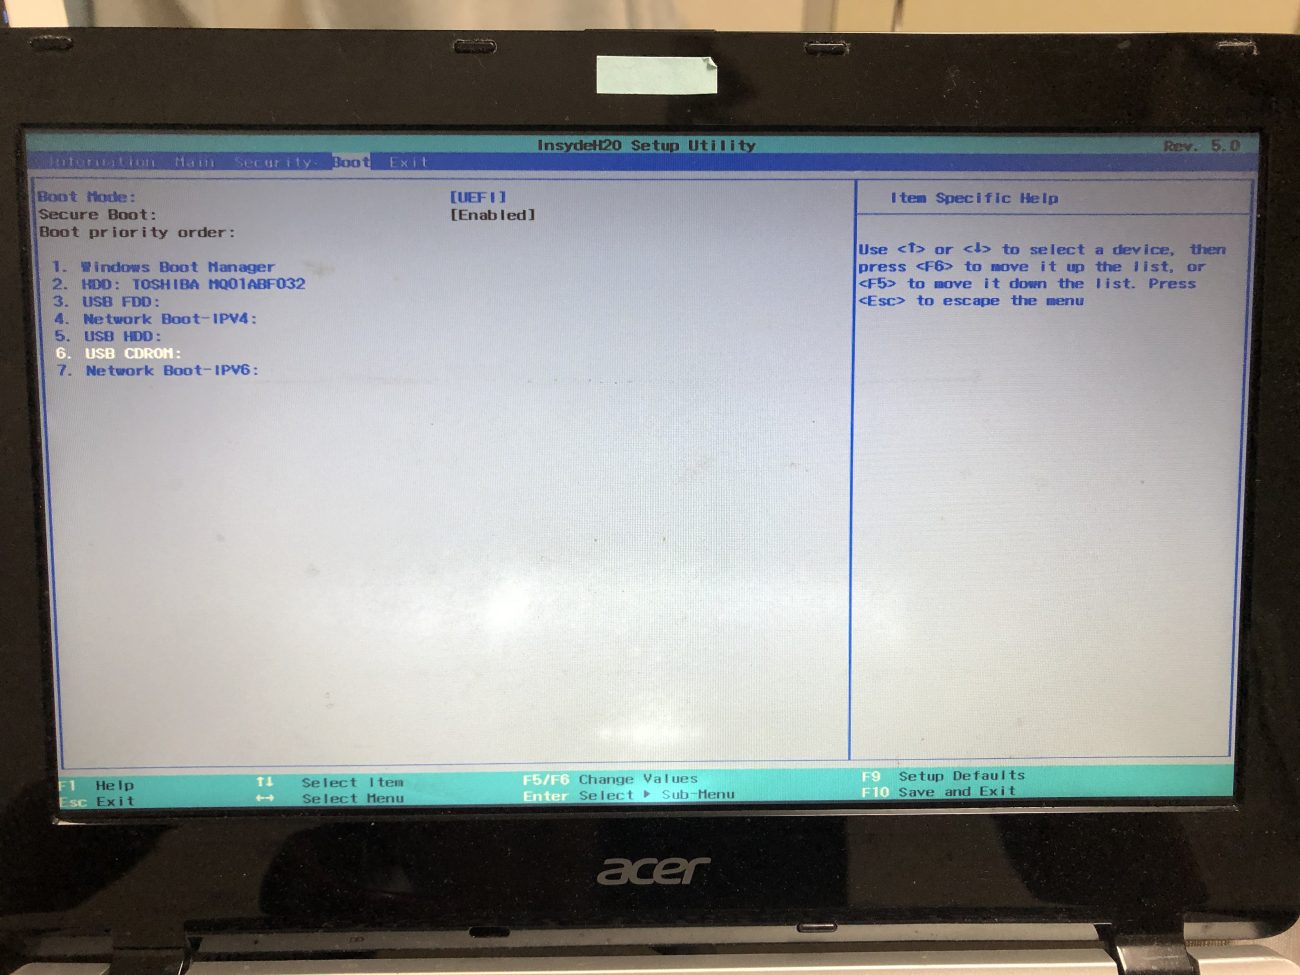
USB CDROMを以下のように1に移動した。
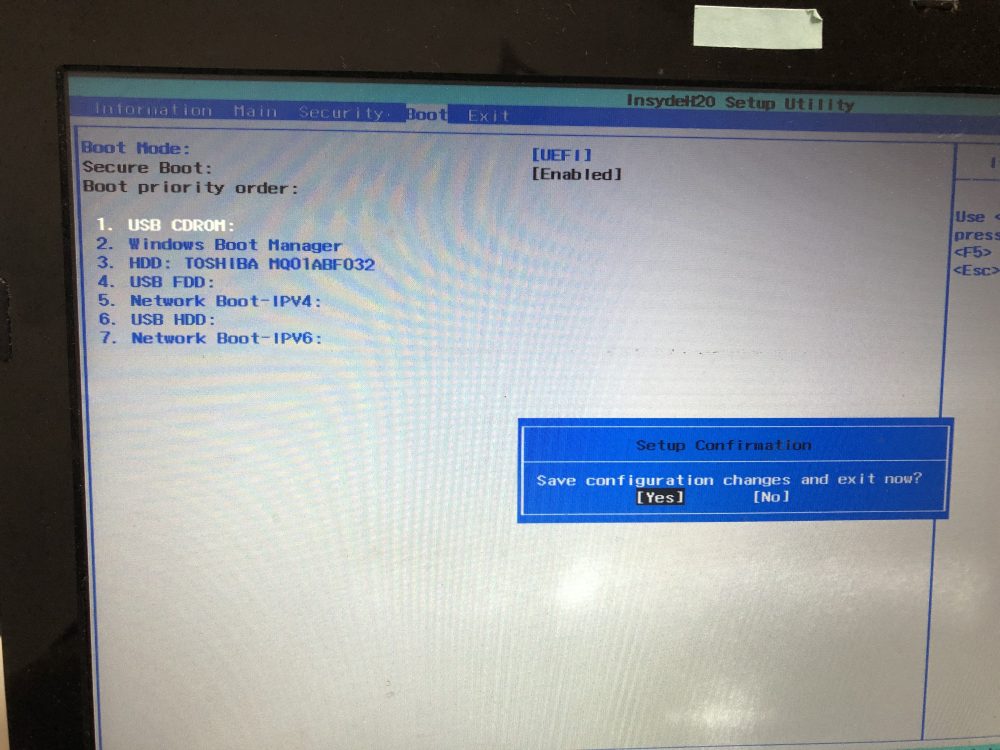
以下画面に記載の通り、F10ボタンを押し、Save and Exitをする。

Setup Confirmationが出現するので、"Yes"を選択する。
Ubuntuのインストール
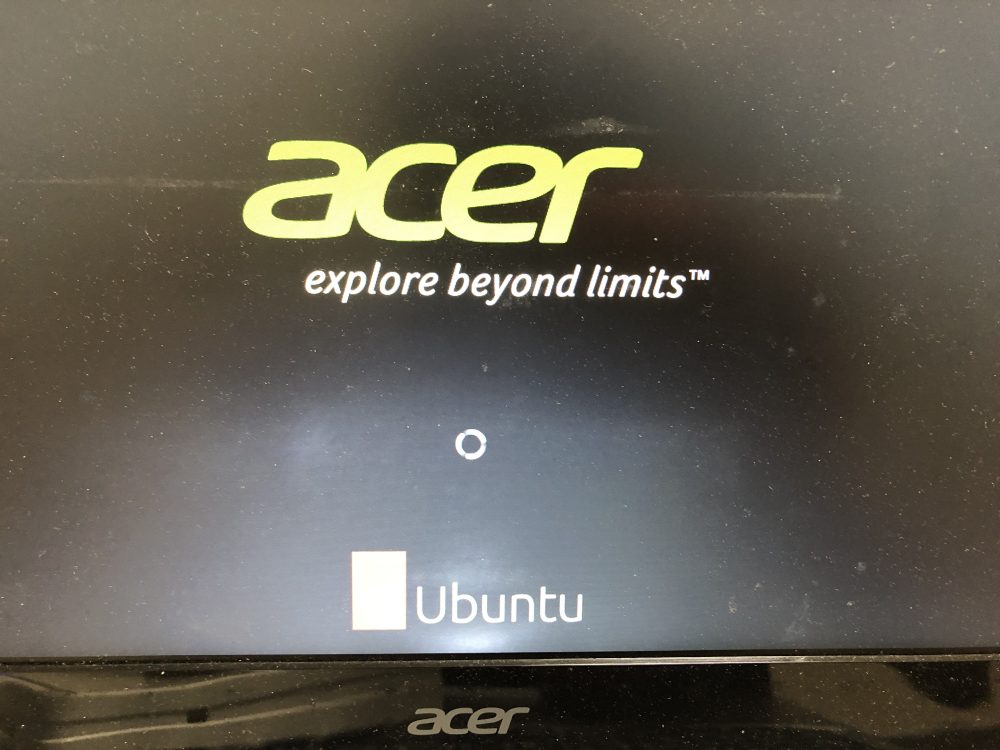
上記にてUbuntuをDVD-Rに書き込んだ。当該DVD-Rを外付けのDVDドライブ入れ、ノートパソコンにつなぐ。その後、電源を入れるとUbuntuのインストールが始まる。
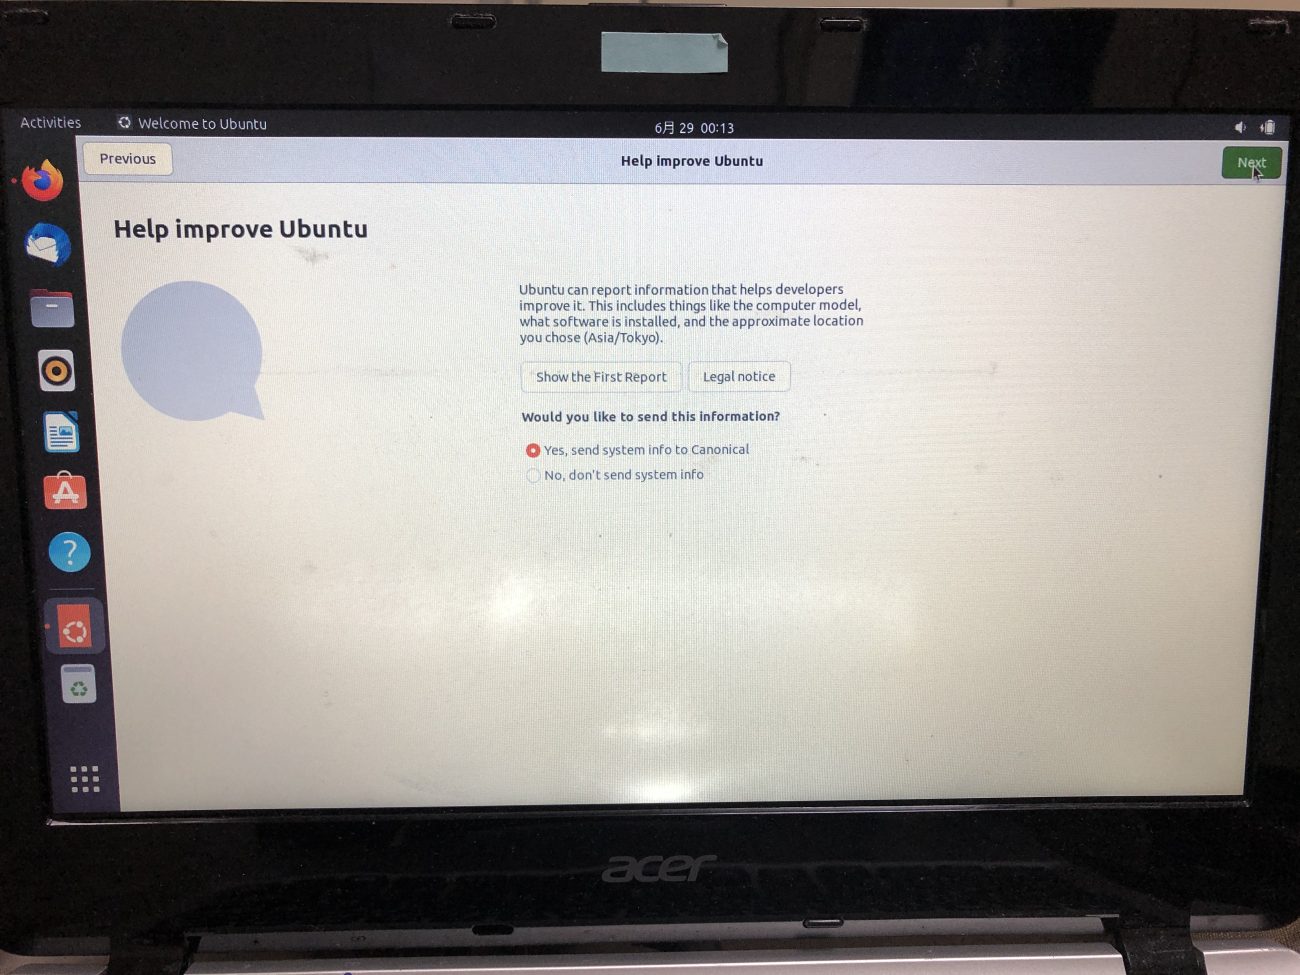
その後、以下画面が出現する。ノートパソコンの情報をUbuntuに送信するかどうかにチェックを入れ、右上の"Next"をクリックする。
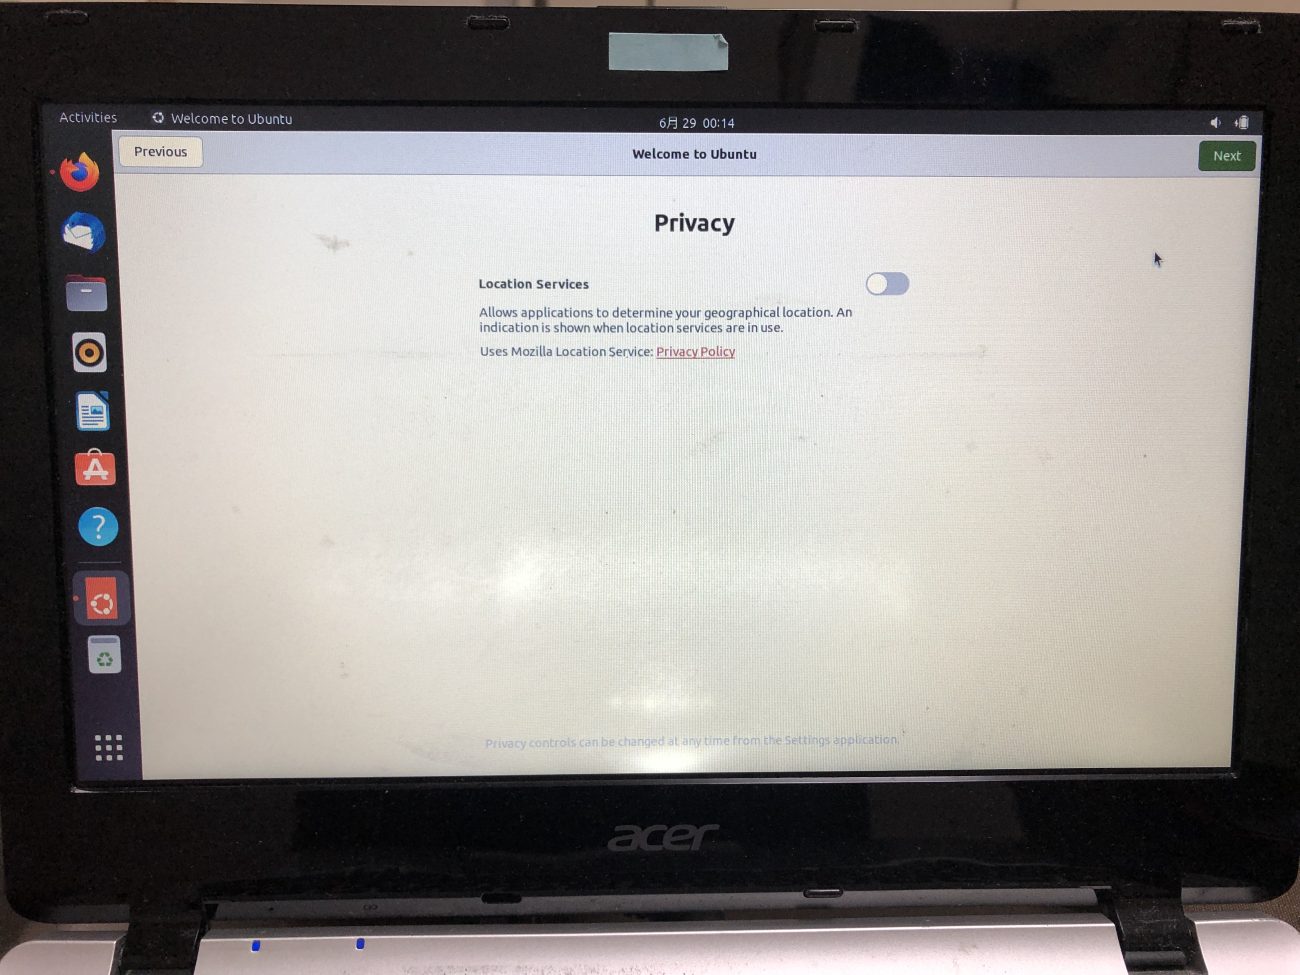
以下画面に遷移する。位置情報サービスを利用しないので、Activeにせずに"Next"をクリックする。
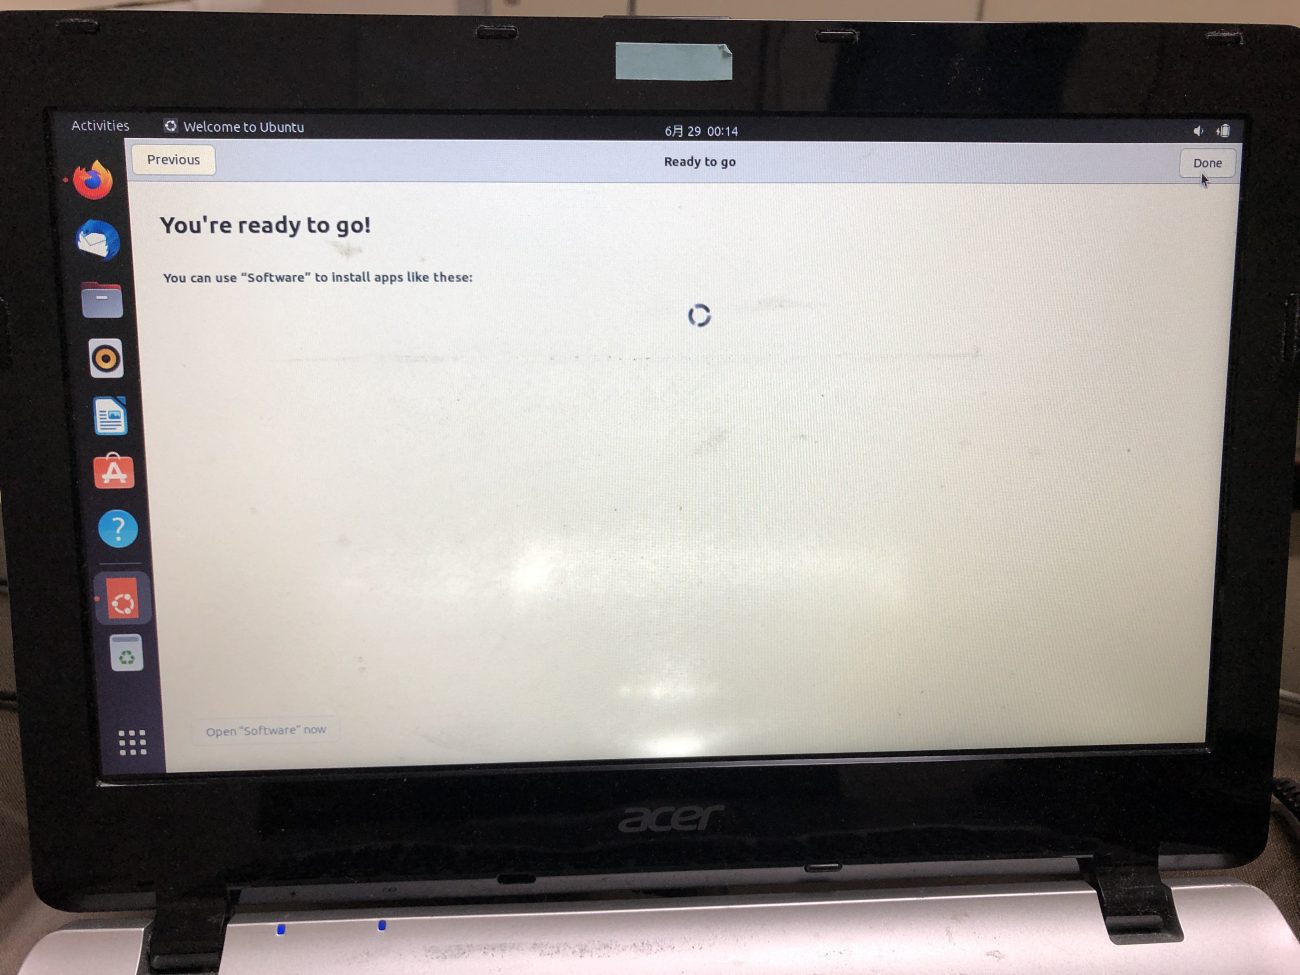
以下画面に遷移するので、"Done"をクリックする。
以下画面に遷移する。希望する項目を、上矢印キーと下矢印キーで操作し、Enterキーをクリックする。私の場合、"Try or Install Ubuntu"を選択した。

以下画面に遷移する。
以下画面が表示された。
以下画面に遷移する。

以下画面に遷移するので、希望する言語を選択し、"Continue"をクリックする。

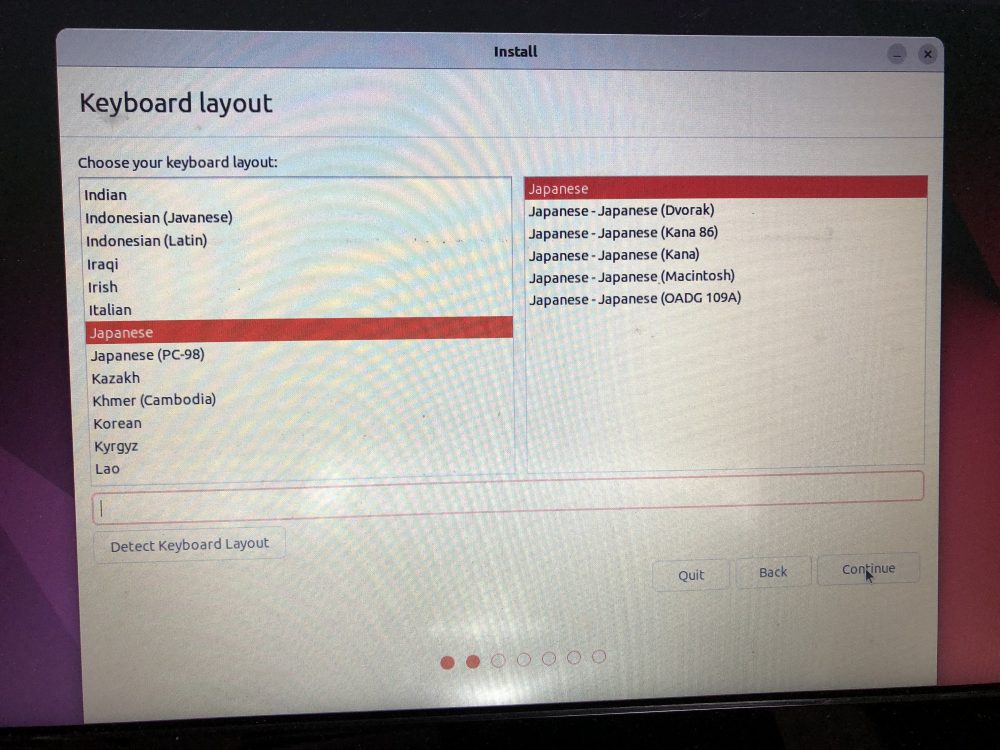
以下キーボードレイアウト画面に遷移するので、希望するレイアウトを選択する。私の場合、以下レイアウトを選択し、"Continue"を選択する。
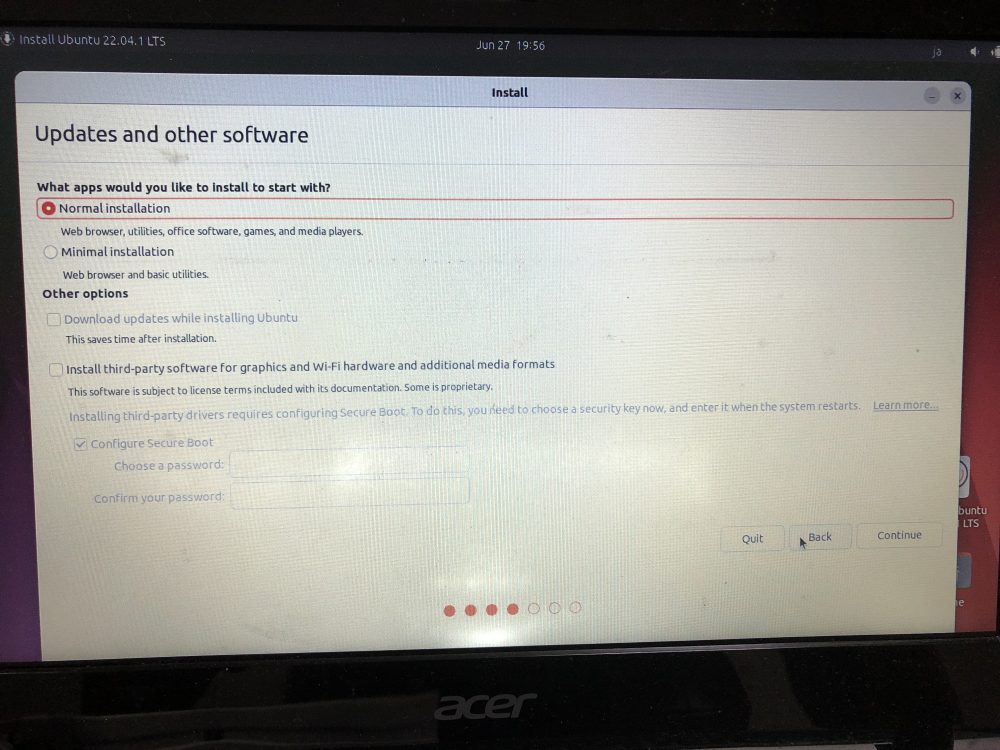
以下画面に遷移するので、私は以下のように選択し、"Continue"をクリックする。
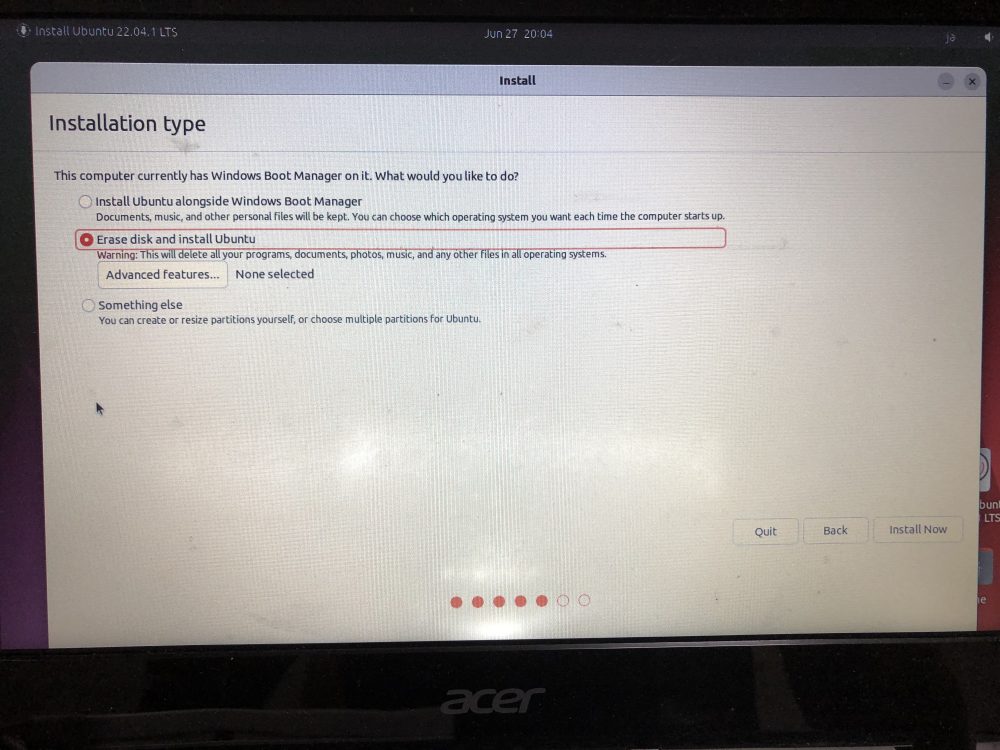
以下インストールタイプ画面に遷移する。私の場合、ノートパソコンにあるWindows OSやその他のデータは不要のため、以下項目にチェックを入れ、"Install Now"を選択した。
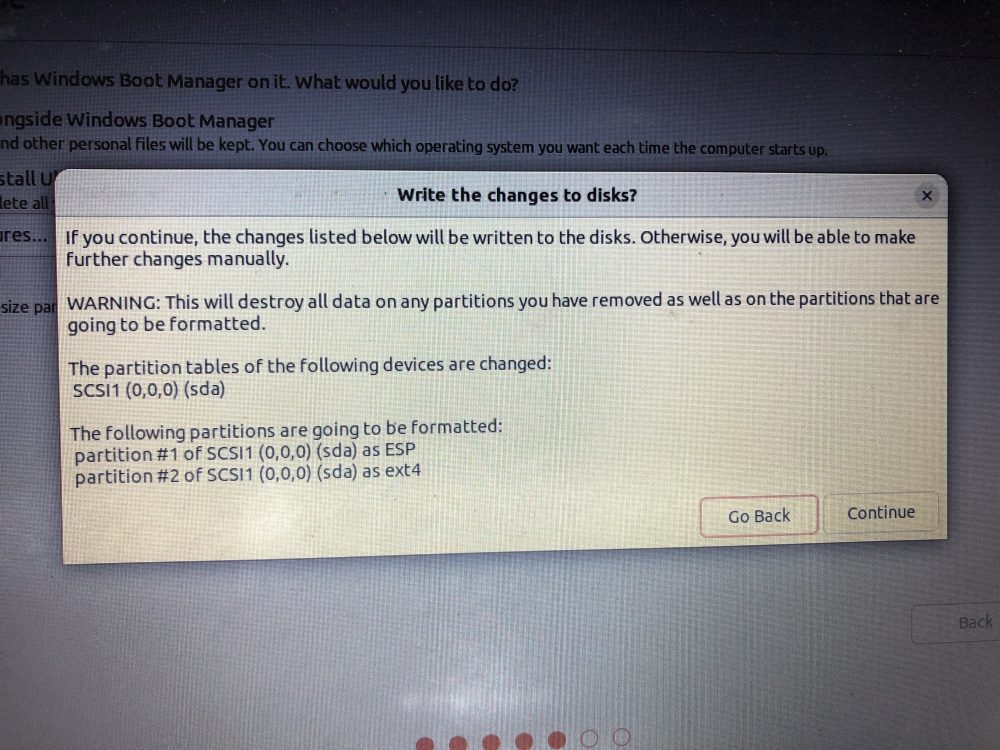
以下画面が現れる。すべてのデータが削除される旨の確認をする。問題なければ、"Continue"を選択する。
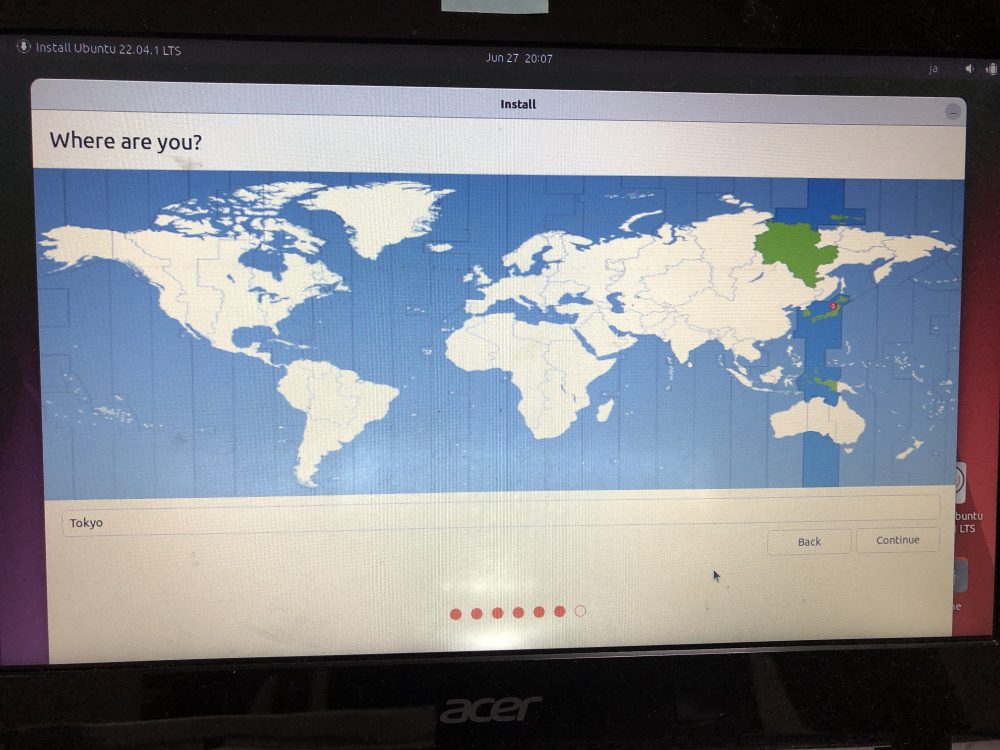
以下所在地確認画面に遷移する。希望する場所を選択し、"Continue"をクリックする。
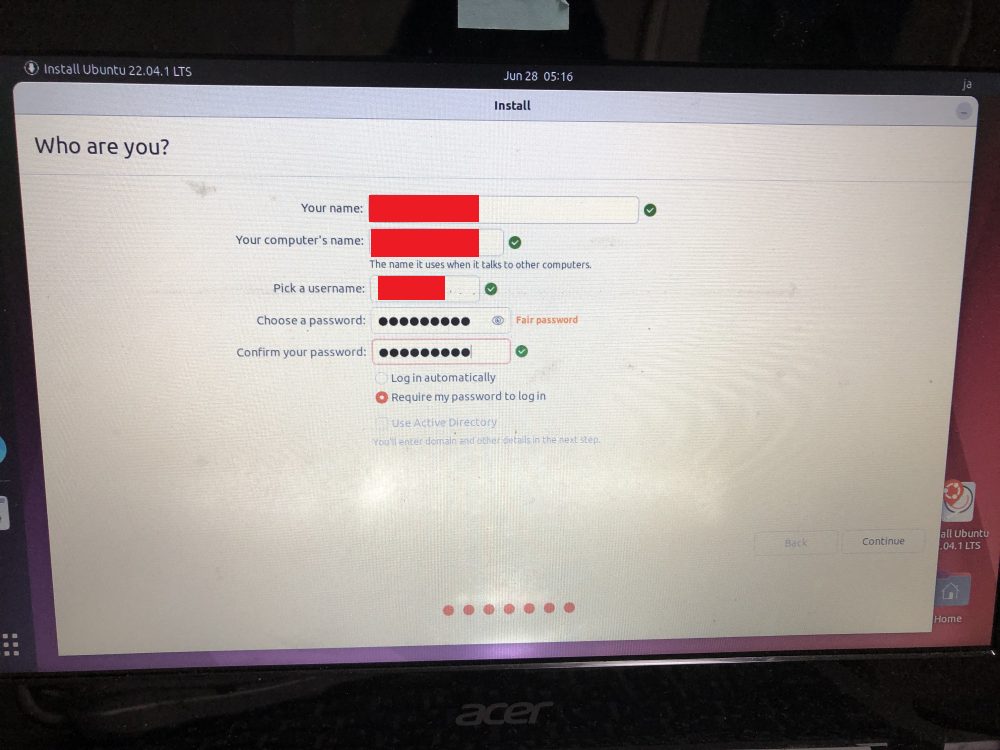
以下画面に遷移するので、コンピューター名やユーザー名、パスワードを入力し、"Continue"をクリックする。
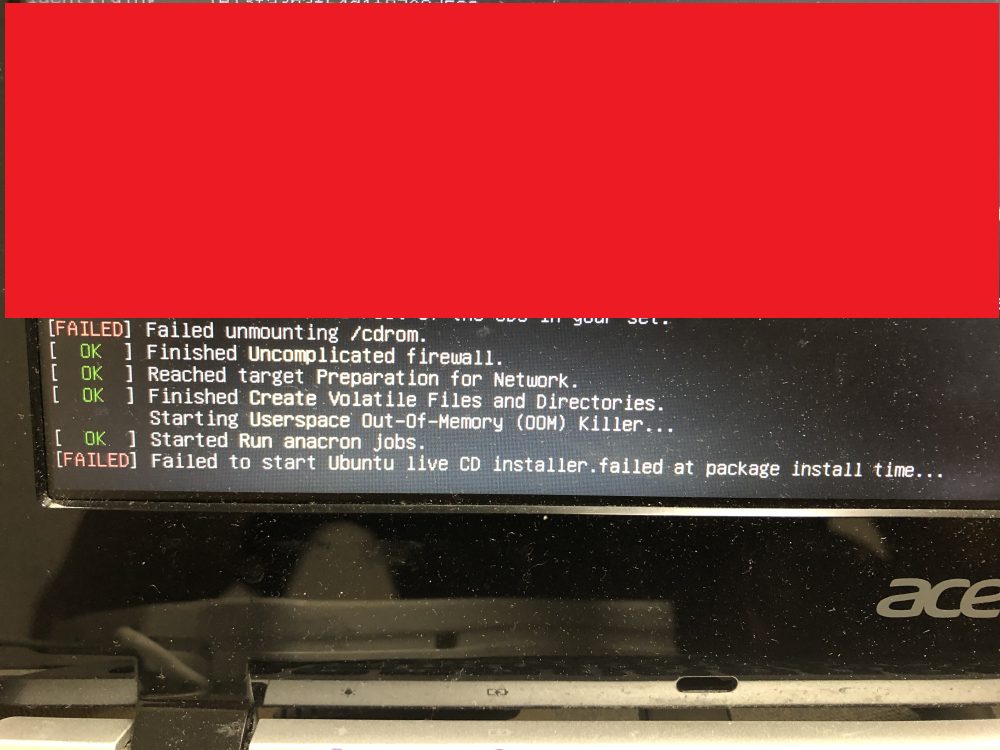
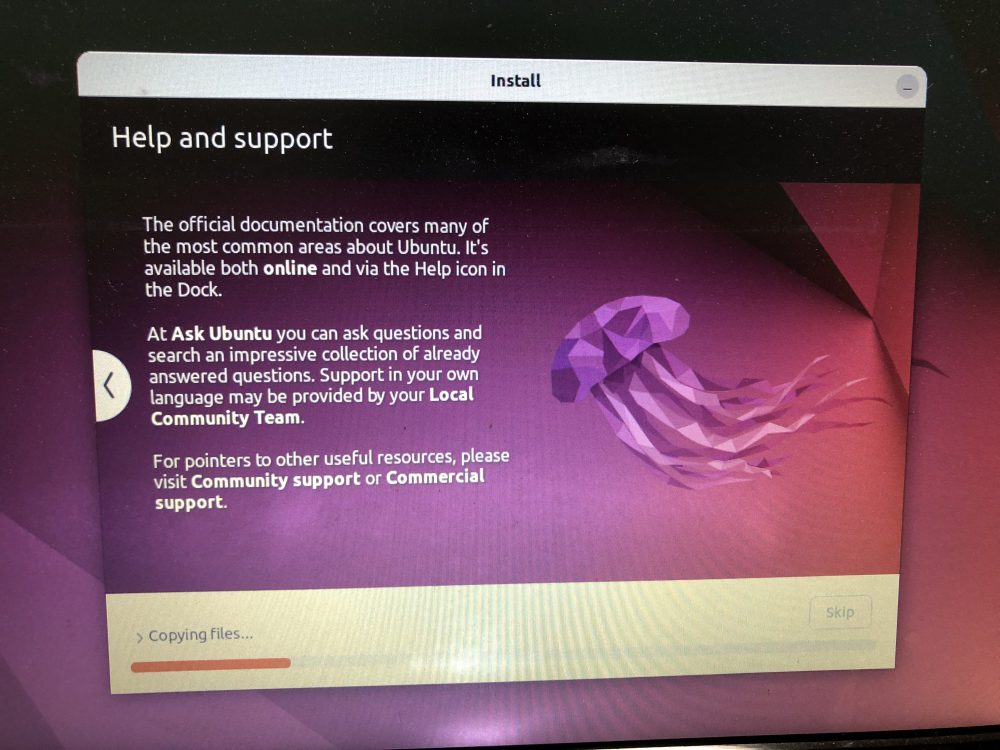
以下インストール画面に遷移する.
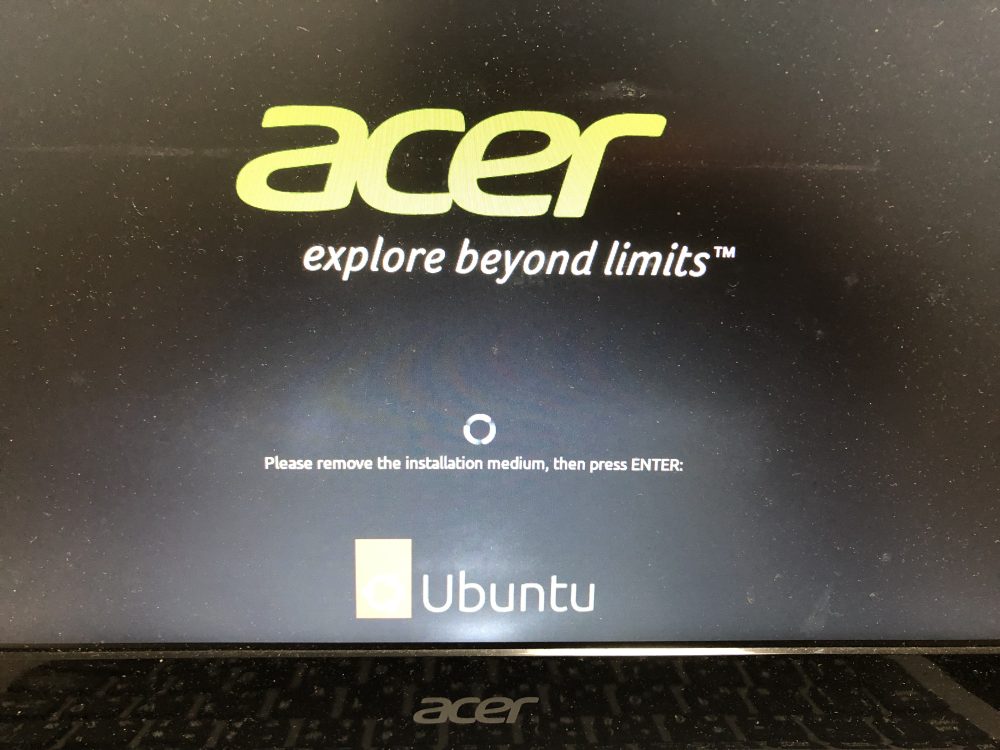
以下画面に遷移する.画面の指示通り,DVD-Rを取り出し,ENTERボタンをクリックする.
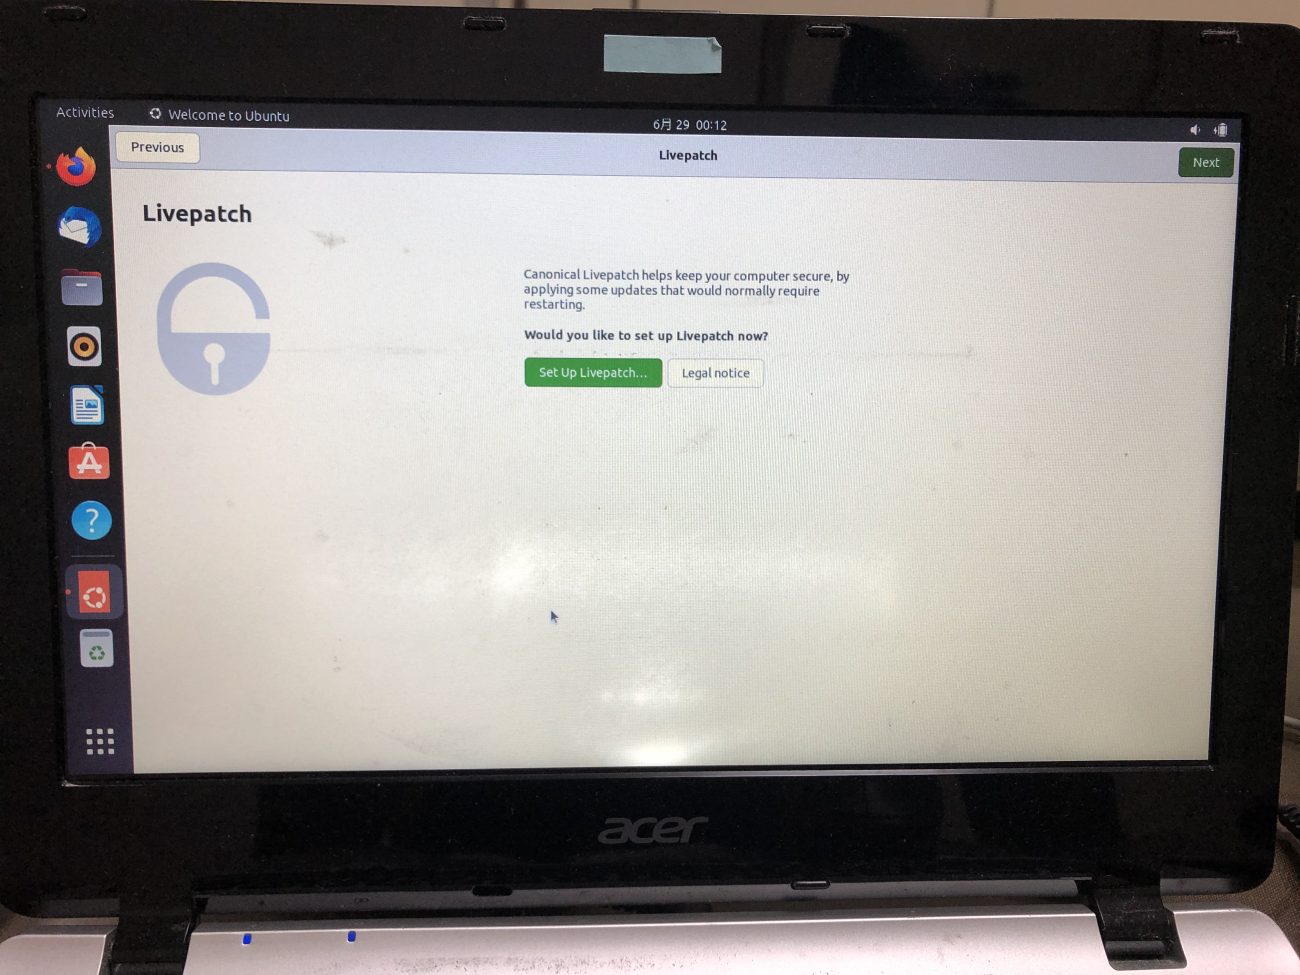
以下画面に遷移する.私の場合,Livepatchの設定はせずに,右上の"Next"をクリックした.
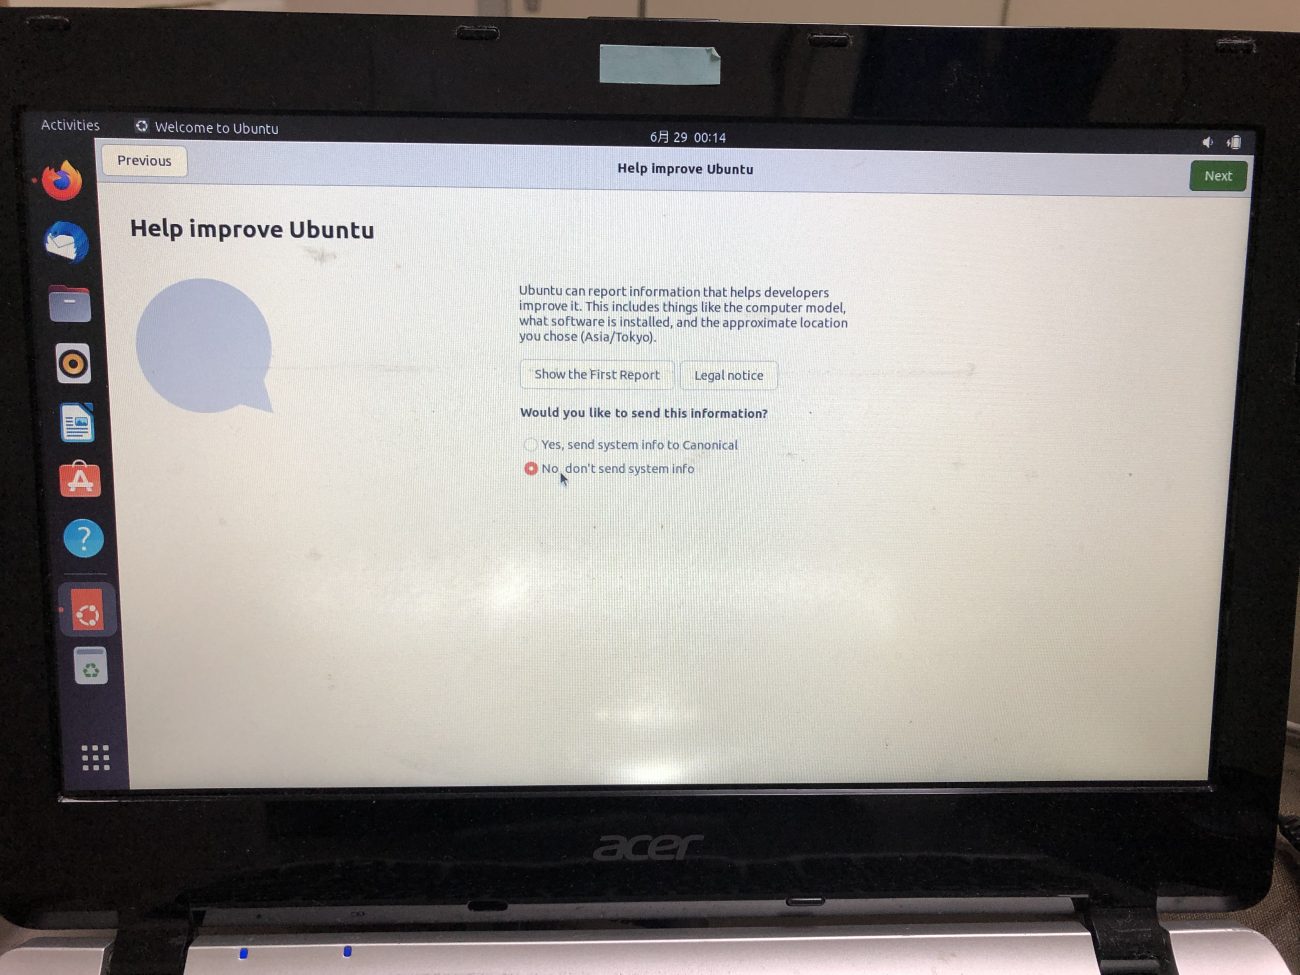
以下画面に遷移する.私の場合,"No, don’t send system info"にチェックを入れ,"Next"をクリックした.
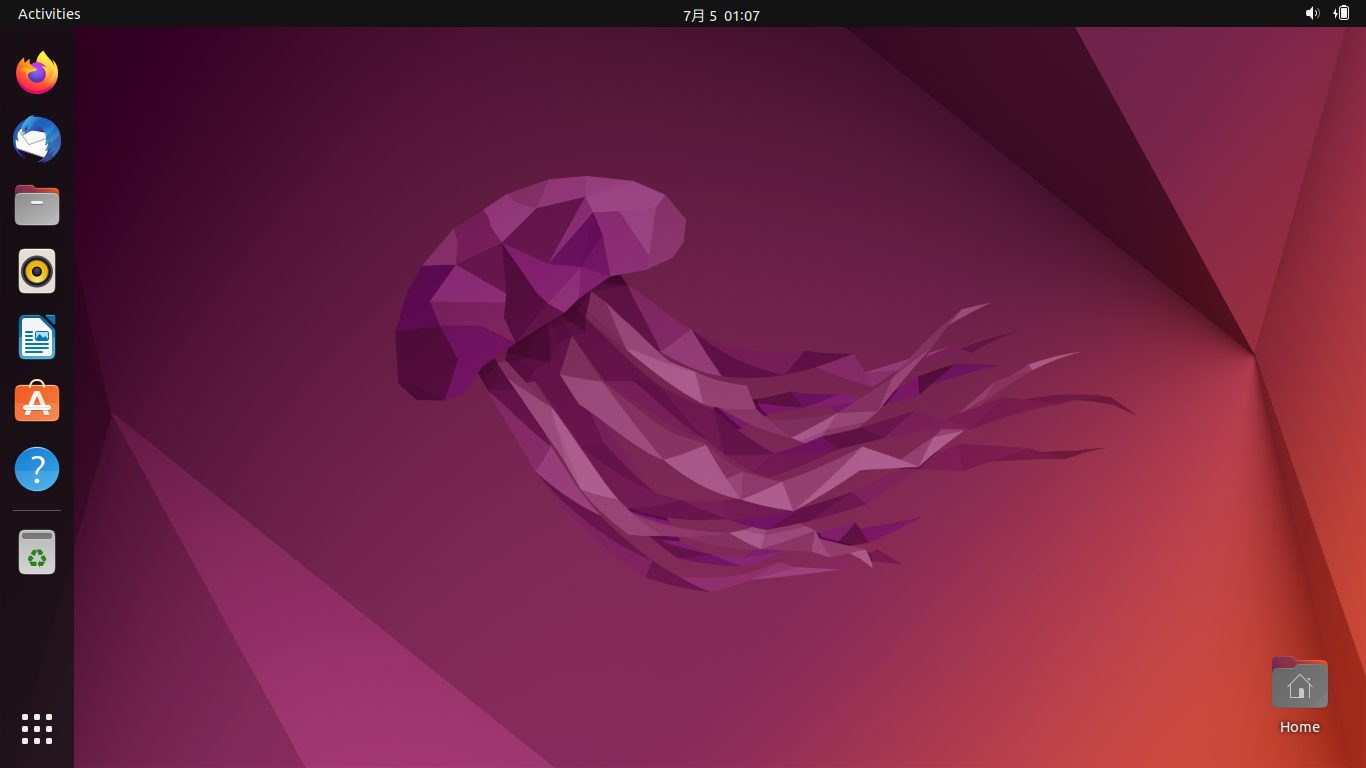
以下のようにUbuntuをインストールすることに成功した。
参照
以上