Python | ChatGPTを利用したmobile application用shopping listの構築方法

ChatGPTとはChat Generative Pre-trained Transformerの略であり,OpenAI社が開発し,2022年11月に公開した人工知能チャットボットである.
今回,ChatGPTを利用してmobile application用のshopping listを作成したので,そのコードを以下に記す.
実施環境
Windows 11
Python 3.11
Visual Studio Code (VS Code) 1.82.2
準備
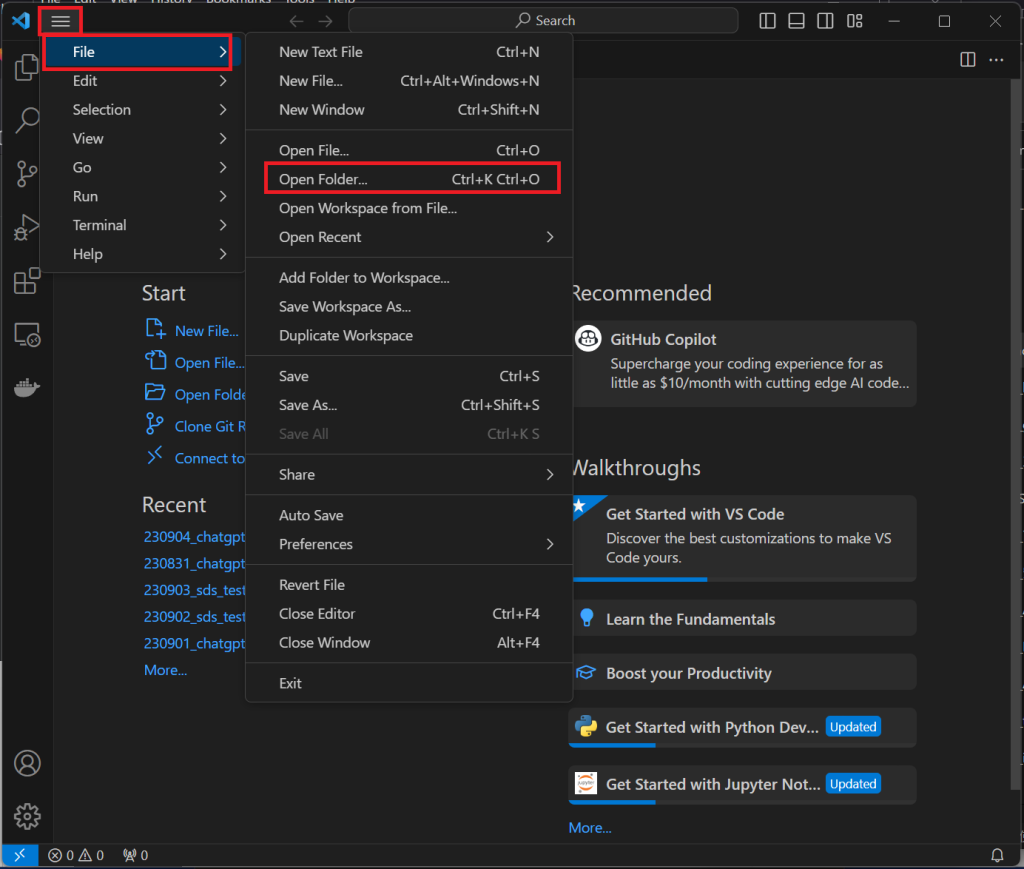
フォルダを作成し,VS Codeを開く.三本線の赤枠をクリックし,"File"を選択する.その後,"Open Folder"をクリックし,作成したフォルダを選択する.
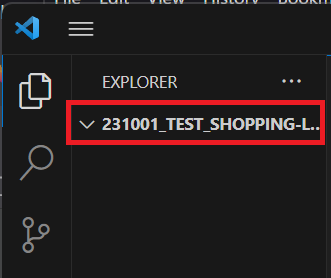
以下のように,作成したフォルダが表示される.
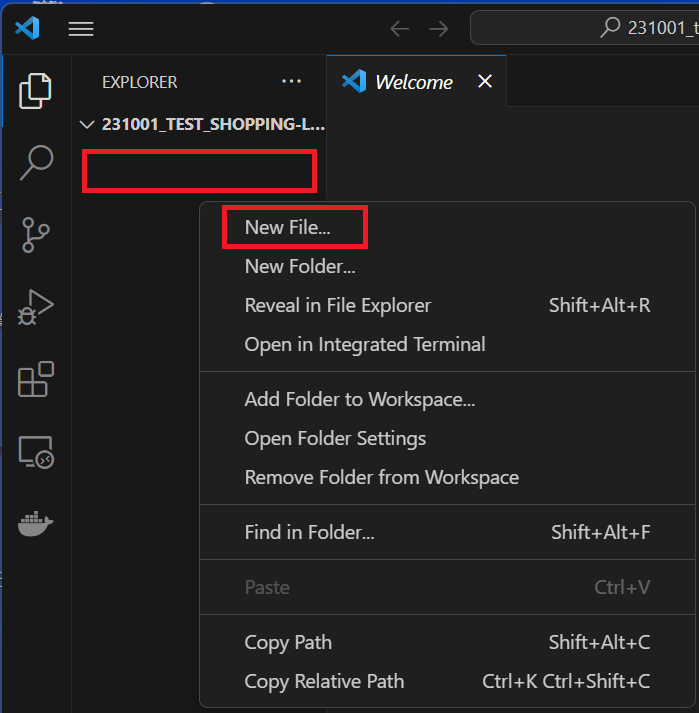
以下のように,フォルダの下の空白部の赤枠を右クリックするとメニューが開くので,"New File"をクリックし,名前(xxx.py)を付ける.
今回は"sample.py"という名前にしたので,以下のようにファイルが作成される.
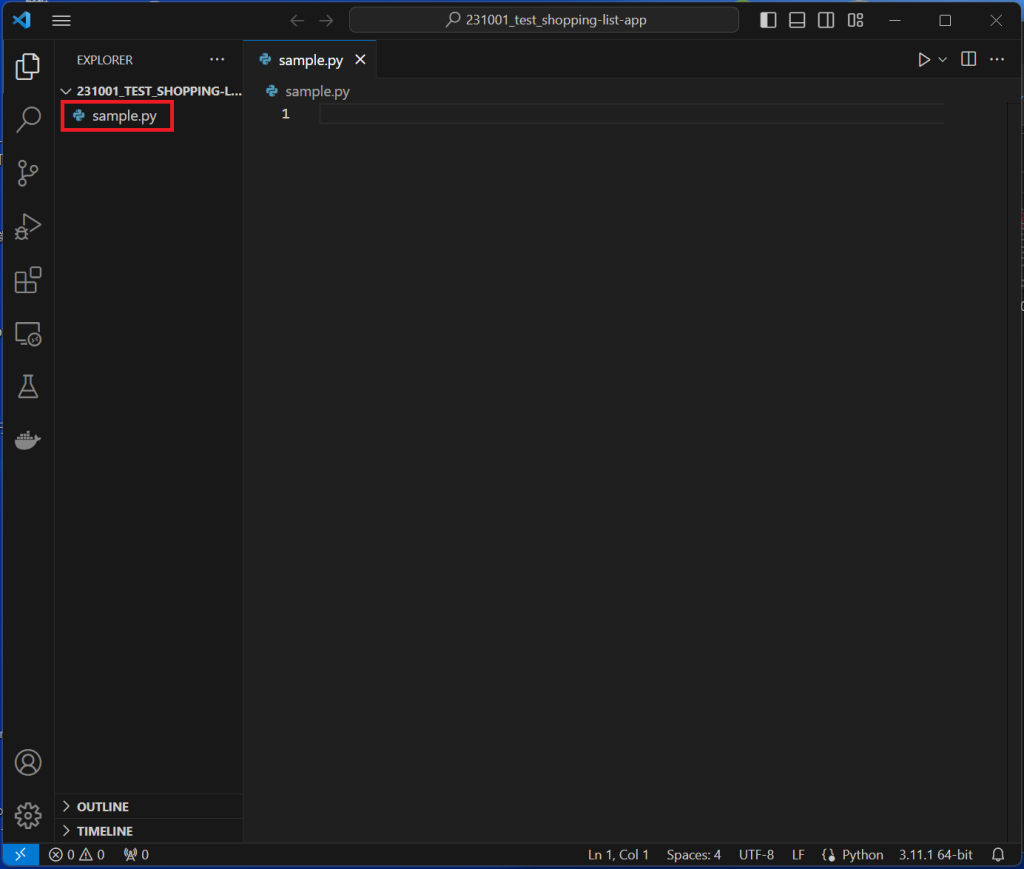
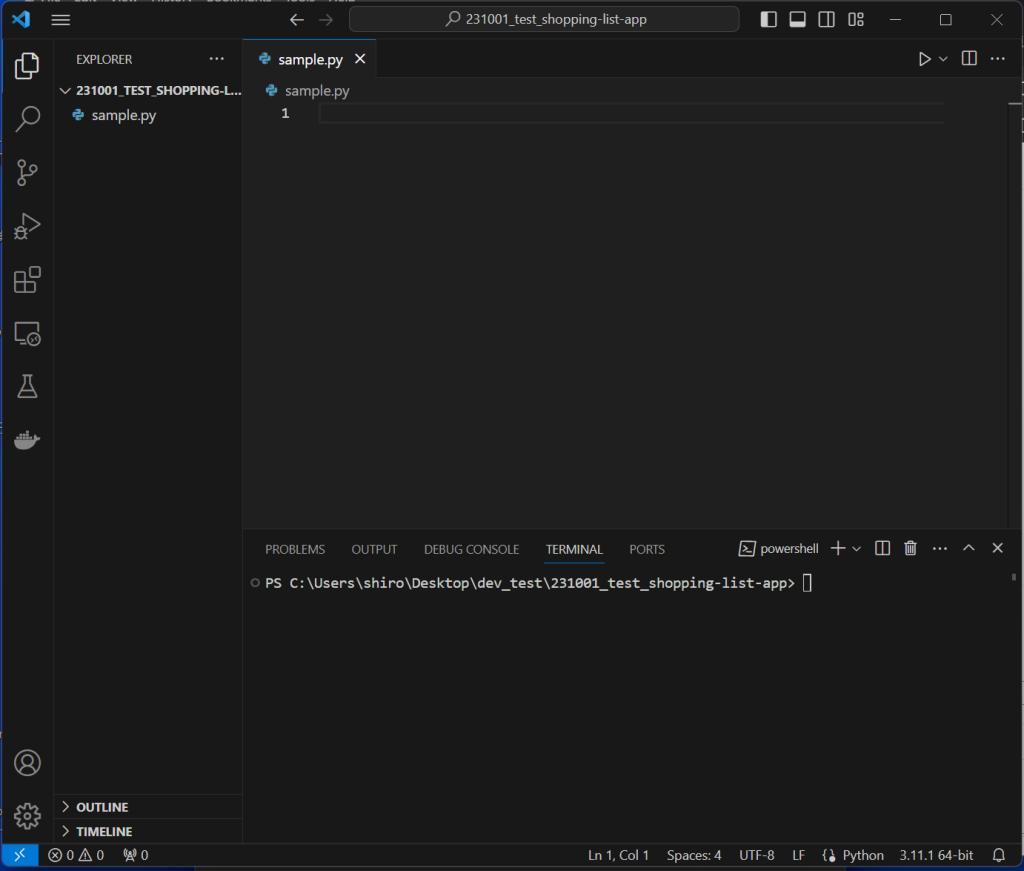
“Shift"+"CTL"+@ボタンを同時にクリックすると,ターミナルが開く.この"sample.py"にコードを書いていく.
コード内容
ChatGPTで何回か質問した結果,kivyを利用したshopping list applicationのコードとtkinterを利用したshopping list applicationのコードが出力されたので,以下に記す.
Kivyを利用したshopping list application
ChatGPTで出力されたコードは以下になる.
from kivy.app import App
from kivy.uix.boxlayout import BoxLayout
from kivy.uix.textinput import TextInput
from kivy.uix.button import Button
from kivy.uix.label import Label
from kivy.clock import Clock

class ShoppingListApp(App):
    def __init__(self, **kwargs):
        super().__init__(**kwargs)
        self.shopping_list = []

    def build(self):
        layout = BoxLayout(orientation="vertical")

        self.text_input = TextInput(hint_text="Enter an item", multiline=False)
        self.text_input.bind(on_text_validate=self.add_item)  # Bind Enter keypress event

        add_button = Button(text="Add Item", size_hint=(0.5, None), height=40)
        add_button.bind(on_press=self.add_item)

        clear_button = Button(text="Clear List", size_hint=(0.5, None), height=40)
        clear_button.bind(on_press=self.clear_list)

        self.shopping_list_label = Label(text="Shopping List:")

        layout.add_widget(self.shopping_list_label)
        layout.add_widget(self.text_input)
        layout.add_widget(add_button)
        layout.add_widget(clear_button)

        return layout

    def add_item(self, instance):
        item = self.text_input.text.strip()
        if item:
            self.shopping_list.append(item)
            self.update_shopping_list()
            self.text_input.text = ""  # Clear the text input field after adding
            Clock.schedule_once(self.focus_text_input)  # Schedule focus after a slight delay

    def focus_text_input(self, dt):
        self.text_input.focus = True  # Set focus back to the text input field

    def clear_list(self, instance):
        self.shopping_list = []  # Clear the shopping list
        self.update_shopping_list()

    def update_shopping_list(self):
        self.shopping_list_label.text = "Shopping List:\n" + "\n".join(self.shopping_list)

if __name__ == '__main__':
    ShoppingListApp().run()
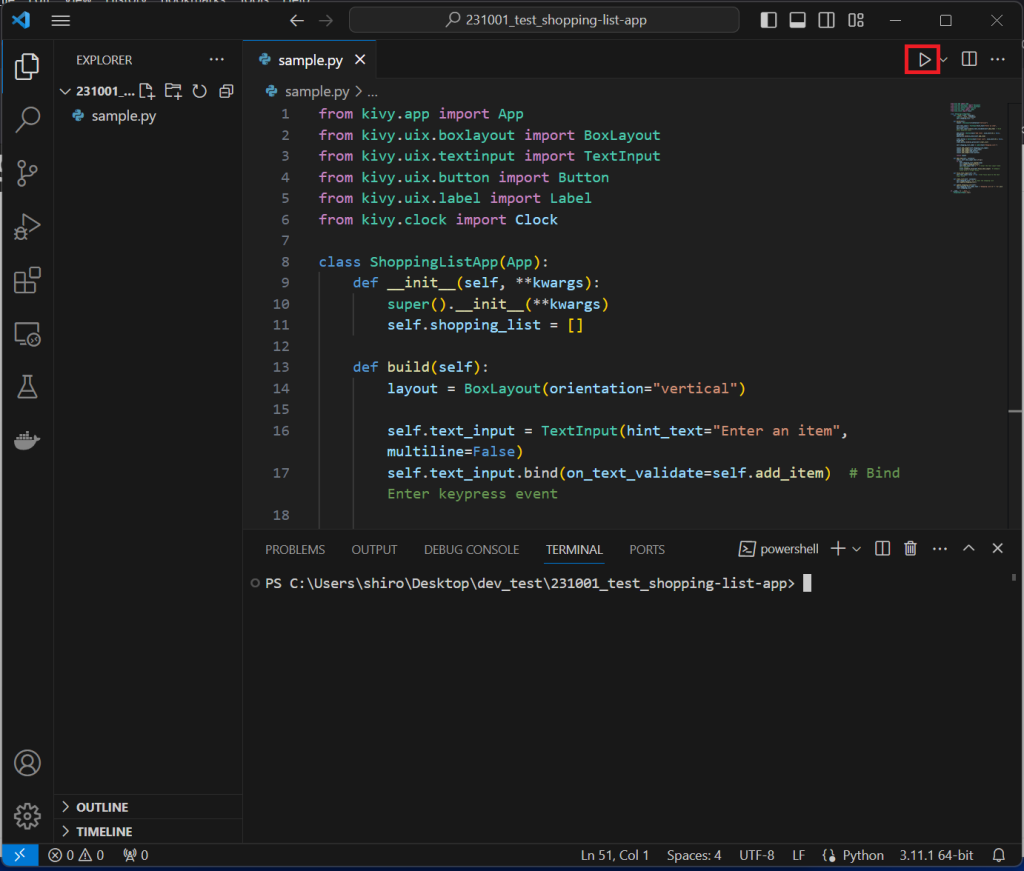
“sample.py"に上記コードを貼り付け,セーブをする.その後,赤枠の矢印(Run Python File)をクリックする.
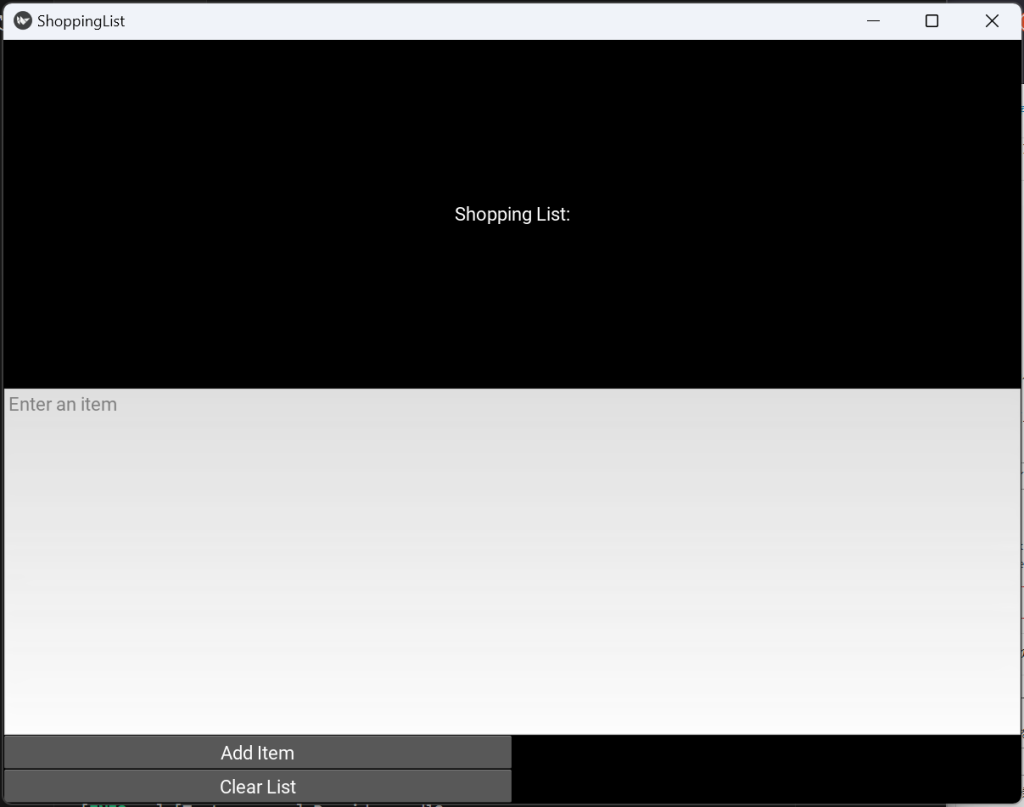
以下のように,Shopping listが開く.
Tkinterを利用したshopping list application
ChatGPTで出力されたコードは以下になる.
import tkinter as tk
from tkinter import messagebox

class ShoppingListApp:
    def __init__(self, root):
        self.root = root
        self.root.title("Shopping List App")

        # Initialize an empty shopping list
        self.shopping_list = []

        # Create a label
        self.label = tk.Label(root, text="Shopping List:")
        self.label.pack()

        # Create a listbox to display the items
        self.listbox = tk.Listbox(root)
        self.listbox.pack()

        # Create an entry field for entering items
        self.entry = tk.Entry(root)
        self.entry.pack()

        # Bind the Enter key to add a task
        self.root.bind('<Return>', lambda event=None: self.add_item())

        # Create buttons
        self.add_button = tk.Button(root, text="Add Item", command=self.add_item)
        self.add_button.pack()

        self.clear_button = tk.Button(root, text="Clear List", command=self.clear_list)
        self.clear_button.pack()

    def add_item(self):
        item = self.entry.get()
        if item:
            self.shopping_list.append(item)
            self.listbox.insert(tk.END, item)
            self.entry.delete(0, tk.END)  # Clear the entry field
        else:
            messagebox.showwarning("Warning", "Please enter an item.")

    def clear_list(self):
        self.shopping_list = []
        self.listbox.delete(0, tk.END)  # Clear the listbox

def main():
    root = tk.Tk()
    app = ShoppingListApp(root)
    root.mainloop()

if __name__ == "__main__":
    main()
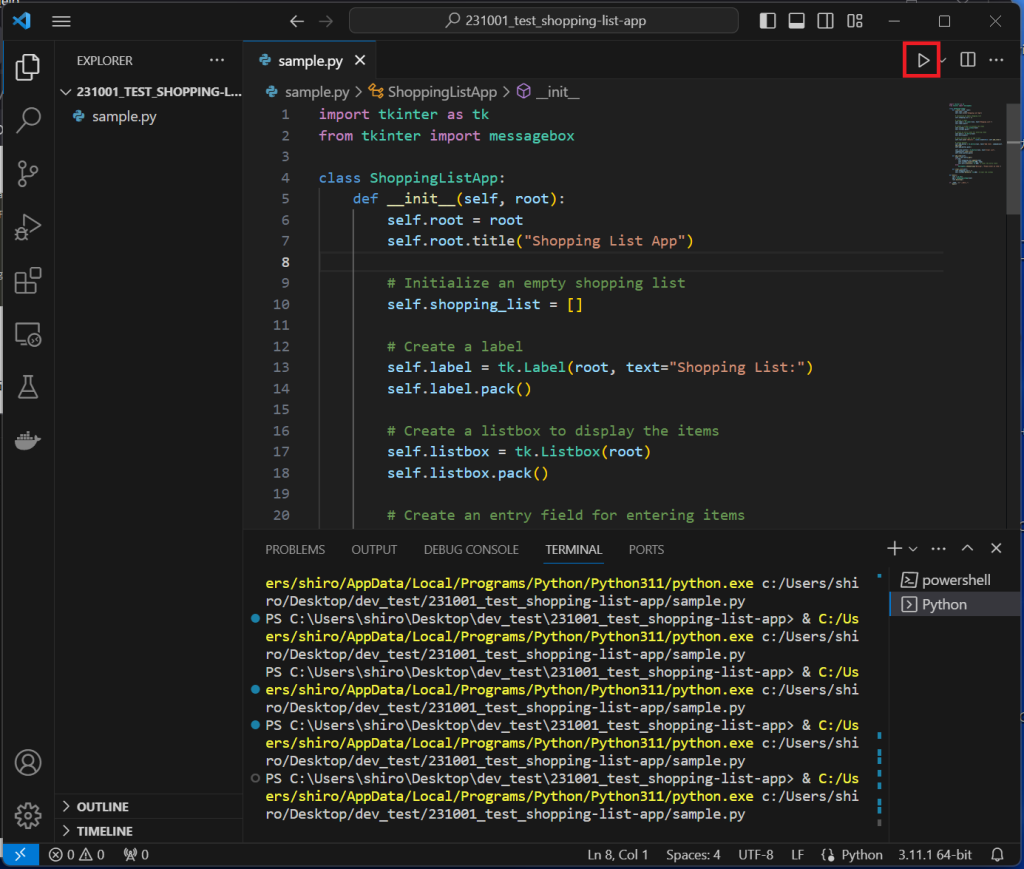
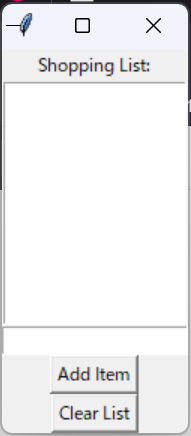
“sample.py"に上記コードを貼り付け,セーブをする.その後,赤枠の矢印(Run Python File)をクリックする.
以下のように,Shopping listが開く.
参考
Udemy | ChatGPT Accelerated Python
以上
