Python | Django | OAuth認証を用いたgoogleでのログイン方法

公開日:2021/9/25
更新日:2021/9/29
Pythonには,DjangoというWebアプリケーションフレームワークがある.フレームワークのため,Djangoを利用するとWebアプリを通常よりも短時間で開発することが可能になる.
2021/9/14に「ECサイトの作成方法」を作成した.当該記事で実装したプロジェクトをそのまま引き継いだ上で,OAuth認証を用いたgoogleでのログインを目指したが,エラーが発生したため,そのまま利用するのは断念した.「ECサイトの作成方法」で実装したプロジェクトを一部変更した上で,本記事では,「OAuth認証を用いたgoogleでのログイン方法」を以下3項目にて記す.
- 準備1(「class-based viewsにおけるログインの実装方法」の修正)
(1) プロジェクトとアプリの作成
(2) ユーザー登録処理
(3) ログイン・ログアウト処理1
(4) ログイン・ログアウト処理2
(5) ログインの保持 - 準備2
- OAuth認証を用いたgoogleでのログイン実装
- 参照
◆実施環境
Python 3.8.8
Django 3.2.3
■OAuth認証を用いたgoogleでのログイン方法
2021/9/14に作成した「ECサイトの作成方法」で利用した"myclassbasedviewslogintest"フォルダの内容を変更した"myclassbasedviewslogin"フォルダを利用する."myclassbasedviewslogin"フォルダは,「class-based viewsにおけるログインの実装方法」で実装した内容をベースにしている.その中の,"date_of_birth"を削除した.
この項目(項目1)では,"date_of_birth"を削除したコードを以下に記す.以下に記したコードに基づき,「ECサイトの作成方法」のコードを追記した上で,項目2に進むとOAuth認証を用いたgoogleでのログイン実装が可能となる.
VS Codeから"myclassbasedviewslogin"フォルダを作成したので,選択する.
VS Codeの"View"を開き,"Terminal"をクリックする.VS Codeの下部にターミナルが開くので,”conda activate 仮想環境名”を実行し,仮想環境に移行する(移行方法の詳細はこちら).その後以下のように”django-admin startproject プロジェクト名”を実行する.プロジェクト名は"views_login"にした.
(djangoenv) C:\Users\shiro\Desktop\210517_python development\myclassbasedviewslogintest
>django-admin startproject views_login
ターミナルで"cd views_login"を入力し,ディレクトリを変更する.その後,"python manage.py startapp アプリ名"を入力する.アプリ名は"myaccount"にした.
(djangoenv) C:\Users\shiro\Desktop\210517_python development\myclassbasedviewslogintest\views_login
>python manage.py startapp myaccount
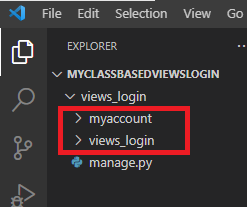
VS Codeにプロジェクト名"views_login"とアプリ名"myaccount"が以下のように作成された.
“views_login/settings.py"のINSTALLED_APPを以下のように編集する.
INSTALLED_APPS = [
    'django.contrib.admin',
    'django.contrib.auth',
    'django.contrib.contenttypes',
    'django.contrib.sessions',
    'django.contrib.messages',
    'django.contrib.staticfiles',
    'myaccount', # 追記箇所
]
“myaccount/models.py"を以下のように編集する.
from django.db import models
from django.contrib.auth.models import (
    BaseUserManager, AbstractBaseUser, PermissionsMixin,
)
from django.urls import reverse_lazy

class UserManager(BaseUserManager):
    def create_user(self, email, username, password=None):
        if not email:
            raise ValueError('You need Email address!')
        user = self.model(
            email=email,
            username=username,
        )
        user.set_password(password)
        user.save(using=self._db)
        return user

class MyUser(AbstractBaseUser, PermissionsMixin):
    username = models.CharField(max_length=100)
    email = models.EmailField(max_length=100, unique=True)
    is_active = models.BooleanField(default=True)
    is_staff = models.BooleanField(default=False)

    USERNAME_FIELD = 'email'
    REQUIRED_FIELDS = ['username']

    objects = UserManager()

    def get_absolute_url(self):
        return reverse_lazy('myaccount:top')
“views_login/settings.py"のINSTALLED_APPの下に追記し,以下のように編集する.
INSTALLED_APPS = [
    'django.contrib.admin',
    'django.contrib.auth',
    'django.contrib.contenttypes',
    'django.contrib.sessions',
    'django.contrib.messages',
    'django.contrib.staticfiles',
    'myaccount',
]

AUTH_USER_MODEL = 'myaccount.MyUser' # 追記箇所
以下にてマイグレーションを実施する.ターミナルで"cd views_login"を入力し,ディレクトリを変更する.その後,"python manage.py makemigrations account"を入力する.以下が出力される.
(djangoenv) C:\Users\shiro\Desktop\210517_python development\myclassbasedviewslogintest\views_login
>python manage.py makemigrations account

Migrations for 'account': # 以下出力箇所
account\migrations\0001_initial.py
- Create model MyUser
続けて,ターミナルで"python manage.py migrate"を入力する.以下が出力されれば,成功となる.
(djangoenv) C:\Users\shiro\Desktop\210517_python development\myclassbasedviewslogintest\views_login
>python manage.py migrate

Operations to perform: # 以下出力箇所
Apply all migrations: myaccount, admin, auth, contenttypes, sessions
Running migrations:
Applying contenttypes.0001_initial... OK
Applying contenttypes.0002_remove_content_type_name... OK
Applying auth.0001_initial... OK
Applying auth.0002_alter_permission_name_max_length... OK
Applying auth.0003_alter_user_email_max_length... OK
Applying auth.0004_alter_user_username_opts... OK
Applying auth.0005_alter_user_last_login_null... OK
Applying auth.0006_require_contenttypes_0002... OK
Applying auth.0007_alter_validators_add_error_messages... OK
Applying auth.0008_alter_user_username_max_length... OK
Applying auth.0009_alter_user_last_name_max_length... OK
Applying auth.0010_alter_group_name_max_length... OK
Applying auth.0011_update_proxy_permissions... OK
Applying auth.0012_alter_user_first_name_max_length... OK
Applying myaccount.0001_initial... OK
Applying admin.0001_initial... OK
Applying admin.0002_logentry_remove_auto_add... OK
Applying admin.0003_logentry_add_action_flag_choices... OK
Applying sessions.0001_initial... OK“myaccount/views.py"を以下のように編集する.
from django.shortcuts import render
from django.views.generic.edit import CreateView
from django.views.generic.base import TemplateView

class TopView(TemplateView):
    template_name = 'top.html'

class RegistrationView(CreateView):
    template_name = 'registration.html'
“myaccount"に"forms.py"を以下のように作成する.
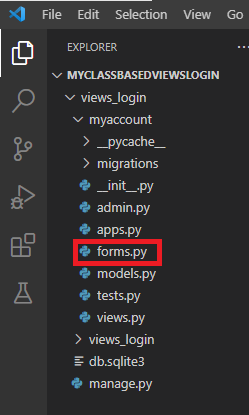
“myaccount/forms.py"を以下のように編集する.
from django import forms
from .models import MyUser
from django.contrib.auth.password_validation import validate_password

class RegistrationForm(forms.ModelForm):
    username = forms.CharField(label='name')
    email = forms.EmailField(label='email address')
    password = forms.CharField(label='password', widget=forms.PasswordInput())

    class Meta:
        model = MyUser
        fields = ['username', 'email', 'password']

    def save(self, commit=False):
        user = super().save(commit=False)
        validate_password(self.cleaned_data['password'], user)
        user.set_password(self.cleaned_data['password'])
        user.save()
        return user
“myaccount/views.py"に追記し,以下のように編集する.
from django.shortcuts import render
from django.views.generic.edit import CreateView, FormView # 変更箇所(2~4行目)
from django.views.generic.base import TemplateView, View
from .forms import RegistrationForm

class TopView(TemplateView):
    template_name = 'top.html'

class RegistrationView(CreateView):
    template_name = 'registration.html'
    form_class = RegistrationForm # 以下追記箇所

class MyLoginView(FormView):
    pass

class MyLogoutView(View):
    pass
“myaccount"フォルダに"urls.py"を以下のように作成する.
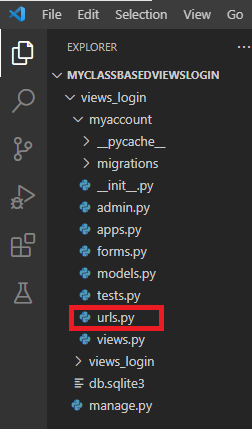
“myaccount/urls.py"を以下のように編集する.
from django.urls import path
from .views import (
    TopView, RegistrationView,
    MyLoginView, MyLogoutView
)

app_name = 'myaccount'
urlpatterns = [
    path('top/', TopView.as_view(), name='top'),
    path('registration/', RegistrationView.as_view(), name='registration'),
    path('login/', MyLoginView.as_view(), name='login'),
    path('logout/', MyLogoutView.as_view(), name='logout'),
]
“views_login/urls.py"に追記し,以下のように編集する.
from django.contrib import admin
from django.urls import path, include # 変更箇所

urlpatterns = [
    path('admin/', admin.site.urls),
    path('myaccount/', include('myaccount.urls')), # 追記箇所
]
“views_login/settings.py"に追記し,以下のように編集する.
from pathlib import Path
import os # 追記箇所
# Build paths inside the project like this: BASE_DIR / 'subdir'.
BASE_DIR = Path(__file__).resolve().parent.parent
TEMPLATE_DIR = os.path.join(BASE_DIR, 'templates') # 追記箇所
~省略~
TEMPLATES = [
{
'BACKEND': 'django.template.backends.django.DjangoTemplates',
'DIRS': [TEMPLATE_DIR,], # 変更箇所
'APP_DIRS': True,
'OPTIONS': {
'context_processors': [
'django.template.context_processors.debug',
'django.template.context_processors.request',
'django.contrib.auth.context_processors.auth',
'django.contrib.messages.context_processors.messages',
],
},
},
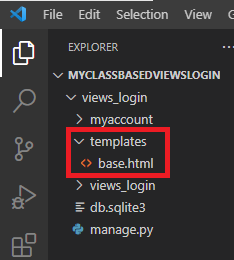
]“views_login"プロジェクトフォルダに"templates"フォルダを作成し,その中に"base.html"を作成する.
以下URLにアクセスし,linkをコピーする.
https://getbootstrap.com/docs/5.0/getting-started/introduction/#css
“templates/base.html"を以下のように編集する.5行目にコピーしたlinkを貼り付けする.
<!DOCTYPE html>
<html lang="ja">
<head>
<meta charset="utf-8">
<link href="https://cdn.jsdelivr.net/npm/bootstrap@5.0.2/dist/css/bootstrap.min.css" rel="stylesheet" integrity="sha384-EVSTQN3/azprG1Anm3QDgpJLIm9Nao0Yz1ztcQTwFspd3yD65VohhpuuCOmLASjC" crossorigin="anonymous">
</head>
<body>
<nav class="navbar-expand-lg navbar-light bg-light">
<a class="navbar-brand" href="{% url 'myaccount:top' %}"> Top</a>
{% if user.is_authenticated %}
<a class="navbar-brand" href="{% url 'myaccount:logout' %}">Logout</a>
{% else %}
<a class="navbar-brand" href="{% url 'myaccount:login' %}">Login</a>
<a class="navbar-brand" href="{% url 'myaccount:registration' %}">Registration</a>
{% endif %}
</nav>
{% block content %}{% endblock %}
</body>
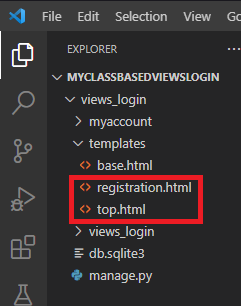
</html>“templates"フォルダに"top.html"と"registration.html"を以下のように作成する.
“top.html"を以下のように編集する.
{% extends 'base.html' %}
{% block content %}
<h2><p> Hello World!</p></h2>
<h2><p> This is Top Page!</p></h2>
{% endblock %}
“registration.html"を以下のように編集する.
{% extends 'base.html' %}
{% block content %}
<form method="POST">
  {% csrf_token %}
  {{ form.as_p }}
  <input type="submit" value="Registration">
</form>
{% endblock %}
VS Codeのターミナルで,”conda activate 仮想環境名”を実行し,ターミナルで"cd views_login"(プロジェクト名)を入力し,ディレクトリを変更する.変更後,以下のように”python manage.py runserver”を実行する.以下が出力される.
(djangoenv) C:\Users\shiro\Desktop\210517_python development\myclassbasedviewtest\class_based_view
>python manage.py runserver
Watching for file changes with StatReloader
Performing system checks...
System check identified no issues (0 silenced). # 以下出力箇所
August 24, 2021 - 15:49:19
Django version 3.2.3, using settings 'class_based_view.settings'
Starting development server at http://127.0.0.1:8000/
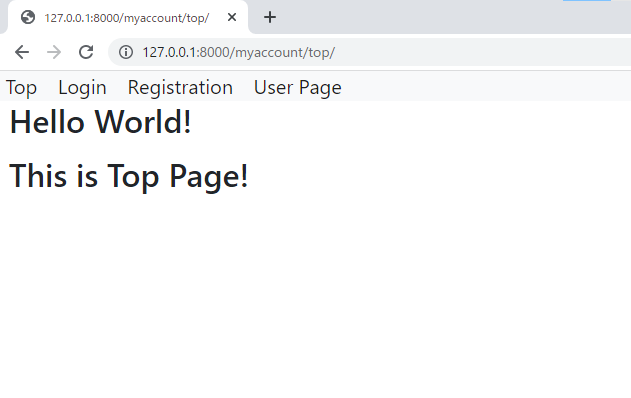
Quit the server with CTRL-BREAK.上記の"http://127.0.0.1:8000/"をクリックすると,ブラウザが開き,以下画面が出力される.
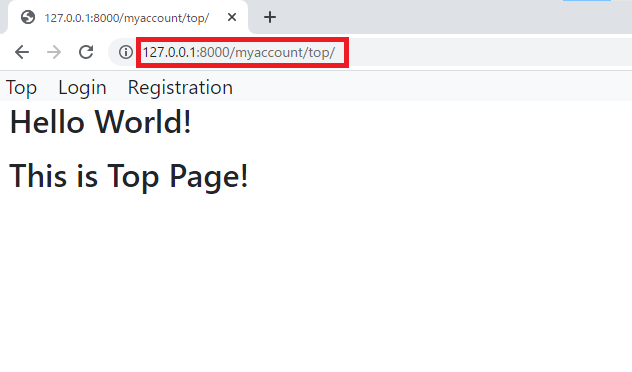
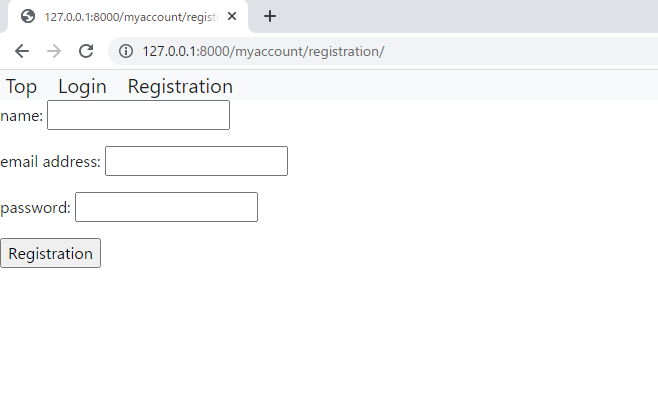
ブラウザのURLに"http://127.0.0.1:8000/myaccount/top"と入力すると,以下トップページに遷移する."Registration"をクリックする.
以下画面に遷移する.
以下ページで以下のように記述し,"Registration"ボタンをクリックする.
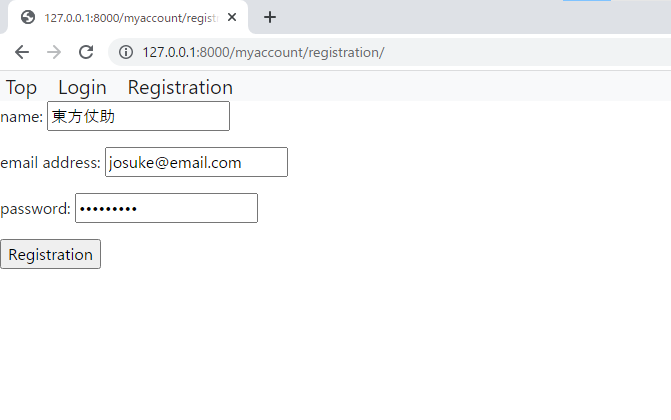
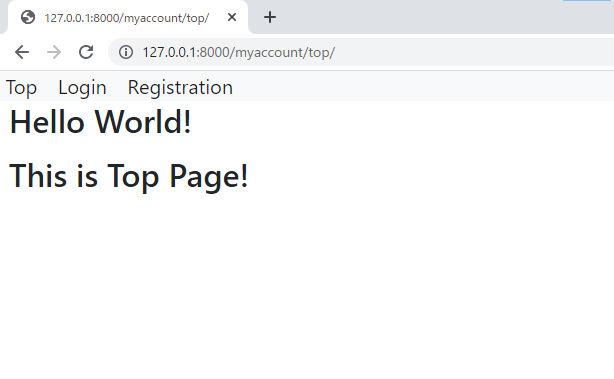
問題がなければ,以下トップページに遷移する.
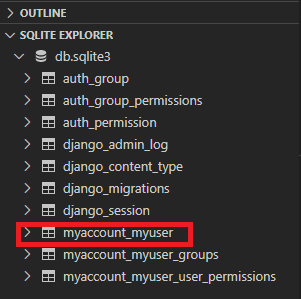
VS Codeにおいて,SQLiteをインストールし(詳細はこちら参照),"SQLITE EXPLORER"を開くと,"myaccount_myuser"テーブルを以下のように確認できる.
“myaccount_myuser"テーブルを右クリックし,"Show Table"をクリックすると以下のように上記で記述したユーザー内容を確認することができる.

“myaccount/forms.py"に追記し,以下のように編集する.
from django import forms
from .models import MyUser
from django.contrib.auth.password_validation import validate_password

class RegistrationForm(forms.ModelForm):
    username = forms.CharField(label='name')
    email = forms.EmailField(label='email address')
    password = forms.CharField(label='password', widget=forms.PasswordInput())

    class Meta:
        model = MyUser
        fields = ['username', 'email', 'password']

    def save(self, commit=False):
        user = super().save(commit=False)
        validate_password(self.cleaned_data['password'], user)
        user.set_password(self.cleaned_data['password'])
        user.save()
        return user

class LoginForm(forms.Form): # 以下追記箇所
    email = forms.EmailField(label='email address')
    password = forms.CharField(label='password', widget=forms.PasswordInput())
“myaccount/views.py"に追記し,以下のように編集する.
from django.shortcuts import render, redirect # 変更箇所
from django.views.generic.edit import CreateView, FormView
from django.views.generic.base import TemplateView, View
from .forms import RegistrationForm, LoginForm # 変更箇所
from django.contrib.auth import authenticate, login, logout # 追記箇所
class TopView(TemplateView):
template_name = 'top.html'
class RegistrationView(CreateView):
template_name = 'registration.html'
form_class = RegistrationForm
class MyLoginView(FormView):
template_name = 'login.html' # 以下追記箇所
form_class = LoginForm
def post(self, request, *args, **kwargs):
email = request.POST['email']
password = request.POST['password']
user = authenticate(email=email, password=password)
if user is not None and user.is_active:
login(request, user)
return redirect('myaccount:top')
class MyLogoutView(View):
def get(self, request, *args, **kwargs):
logout(request)
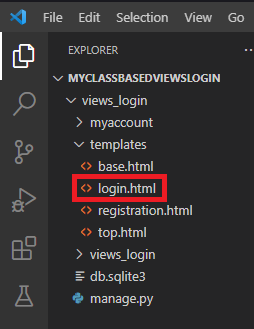
return redirect('myaccount:login')“myaccount/views.py"に"login.html"を記述したので,"templates"フォルダに"login.html"を以下のように作成する.
“templates/login.html"を以下のように編集する.
{% extends 'base.html' %}
{% block content %}
<form method="POST">
{% csrf_token %}
{{ form.as_p }}
<input type="submit" value="Login">
</form>
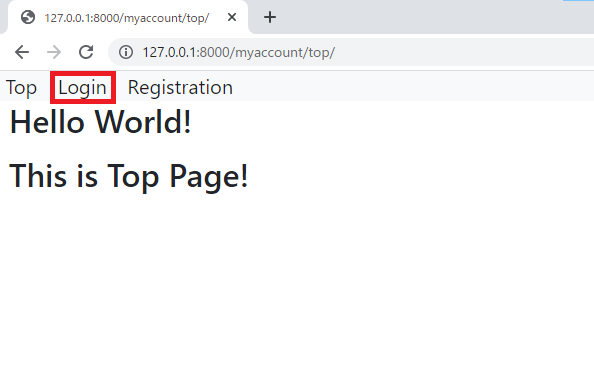
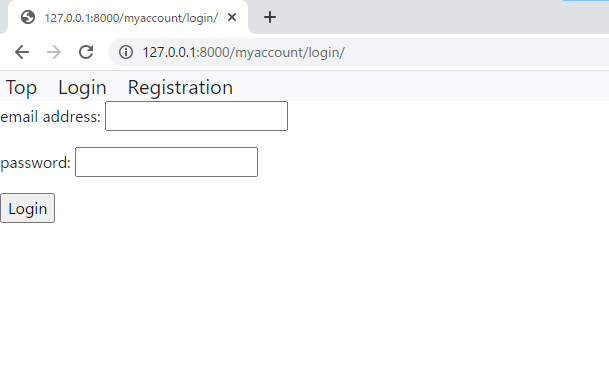
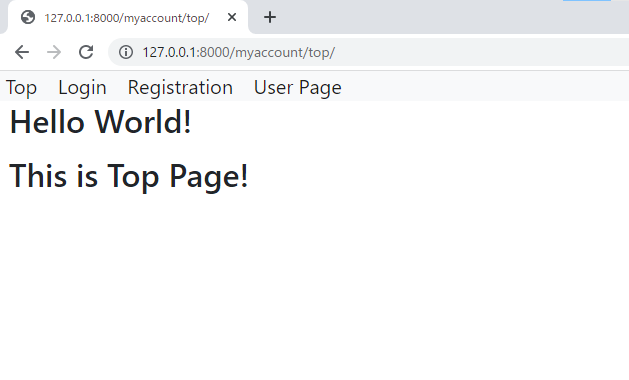
{% endblock %}上記を保存し,ブラウザのURLに"http://127.0.0.1:8000/myaccount/top"と入力すると,以下トップページに遷移する."Login"をクリックする.
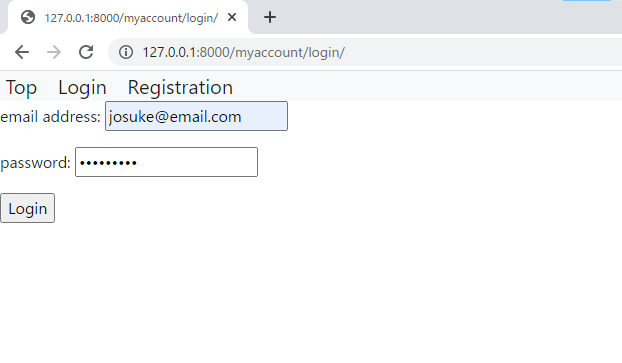
以下ログインページに遷移する.

上記の項目2で登録したメールアドレスとパスワードを入力し,"Login"ボタンをクリックする.
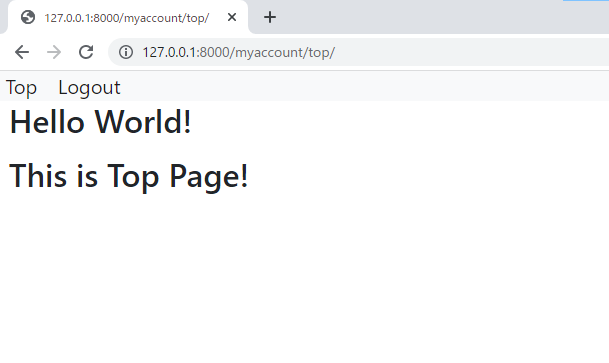
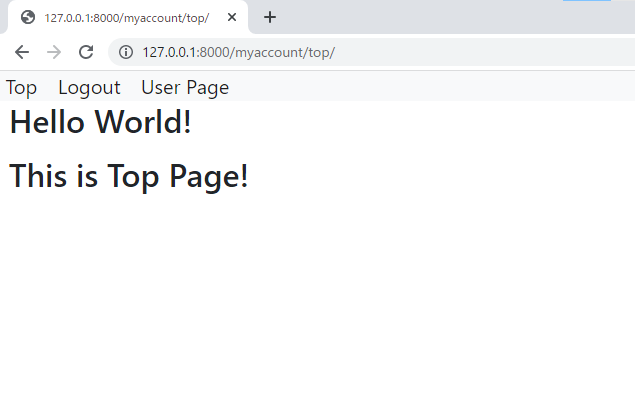
以下画面に遷移し,上部は"Top"と"Logout"のみ表記される."Logout"をクリックする.
以下のようにログインページに遷移する.
“myaccount/views.py"に追記し,以下のように編集する.
from django.shortcuts import render, redirect
from django.views.generic.edit import CreateView, FormView
from django.views.generic.base import TemplateView, View
from .forms import RegistrationForm, LoginForm
from django.contrib.auth import authenticate, login, logout

class TopView(TemplateView):
    template_name = 'top.html'

class RegistrationView(CreateView):
    template_name = 'registration.html'
    form_class = RegistrationForm

class MyLoginView(FormView):
    template_name = 'login.html'
    form_class = LoginForm

    def post(self, request, *args, **kwargs):
        email = request.POST['email']
        password = request.POST['password']
        user = authenticate(email=email, password=password)
        if user is not None and user.is_active:
            login(request, user)
        return redirect('myaccount:top')

class MyLogoutView(View):

    def get(self, request, *args, **kwargs):
        logout(request)
        return redirect('myaccount:login')

class MyUserView(TemplateView): # 以下追記箇所
    template_name = 'user.html'
“myaccount/views.py"で"user.html"を記載したので,"templates"フォルダに"user.html"を以下のように作成する.

“templates/user.html"を以下のように編集する.
{% extends 'base.html' %}
{% block content %}
<h2><p> Hello World!</p></h2>
<h2><p> This is User Page!</p></h2>
{% endblock %}“myaccount/urls.py"に追記し,以下のように編集する.
from django.urls import path
from .views import ( # 変更箇所
    TopView, RegistrationView,
    MyLoginView, MyLogoutView,
    MyUserView,
)

app_name = 'myaccount'
urlpatterns = [
    path('top/', TopView.as_view(), name='top'),
    path('registration/', RegistrationView.as_view(), name='registration'),
    path('login/', MyLoginView.as_view(), name='login'),
    path('logout/', MyLogoutView.as_view(), name='logout'),
    path('user/', MyUserView.as_view(), name='user'), # 追記箇所
]
“templates/base.html"に追記し,以下のように編集する.
<!DOCTYPE html>
<html lang="ja">
<head>
<meta charset="utf-8">
<link href="https://cdn.jsdelivr.net/npm/bootstrap@5.0.2/dist/css/bootstrap.min.css" rel="stylesheet" integrity="sha384-EVSTQN3/azprG1Anm3QDgpJLIm9Nao0Yz1ztcQTwFspd3yD65VohhpuuCOmLASjC" crossorigin="anonymous">
</head>
<body>
<nav class="navbar-expand-lg navbar-light bg-light">
<a class="navbar-brand" href="{% url 'myaccount:top' %}"> Top</a>
{% if user.is_authenticated %}
<a class="navbar-brand" href="{% url 'myaccount:logout' %}">Logout</a>
{% else %}
<a class="navbar-brand" href="{% url 'myaccount:login' %}">Login</a>
<a class="navbar-brand" href="{% url 'myaccount:registration' %}">Registration</a>
{% endif %}
<a class="navbar-brand" href="{% url 'myaccount:user' %}">User Page</a> # 追記箇所
</nav>
{% block content %}{% endblock %}
</body>
</html>VS Codeのターミナルで,”conda activate 仮想環境名”を実行し,"views_login"のディレクトリにて,以下のように”python manage.py runserver”を実行する.以下が出力される.
(djangoenv) C:\Users\shiro\Desktop\210517_python development\myclassbasedviewtest\class_based_view
>python manage.py runserver
Watching for file changes with StatReloader
Performing system checks...
System check identified no issues (0 silenced). # 以下出力箇所
August 25, 2021 - 13:41:40
Django version 3.2.3, using settings 'class_based_view.settings'
Starting development server at http://127.0.0.1:8000/
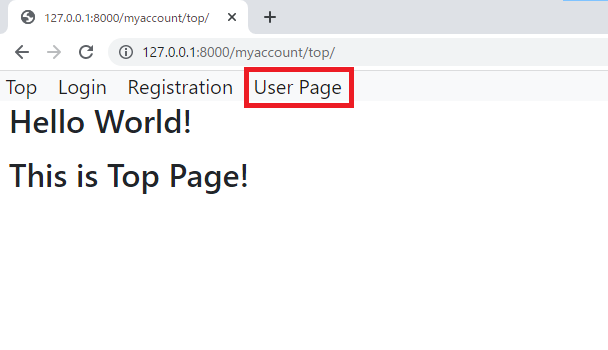
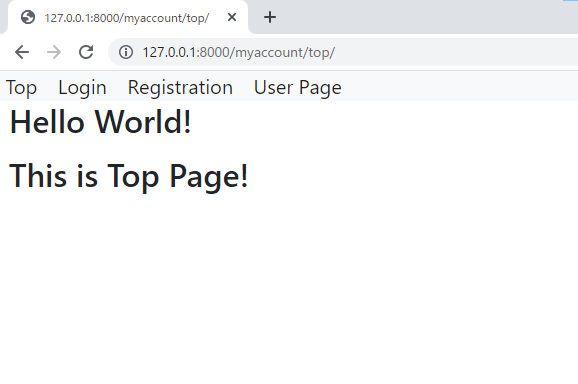
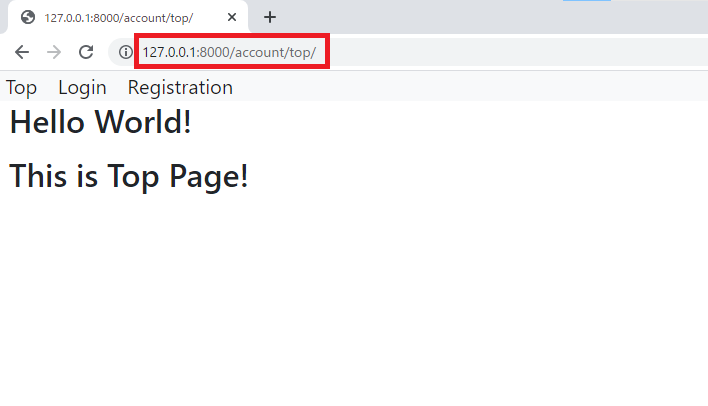
Quit the server with CTRL-BREAK.上記の"http://127.0.0.1:8000/"をクリックすると,ブラウザが開くので,ブラウザのURLに"http://127.0.0.1:8000/account/top"を入力すると以下のようにトップページに遷移する.トップページに"Use Page"が赤枠のように追記された.
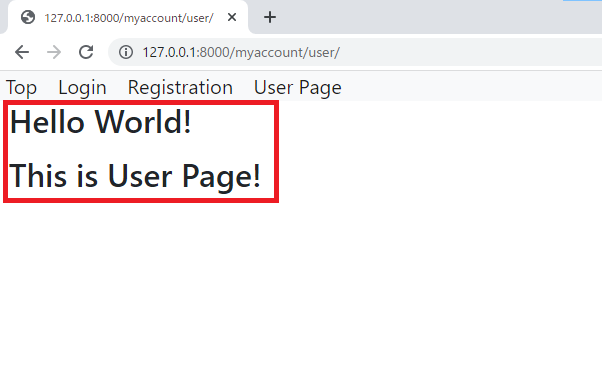
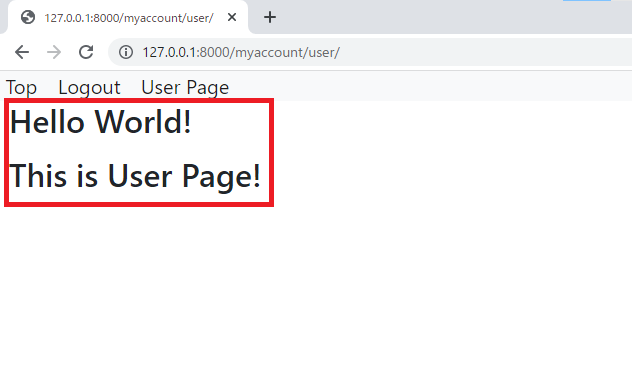
上記の"Use Page"をクリックすると,以下のように"User Page"に遷移した.
“myaccount/views.py"に追記し,以下のように編集する.
from django.shortcuts import render, redirect
from django.views.generic.edit import CreateView, FormView
from django.views.generic.base import TemplateView, View
from .forms import RegistrationForm, LoginForm
from django.contrib.auth import authenticate, login, logout
from django.contrib.auth.decorators import login_required # 追記箇所(6~8行目)
from django.utils.decorators import method_decorator
from django.contrib.auth.mixins import LoginRequiredMixin

class TopView(TemplateView):
    template_name = 'top.html'

class RegistrationView(CreateView):
    template_name = 'registration.html'
    form_class = RegistrationForm

class MyLoginView(FormView):
    template_name = 'login.html'
    form_class = LoginForm

    def post(self, request, *args, **kwargs):
        email = request.POST['email']
        password = request.POST['password']
        user = authenticate(email=email, password=password)
        if user is not None and user.is_active:
            login(request, user)
        return redirect('myaccount:top')

class MyLogoutView(View):

    def get(self, request, *args, **kwargs):
        logout(request)
        return redirect('myaccount:login')

class MyUserView(TemplateView):
    template_name = 'user.html'

    @method_decorator(login_required) # 以下追記箇所
    def dispatch(self, *args, **kwargs):
        return super().dispatch(*args, **kwargs)
“views_login/settings.py"の最下部に追記し,以下のように編集する.
DEFAULT_AUTO_FIELD = 'django.db.models.BigAutoField'

LOGIN_URL = '/myaccount/login' # 追記箇所
上記を保存し,ブラウザから"http://127.0.0.1:8000/myaccount/top"に以下のように遷移する.
上記の"User Page"をクリックすると,以下のようにログインページに遷移した."User Page"は,ログインをしていなければ遷移させることができないようにした.そのため,リダイレクトでログインページに遷移した.
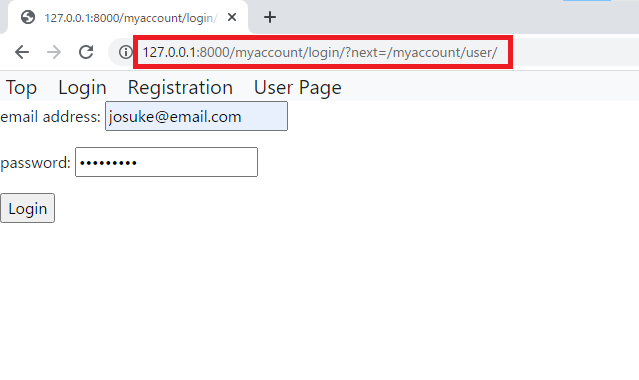
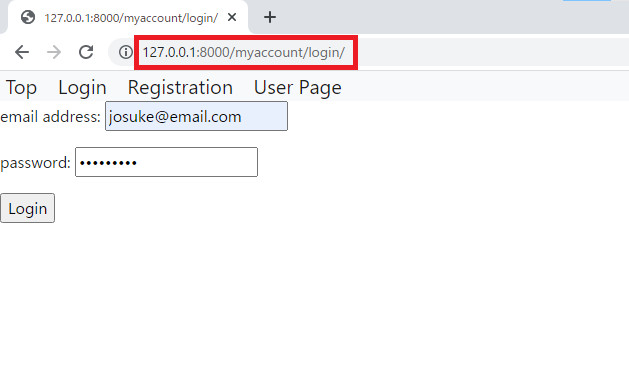
“User Page"でリダイレクトし,ログインページに遷移する場合と直接ログインページに遷移する場合,URLには以下のような差がある.
直接ログインページに遷移:http://127.0.0.1:8000/myaccount/login/
“User Page"からログインページに遷移:http://127.0.0.1:8000/myaccount/login/?next=/myaccount/user/
この差を利用し,"User Page"でリダイレクトし,ログインページに遷移する場合,ログイン後に"User Page"に遷移するようにコードを記述していく.
“myaccount/views.py"に追記し,以下のように編集する.
from django.shortcuts import render, redirect
from django.views.generic.edit import CreateView, FormView
from django.views.generic.base import TemplateView, View
from .forms import RegistrationForm, LoginForm
from django.contrib.auth import authenticate, login, logout
from django.contrib.auth.decorators import login_required
from django.utils.decorators import method_decorator
from django.contrib.auth.mixins import LoginRequiredMixin

class TopView(TemplateView):
    template_name = 'top.html'

class RegistrationView(CreateView):
    template_name = 'registration.html'
    form_class = RegistrationForm

class MyLoginView(FormView):
    template_name = 'login.html'
    form_class = LoginForm

    def post(self, request, *args, **kwargs):
        email = request.POST['email']
        password = request.POST['password']
        user = authenticate(email=email, password=password)
        next_url = request.POST['next'] # 追記箇所
        if user is not None and user.is_active:
            login(request, user)
        if next_url: # 追記箇所(28~29行目)
            return redirect(next_url)
        return redirect('myaccount:top')

class MyLogoutView(View):

    def get(self, request, *args, **kwargs):
        logout(request)
        return redirect('myaccount:login')

class MyUserView(TemplateView):
    template_name = 'user.html'

    @method_decorator(login_required)
    def dispatch(self, *args, **kwargs):
        return super().dispatch(*args, **kwargs)
“templates/login.html"に追記し,以下のように編集する.
{% extends 'base.html' %}
{% block content %}
<form method="POST">
{% csrf_token %}
{{ form.as_p }}
<input type="hidden" name="next" value="{{ request.GET.next }}"> # 追記箇所
<input type="submit" value="Login">
</form>
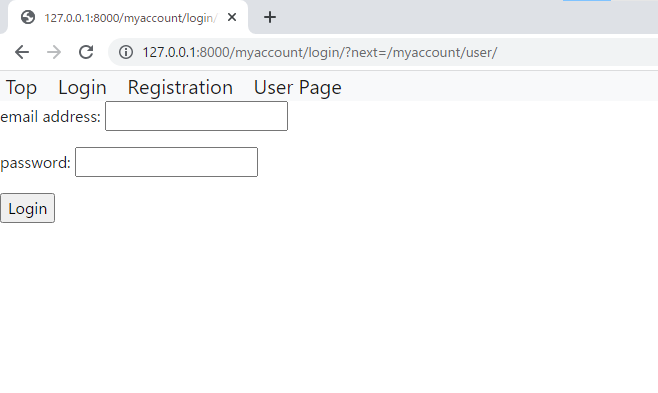
{% endblock %}上記を保存し,ブラウザから"http://127.0.0.1:8000/myaccount/top"に以下のように遷移する.
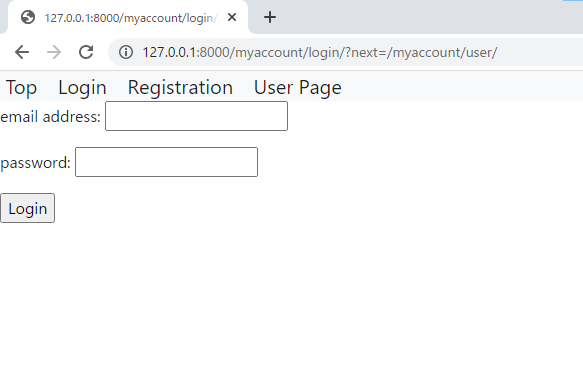
上記の"User Page"をクリックすると,以下のようにログインページに遷移した.
以下のように上記で登録したユーザー情報を用いてログインを行う.
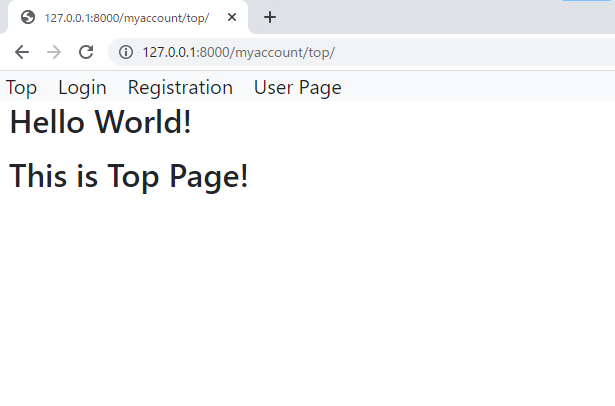
ログイン後,以下のように"User Page"に遷移した.
なお,Top Pageから"Login"をクリックし,以下のようにログインする.
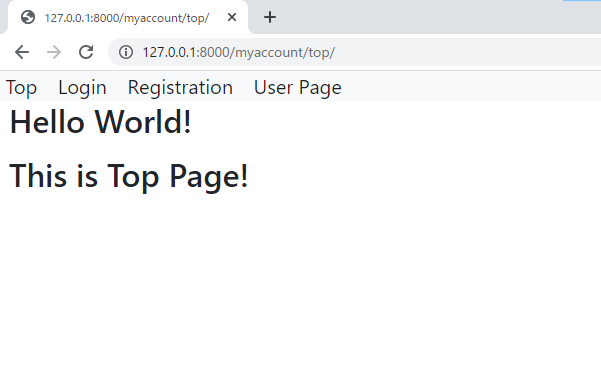
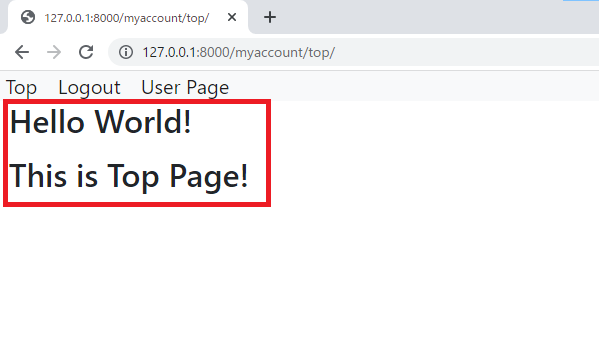
ログイン後,以下のように"Top Page"に遷移した.
(3)にてログイン・ログアウトの実装をしたが,(4)では異なるコードでログイン・ログアウトの実装を行う.
“myaccount/views.py"を以下のように編集する.
from django.shortcuts import render, redirect
from django.views.generic.edit import CreateView, FormView
from django.views.generic.base import TemplateView, View
from .forms import RegistrationForm, LoginForm
from django.contrib.auth import authenticate, login, logout
from django.contrib.auth.decorators import login_required
from django.utils.decorators import method_decorator
from django.contrib.auth.mixins import LoginRequiredMixin
from django.contrib.auth.views import LoginView, LogoutView # 追記箇所

class TopView(TemplateView):
    template_name = 'top.html'

class RegistrationView(CreateView):
    template_name = 'registration.html'
    form_class = RegistrationForm

class MyLoginView(LoginView): # 追記箇所(18~20行目)
    template_name = 'login.html'
    authentication_form = LoginForm

class MyLogoutView(View):

    def get(self, request, *args, **kwargs):
        logout(request)
        return redirect('myaccount:login')

class MyUserView(TemplateView):
    template_name = 'user.html'

    @method_decorator(login_required)
    def dispatch(self, *args, **kwargs):
        return super().dispatch(*args, **kwargs)
“myaccount/forms.py"を以下のように編集する.
from django import forms
from .models import MyUser
from django.contrib.auth.password_validation import validate_password
from django.contrib.auth.forms import AuthenticationForm # 追記箇所

class RegistrationForm(forms.ModelForm):
    username = forms.CharField(label='name')
    email = forms.EmailField(label='email address')
    password = forms.CharField(label='password', widget=forms.PasswordInput())

    class Meta:
        model = MyUser
        fields = ['username', 'email', 'password']

    def save(self, commit=False):
        user = super().save(commit=False)
        validate_password(self.cleaned_data['password'], user)
        user.set_password(self.cleaned_data['password'])
        user.save()
        return user

class LoginForm(AuthenticationForm): # 以下追記箇所
    username = forms.EmailField(label='Email Address')
    password = forms.CharField(label='Password', widget=forms.PasswordInput())
“views_login/settings.py"に追記し,以下のように編集する.
DEFAULT_AUTO_FIELD = 'django.db.models.BigAutoField'

LOGIN_URL = '/myaccount/login'
LOGIN_REDIRECT_URL = '/myaccount/top' # 追記箇所
VS Codeのターミナルで,”conda activate 仮想環境名”を実行し,"views_login"のディレクトリにて,以下のように”python manage.py runserver”を実行する.以下が出力される.
(djangoenv) C:\Users\shiro\Desktop\210517_python development\myclassbasedviewtest\class_based_view
>python manage.py runserver
Watching for file changes with StatReloader
Performing system checks...

System check identified no issues (0 silenced). # 以下出力箇所
August 25, 2021 - 16:03:19
Django version 3.2.3, using settings 'class_based_view.settings'
Starting development server at http://127.0.0.1:8000/
Quit the server with CTRL-BREAK.
上記の"http://127.0.0.1:8000/"をクリックすると,ブラウザが開くので,ブラウザのURLに"http://127.0.0.1:8000/myaccount/top"を入力すると以下のようにトップページに遷移する.
ログイン画面に移動し,以下のように登録した情報を記入し,"Login"ボタンをクリックする.
以下のようにログインに成功し,"Top Page"に遷移した.
“myaccount/views.py"を以下のように編集する.
from django.shortcuts import render, redirect
from django.views.generic.edit import CreateView, FormView
from django.views.generic.base import TemplateView, View
from .forms import RegistrationForm, LoginForm
from django.contrib.auth import authenticate, login, logout
from django.contrib.auth.decorators import login_required
from django.utils.decorators import method_decorator
from django.contrib.auth.mixins import LoginRequiredMixin
from django.contrib.auth.views import LoginView, LogoutView

class TopView(TemplateView):
    template_name = 'top.html'

class RegistrationView(CreateView):
    template_name = 'registration.html'
    form_class = RegistrationForm

class MyLoginView(LoginView):
    template_name = 'login.html'
    authentication_form = LoginForm

class MyLogoutView(LogoutView): # 追記箇所
    pass # 追記箇所

class MyUserView(TemplateView):
    template_name = 'user.html'

    @method_decorator(login_required)
    def dispatch(self, *args, **kwargs):
        return super().dispatch(*args, **kwargs)
“views_login/settings.py"に追記し,以下のように編集する.
DEFAULT_AUTO_FIELD = 'django.db.models.BigAutoField'
LOGIN_URL = '/myaccount/login'
LOGIN_REDIRECT_URL = '/myaccount/top'
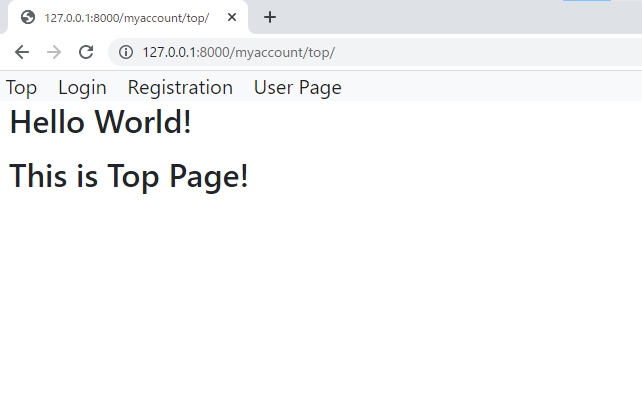
LOGOUT_REDIRECT_URL = '/myaccount/login' # 追記箇所上記の"http://127.0.0.1:8000/"をクリックすると,ブラウザが開くので,ブラウザのURLに"http://127.0.0.1:8000/myaccount/top"を入力すると以下のようにトップページに遷移する."Login"をクリックする.
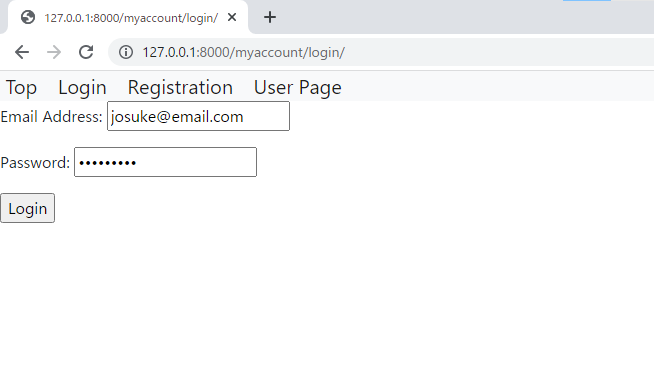
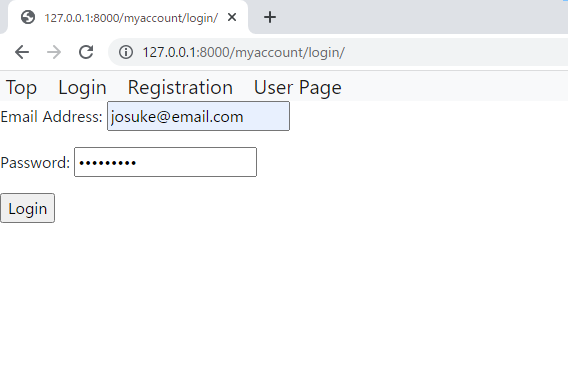
以下画面に遷移するので,登録情報を記入し,"Login"ボタンをクリックする.
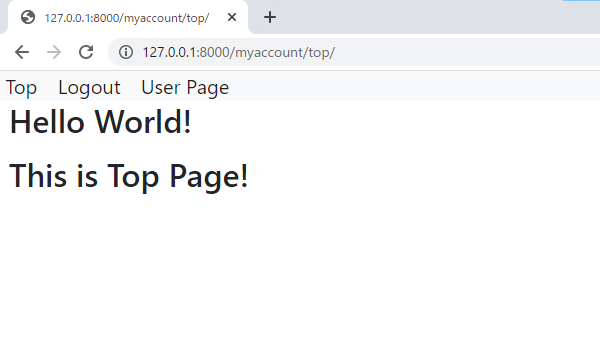
ログインに成功し,以下のようにTop Pageに遷移する."Logout"をクリックする.

ログアウト後,以下のようにログインページに遷移する.

“views_login/settings.py"に追記し,以下のように編集する.ログインの保持を10秒にすることを意味している.
DEFAULT_AUTO_FIELD = 'django.db.models.BigAutoField'

LOGIN_URL = '/myaccount/login'
LOGIN_REDIRECT_URL = '/myaccount/top'
LOGOUT_REDIRECT_URL = '/myaccount/login'

SESSION_COOKIE_AGE = 10 # 追記箇所
上記を保存し,ブラウザから"http://127.0.0.1:8000/myaccount/top"に以下のように遷移する.
ログインをすることによって,"Top Page"に遷移する.

10秒後に更新すると,以下のように自動的にログアウト状態になる.

“myaccount/forms.py"に追記し,以下のように編集する.
from django import forms
from .models import MyUser
from django.contrib.auth.password_validation import validate_password
from django.contrib.auth.forms import AuthenticationForm

class RegistrationForm(forms.ModelForm):
    username = forms.CharField(label='name')
    email = forms.EmailField(label='email address')
    password = forms.CharField(label='password', widget=forms.PasswordInput())

    class Meta:
        model = MyUser
        fields = ['username', 'email', 'password']

    def save(self, commit=False):
        user = super().save(commit=False)
        validate_password(self.cleaned_data['password'], user)
        user.set_password(self.cleaned_data['password'])
        user.save()
        return user

class LoginForm(AuthenticationForm):
    username = forms.EmailField(label='Email Address')
    password = forms.CharField(label='Password', widget=forms.PasswordInput())
    remember = forms.BooleanField(label='keep login', required=False) # 以下追記箇所
“myaccount/views.py"に追記し,以下のように編集する.
from django.shortcuts import render, redirect
from django.views.generic.edit import CreateView, FormView
from django.views.generic.base import TemplateView, View
from .forms import RegistrationForm, LoginForm
from django.contrib.auth import authenticate, login, logout
from django.contrib.auth.decorators import login_required
from django.utils.decorators import method_decorator
from django.contrib.auth.mixins import LoginRequiredMixin
from django.contrib.auth.views import LoginView, LogoutView

class TopView(TemplateView):
    template_name = 'top.html'

class RegistrationView(CreateView):
    template_name = 'registration.html'
    form_class = RegistrationForm

class MyLoginView(LoginView):
    template_name = 'login.html'
    authentication_form = LoginForm

    def form_valid(self, form): # 追記箇所(以下5行が追記箇所)
        remember = form.cleaned_data['remember']
        if remember:
            self.request.session.set_expiry(1000000)
        return super().form_valid(form)

class MyLogoutView(LogoutView):
    pass

class MyUserView(TemplateView):
    template_name = 'user.html'

    @method_decorator(login_required)
    def dispatch(self, *args, **kwargs):
        return super().dispatch(*args, **kwargs)
上記を保存し,ブラウザから"http://127.0.0.1:8000/myaccount/top"に以下のように遷移する."Login"をクリックする.
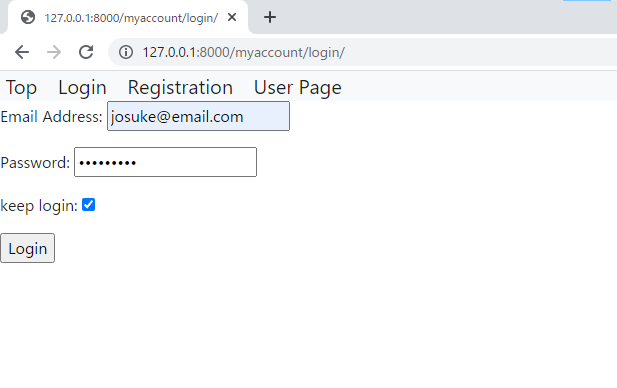
以下のようにログインページに遷移する.赤枠の"keep login"が加わった.チェックをするとログイン状態をキープすることができる.チェックをしないと10秒でログアウト状態になる.

以下のようにユーザー情報を記述し,"keep login"にチェックを入れ,"Login"ボタンをクリックする.
以下のようにログイン状態になり,Top Pageに遷移した.
10秒後,更新をしてもログアウトにならない.

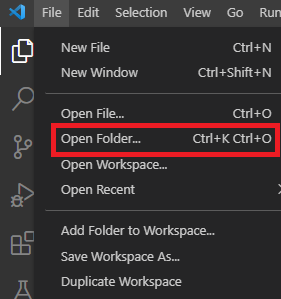
VS Codeの"File"をクリックし,"Open Folder"から"myclassbasedviewslogin"フォルダを選ぶ.
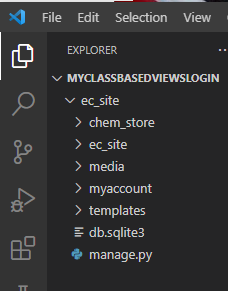
“myclassbasedviewslogin"フォルダを選択すると以下のように表示される.
Windowsの以下スタートボタンを右クリックし,"検索"をクリックする.
![]()
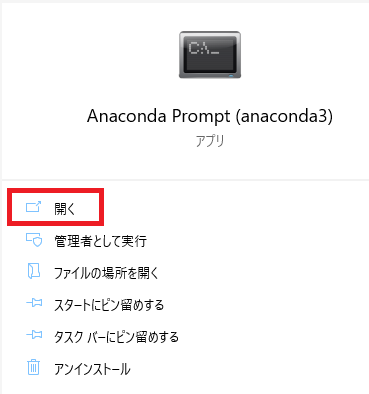
“Anaconda Prompt"と検索をすると"Anaconda Prompt"が見つかるので,"開く"をクリックする.
クリックすると以下"Anaconda Prompt"ウィンドウが開く.
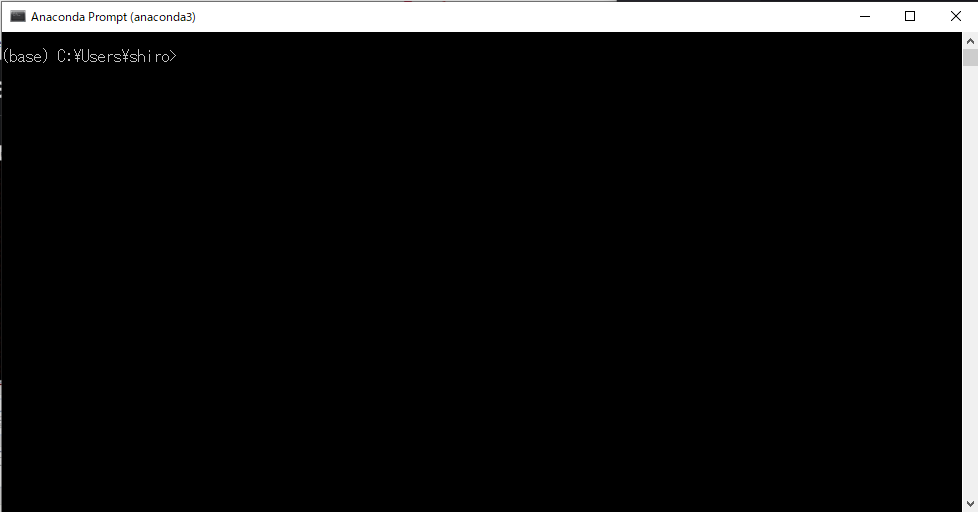
以下のように”conda activate 仮想環境名”を実行し,仮想環境に移行する.仮想環境名は"djangoenv"なので,”conda activate djangoenv”を実行すると,"djangoenv"の仮想環境に移行する.
(base) C:\Users\shiro>conda activate djangoenv

(djangoenv) C:\Users\shiro>
以下のように記載して実行をすると,以下のように出力される.
(djangoenv) C:\Users\shiro>pip install django-allauth

Collecting django-allauth # 出力箇所
  Downloading django-allauth-0.45.0.tar.gz (581 kB)
     |████████████████████████████████| 581 kB 3.3 MB/s
Requirement already satisfied: Django>=2.0 in c:\users\shiro\anaconda3\envs\djangoenv\lib\site-packages (from django-allauth) (3.2.3)
Collecting python3-openid>=3.0.8
  Using cached python3_openid-3.2.0-py3-none-any.whl (133 kB)
Collecting requests-oauthlib>=0.3.0
  Using cached requests_oauthlib-1.3.0-py2.py3-none-any.whl (23 kB)
Collecting requests
  Downloading requests-2.26.0-py2.py3-none-any.whl (62 kB)
     |████████████████████████████████| 62 kB 4.5 MB/s
Collecting pyjwt[crypto]>=1.7
  Using cached PyJWT-2.1.0-py3-none-any.whl (16 kB)
Requirement already satisfied: pytz in c:\users\shiro\anaconda3\envs\djangoenv\lib\site-packages (from Django>=2.0->django-allauth) (2021.1)
Requirement already satisfied: asgiref<4,>=3.3.2 in c:\users\shiro\anaconda3\envs\djangoenv\lib\site-packages (from Django>=2.0->django-allauth) (3.3.4)
Requirement already satisfied: sqlparse>=0.2.2 in c:\users\shiro\anaconda3\envs\djangoenv\lib\site-packages (from Django>=2.0->django-allauth) (0.4.1)
Collecting cryptography<4.0.0,>=3.3.1
  Downloading cryptography-3.4.8-cp36-abi3-win_amd64.whl (1.6 MB)
     |████████████████████████████████| 1.6 MB ...
Requirement already satisfied: cffi>=1.12 in c:\users\shiro\anaconda3\envs\djangoenv\lib\site-packages (from cryptography<4.0.0,>=3.3.1->pyjwt[crypto]>=1.7->django-allauth) (1.14.6)
Requirement already satisfied: pycparser in c:\users\shiro\anaconda3\envs\djangoenv\lib\site-packages (from cffi>=1.12->cryptography<4.0.0,>=3.3.1->pyjwt[crypto]>=1.7->django-allauth) (2.20)
Collecting defusedxml
  Using cached defusedxml-0.7.1-py2.py3-none-any.whl (25 kB)
Collecting oauthlib>=3.0.0
  Downloading oauthlib-3.1.1-py2.py3-none-any.whl (146 kB)
     |████████████████████████████████| 146 kB 6.4 MB/s
Collecting urllib3<1.27,>=1.21.1
  Downloading urllib3-1.26.6-py2.py3-none-any.whl (138 kB)
     |████████████████████████████████| 138 kB ...
Collecting charset-normalizer~=2.0.0
  Downloading charset_normalizer-2.0.5-py3-none-any.whl (37 kB)
Collecting idna<4,>=2.5
  Downloading idna-3.2-py3-none-any.whl (59 kB)
     |████████████████████████████████| 59 kB 4.1 MB/s
Requirement already satisfied: certifi>=2017.4.17 in c:\users\shiro\anaconda3\envs\djangoenv\lib\site-packages (from requests->django-allauth) (2020.12.5)
Building wheels for collected packages: django-allauth
  Building wheel for django-allauth (setup.py) ... done
  Created wheel for django-allauth: filename=django_allauth-0.45.0-py3-none-any.whl size=914487 sha256=08576596935b30d0dfb55323a2a47a64b52e87d64f7fcc8f1dafc03f8687367e
  Stored in directory: c:\users\shiro\appdata\local\pip\cache\wheels\94\2d\f8\c63cadecc18b2ab065df9861876bab1a955f4f59ff1c79682e
Successfully built django-allauth
Installing collected packages: urllib3, idna, charset-normalizer, requests, pyjwt, oauthlib, defusedxml, cryptography, requests-oauthlib, python3-openid, django-allauth
Successfully installed charset-normalizer-2.0.5 cryptography-3.4.8 defusedxml-0.7.1 django-allauth-0.45.0 idna-3.2 oauthlib-3.1.1 pyjwt-2.1.0 python3-openid-3.2.0 requests-2.26.0 requests-oauthlib-1.3.0 urllib3-1.26.6以下URLを参照する.
https://django-allauth.readthedocs.io/en/latest/installation.html
上記URLの内容を参照し,VS Codeを開く."ec_site/ec_site/settings.py"に追記し,以下のように編集する.
INSTALLED_APPS = [
    'django.contrib.admin',
    'django.contrib.auth',
    'django.contrib.contenttypes',
    'django.contrib.sessions',
    'django.contrib.messages',
    'django.contrib.staticfiles',
    'django.contrib.sites', # 追記箇所(以下5行追加)
    'allauth',
    'allauth.account',
    'allauth.socialaccount',
    'allauth.socialaccount.providers.google',
    'account',
    'chem_store',
]

~省略~

WSGI_APPLICATION = 'ec_site.wsgi.application'

AUTHENTICATION_BACKENDS = [ # 追記箇所
    "django.contrib.auth.backends.ModelBackend",
    "allauth.account.auth_backends.AuthenticationBackend",
]

~省略~

MEDIA_ROOT = os.path.join(BASE_DIR, 'media')
MEDIA_URL = '/media/'

SITE_ID = 1 # 以下追記箇所
ACCOUNT_EMAIL_REQUIRED = True
ACCOUNT_UNIQUE_EMAIL = True
ACCOUNT_USERNAME_REQUIRED = False
以下URLを参照する.
https://django-allauth.readthedocs.io/en/latest/providers.html#google
上記URLの"Django configuration"を参照し,"ec_site/ec_site/settings.py"の最下部に追記し,以下のように編集する.
MEDIA_ROOT = os.path.join(BASE_DIR, 'media')
MEDIA_URL = '/media/'

SITE_ID = 1
ACCOUNT_EMAIL_REQUIRED = True
ACCOUNT_UNIQUE_EMAIL = True
ACCOUNT_USERNAME_REQUIRED = False

SOCIALACCOUNT_PROVIDERS = { # 以下追記箇所
    'google': {
        'SCOPE': [
            'profile',
            'email',
        ],
        'AUTH_PARAMS': {
            'access_type': 'online',
        }
    }
}
以下URLにアクセスし,ログインをする.
https://console.cloud.google.com
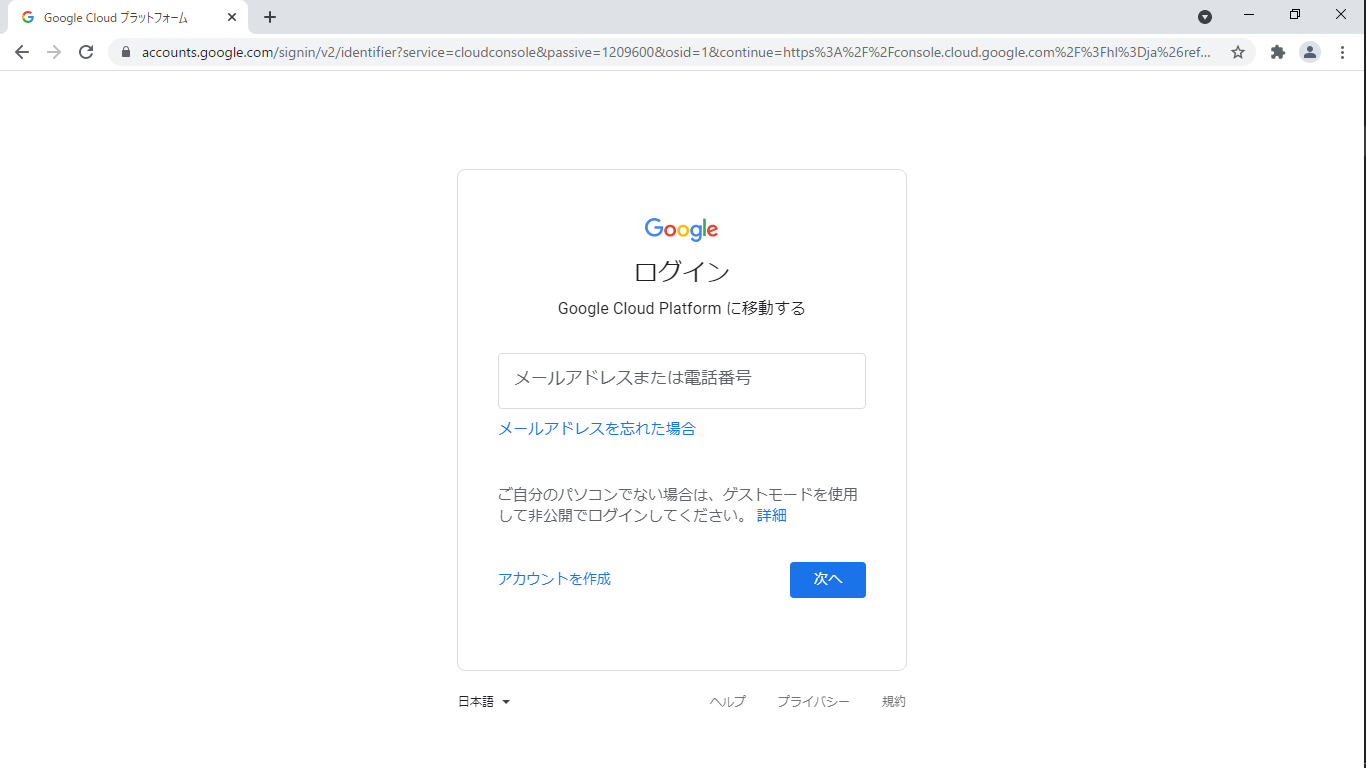
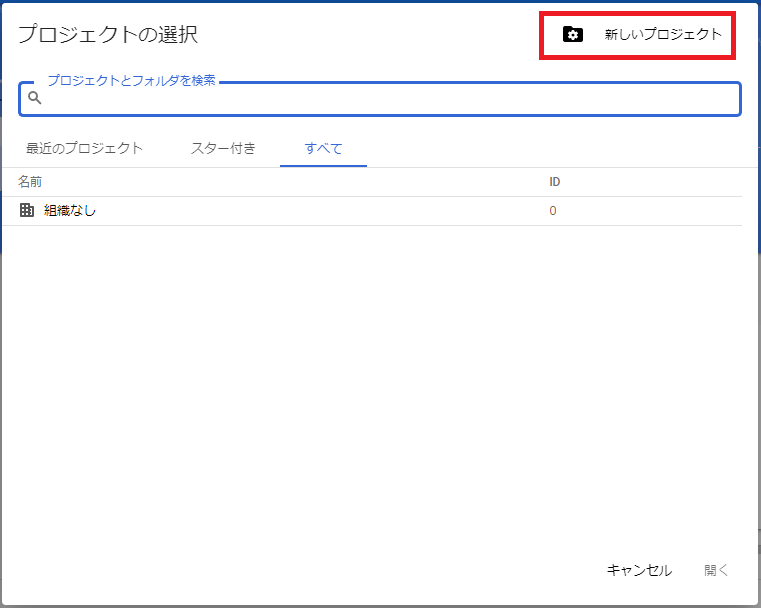
ログインをすると以下画面に遷移する.赤枠の"プロジェクトの選択"をクリックする.

以下ポップが出現するので,"新しいプロジェクト"をクリックする.
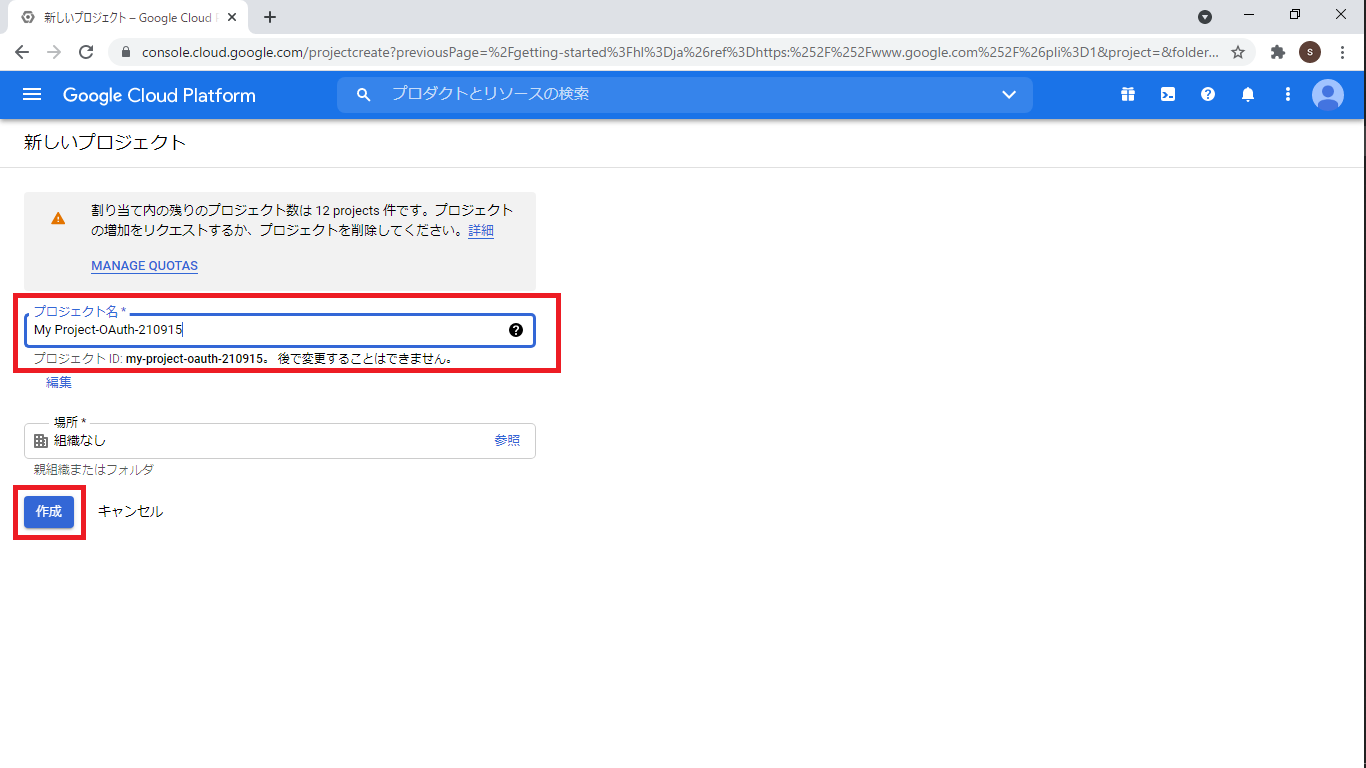
“プロジェクト名"を記載し,"作成"をクリックする.
以下画面に遷移するので,"プロジェクトを選択"をクリックする.
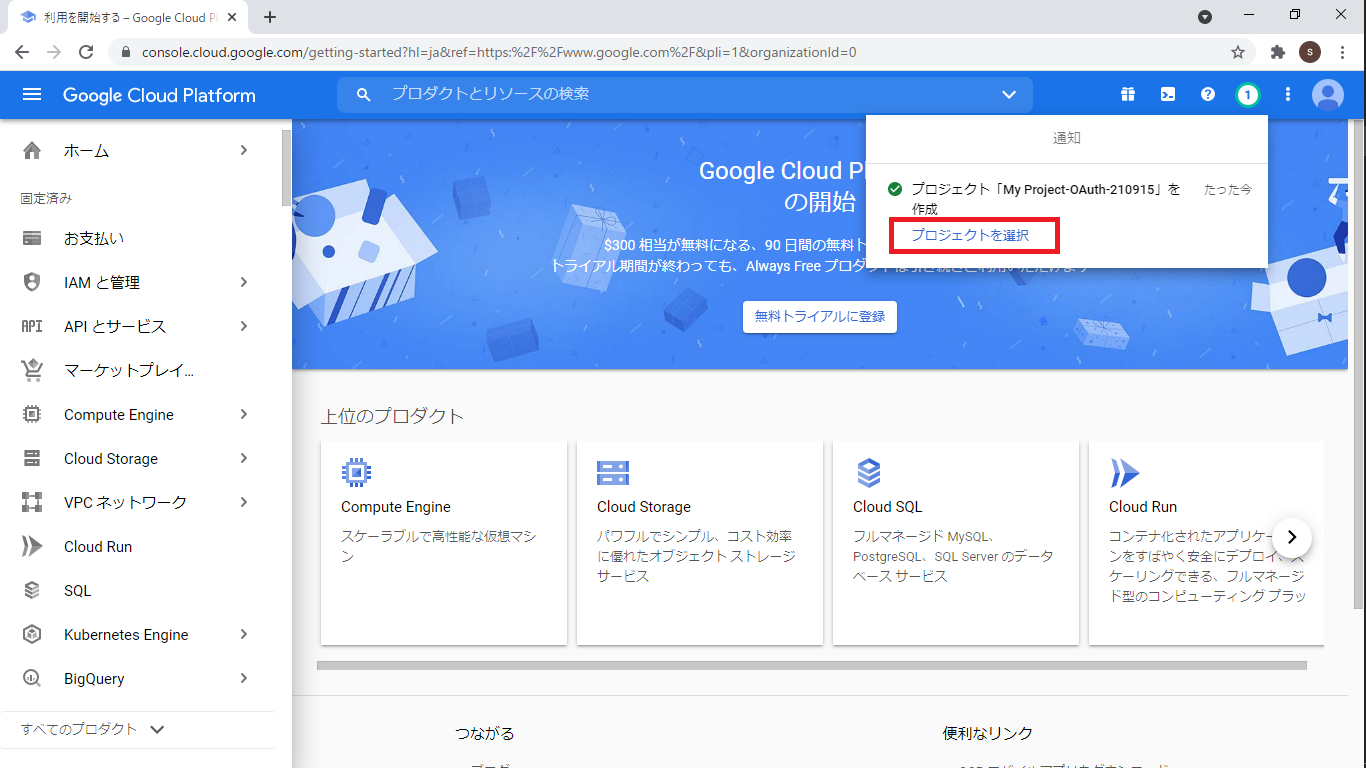
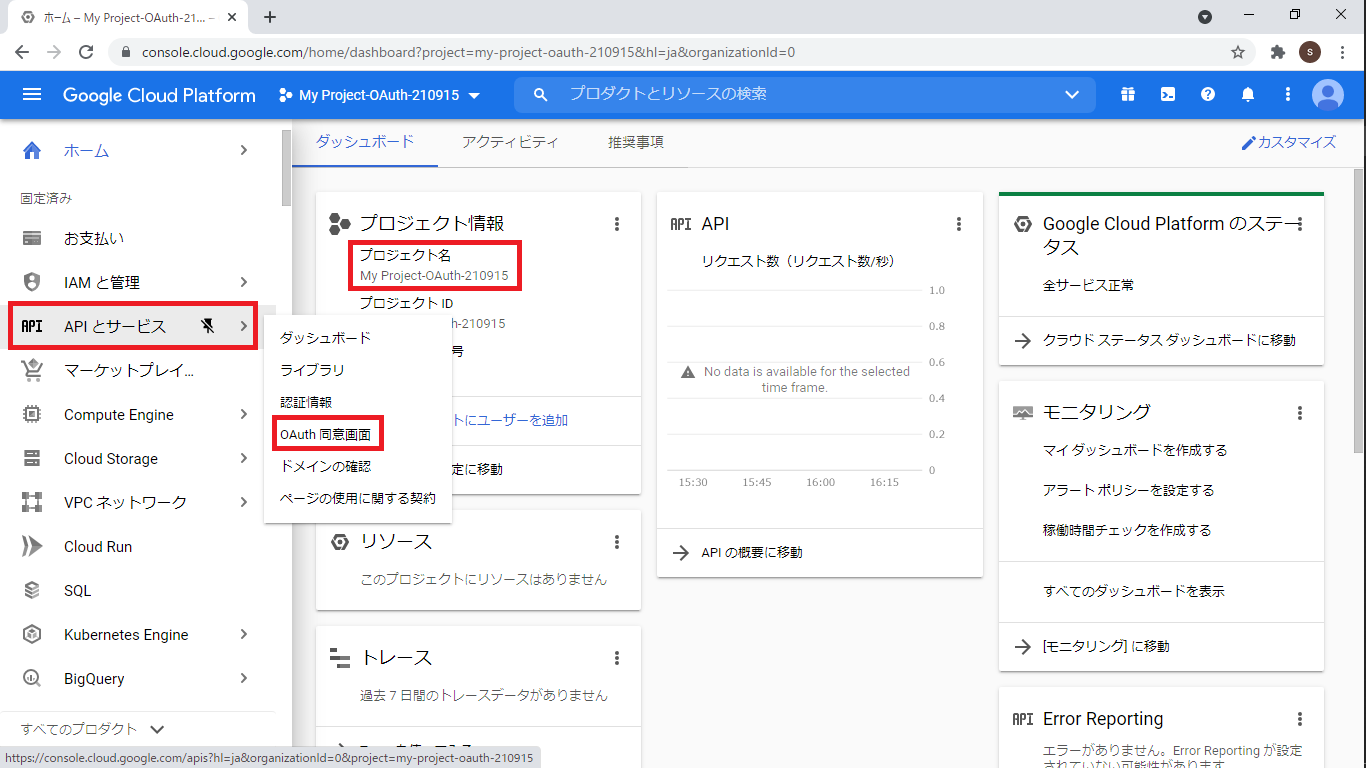
以下画面に遷移する."プロジェクト名"が表示される."APIとサービス"をクリックし,"OAuth同意画面"をクリックする.
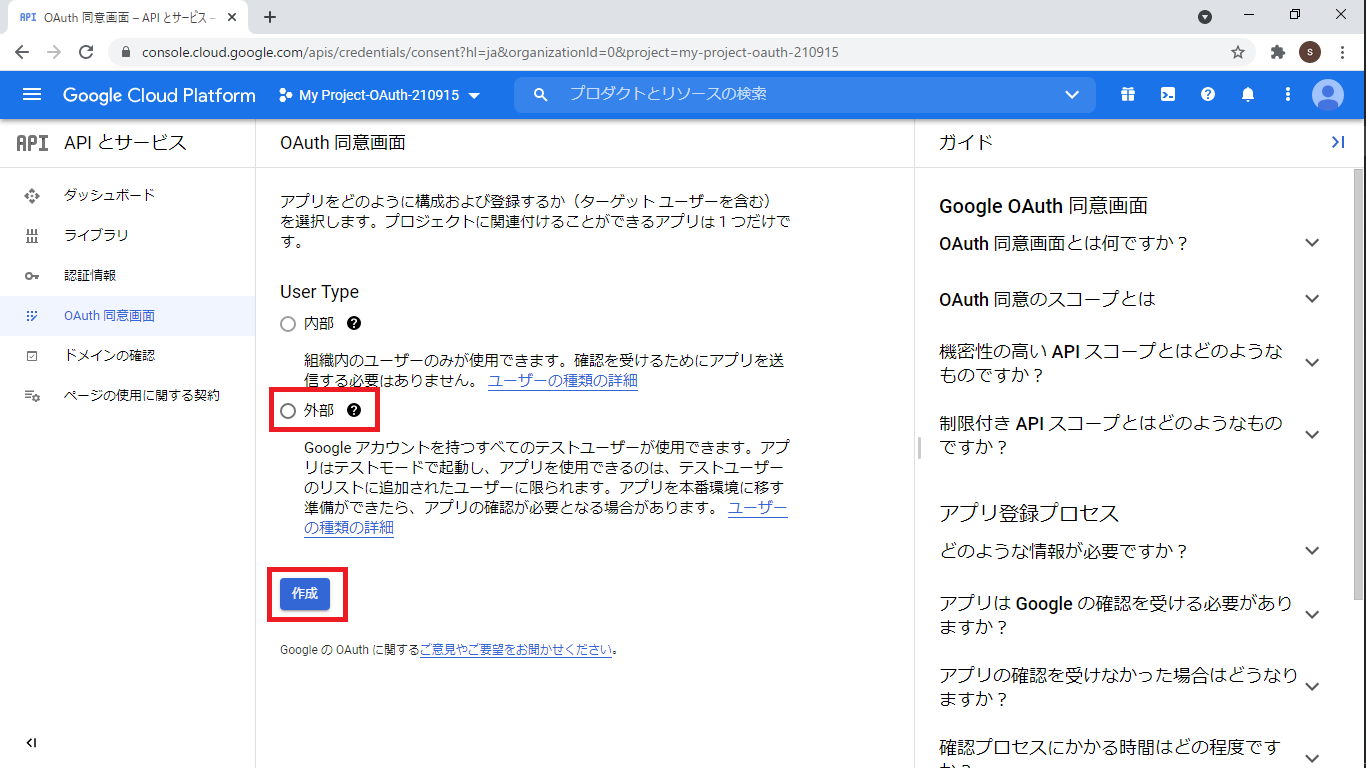
“外部"にチェックを入れ,"作成"をクリックする.
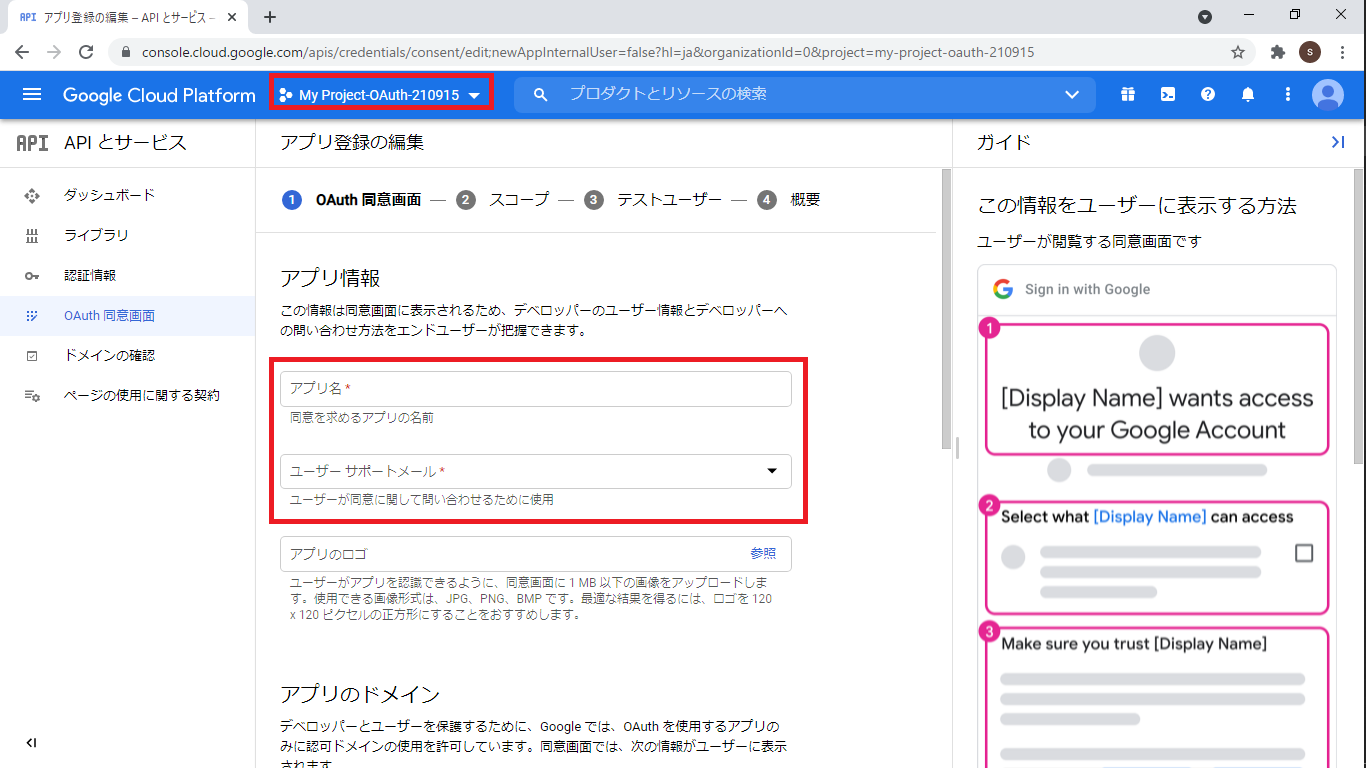
以下画面に遷移する.アプリ名には,作成したアプリ名を記述し,"ユーザーサポートメール"には対応できるメールを入力する.
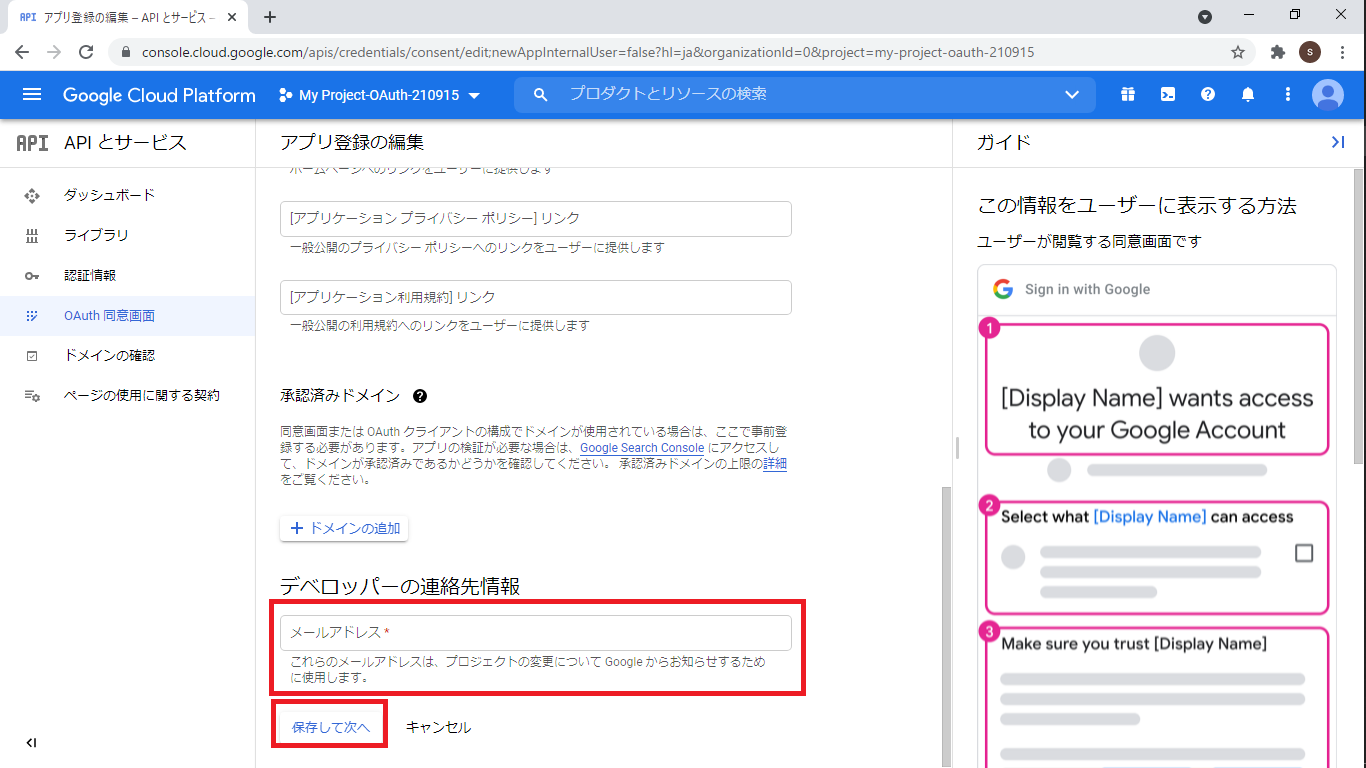
スクロールダウンし,赤枠に適当なメールアドレスを記述し,"保存して次へ"をクリックする.
スコープに移動する.
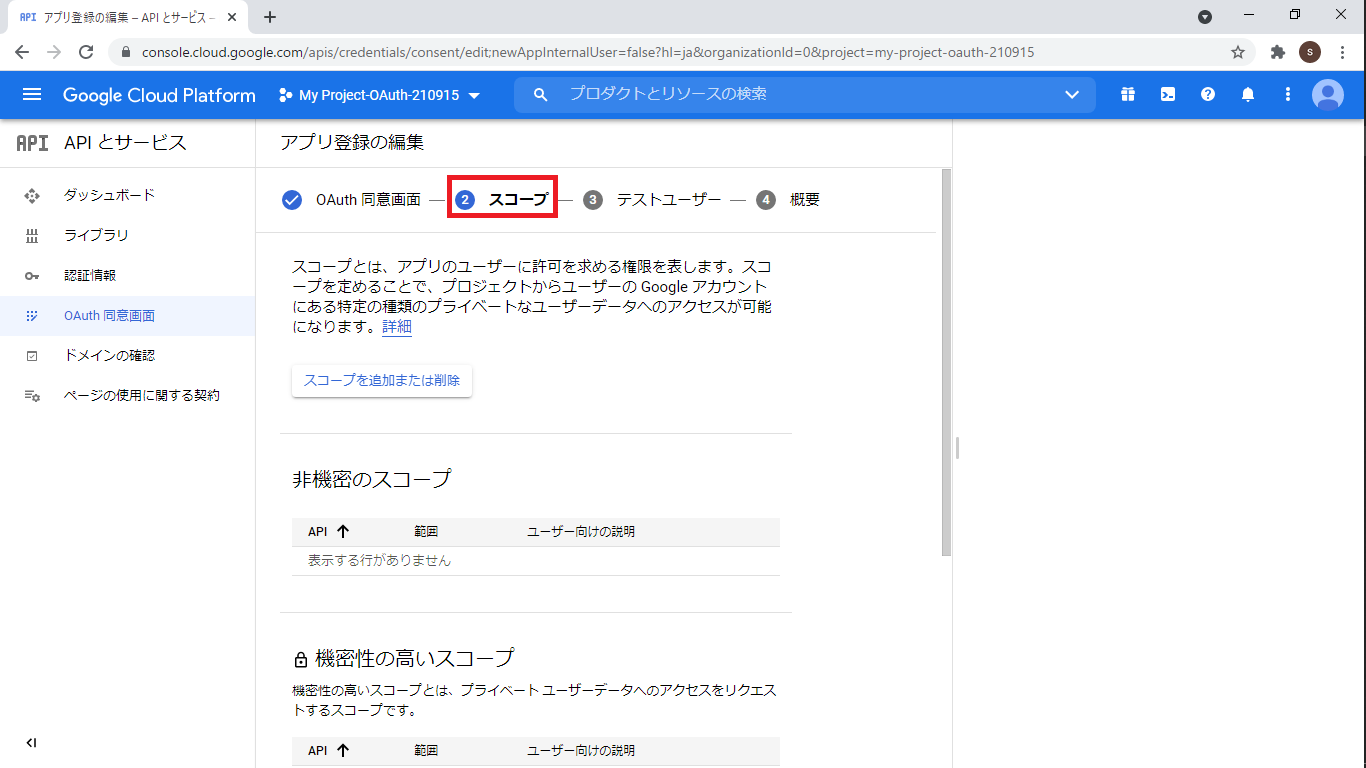
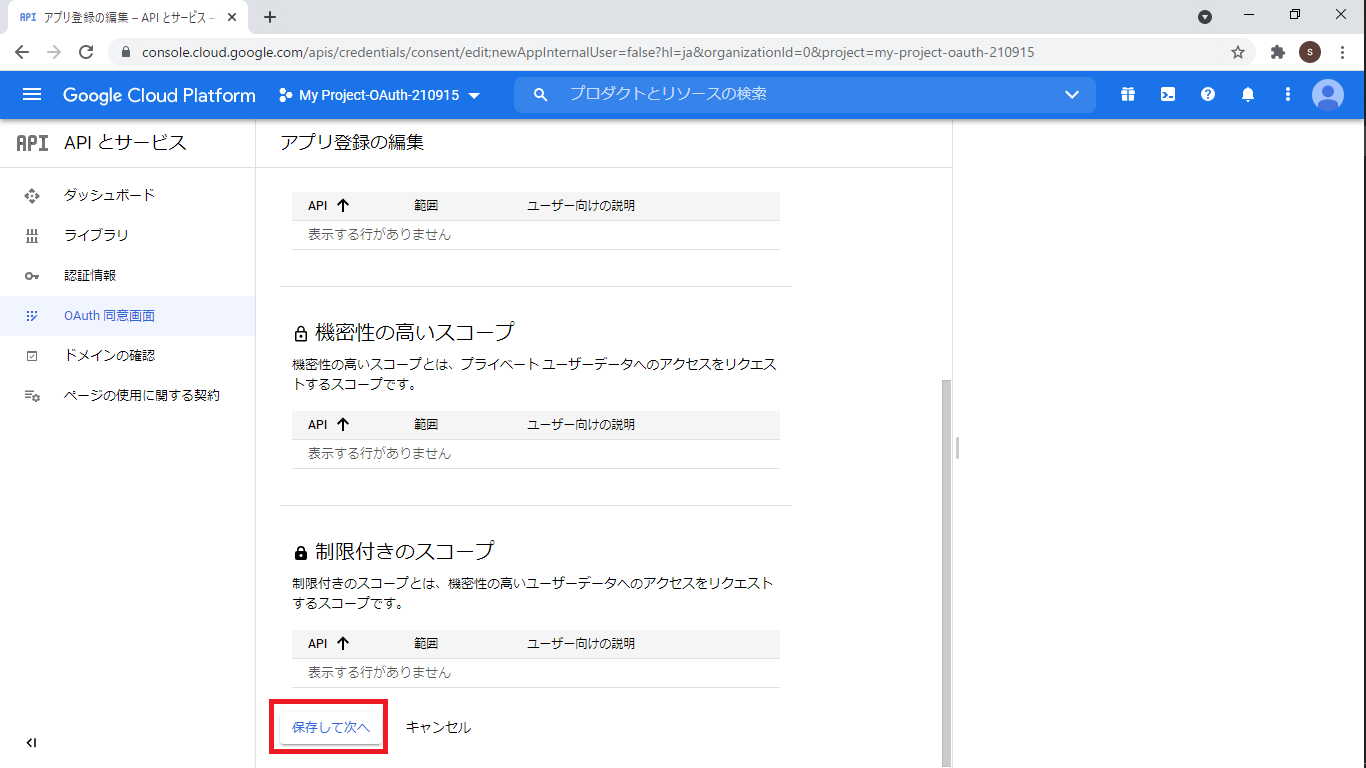
スクロールダウンし,"保存して次へ"をクリックする.
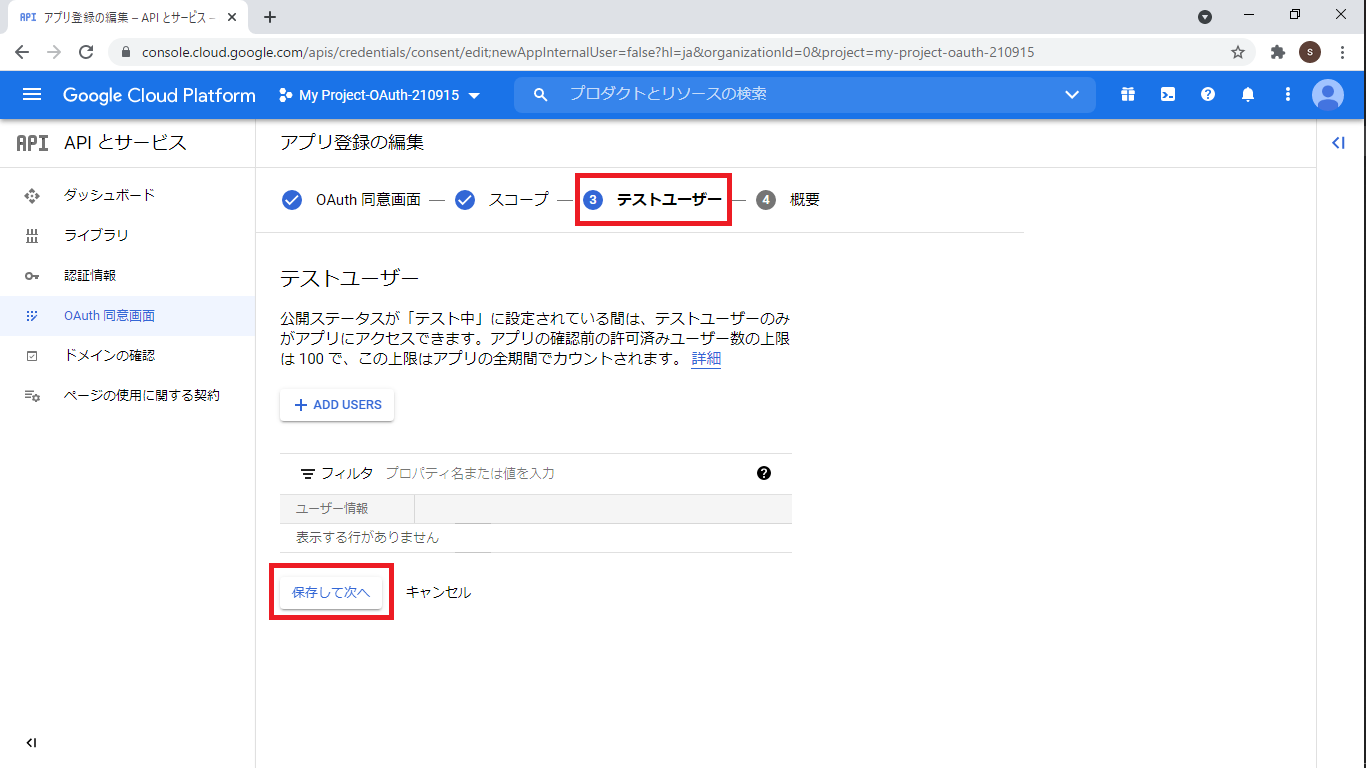
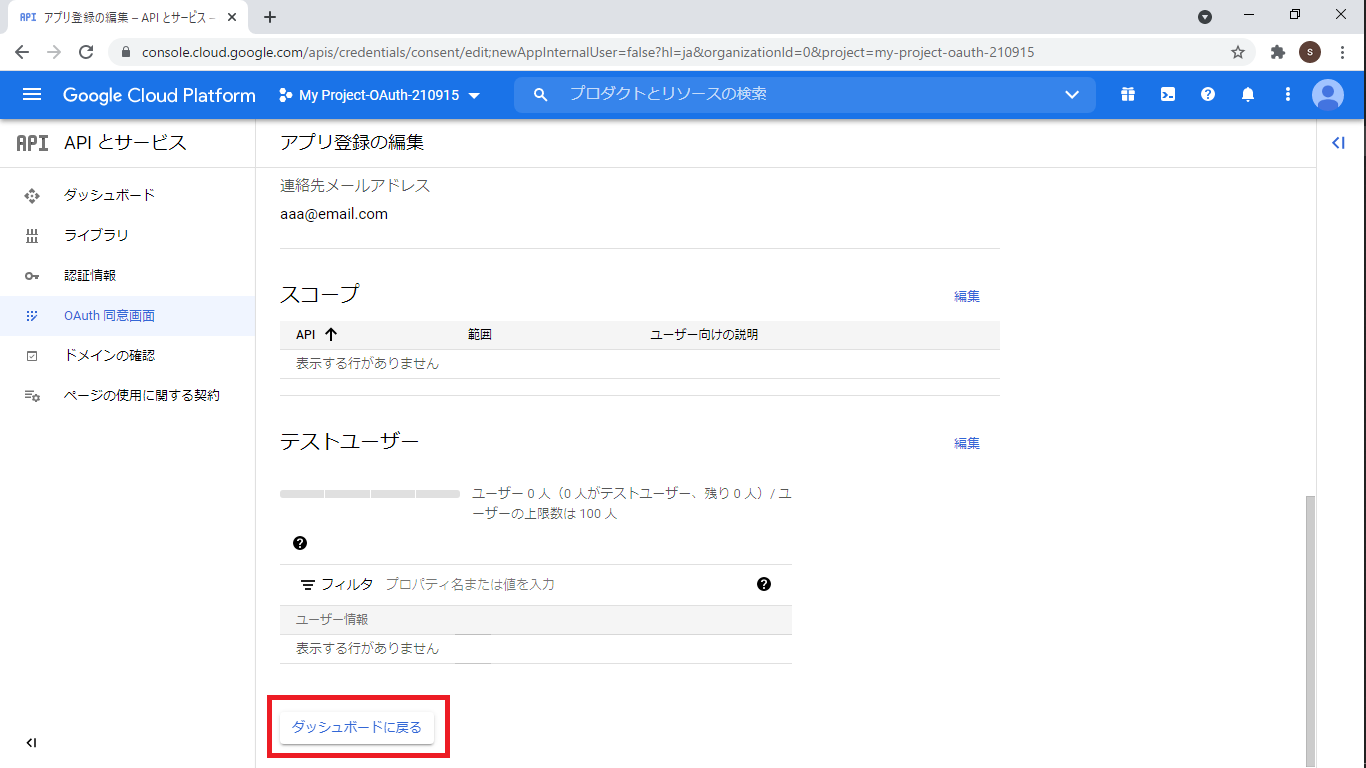
テストユーザーに移動するので,"保存して次へ"をクリックする.
概要に移動する.
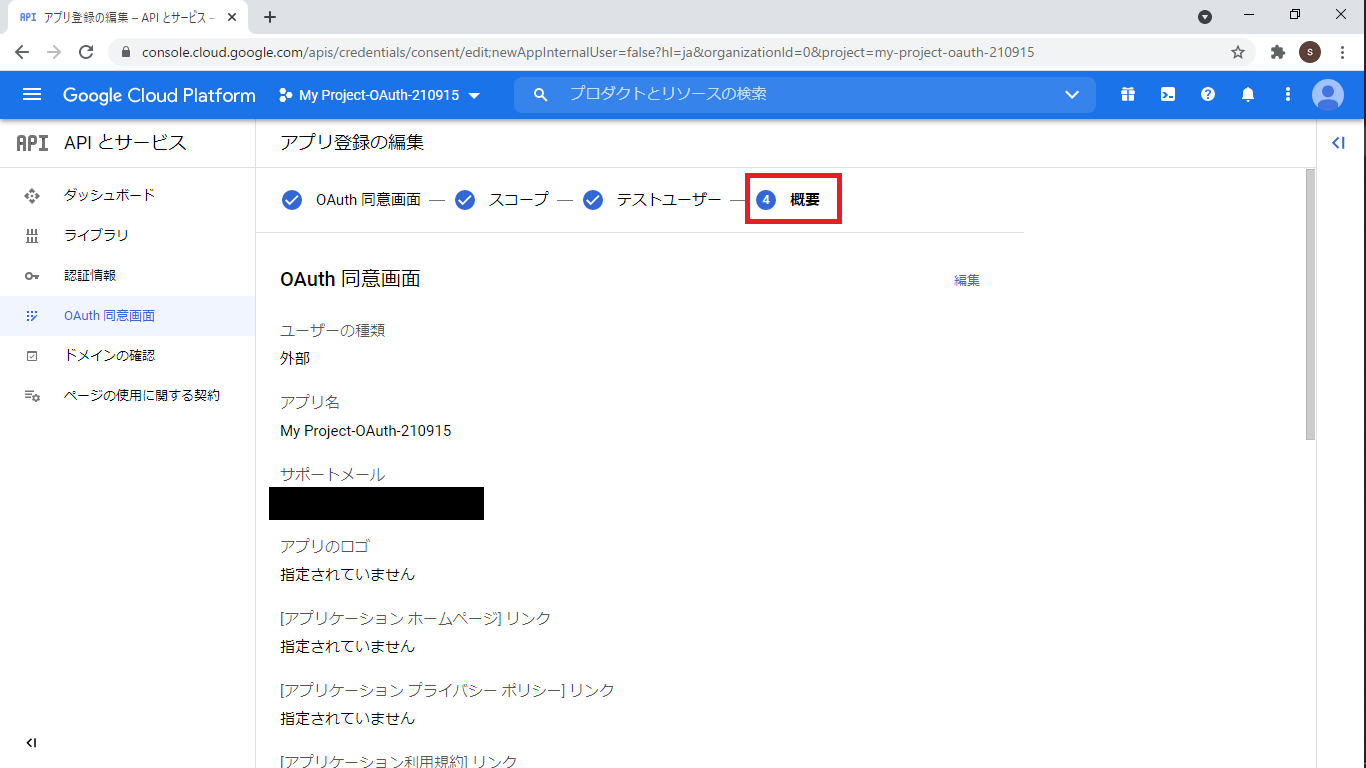
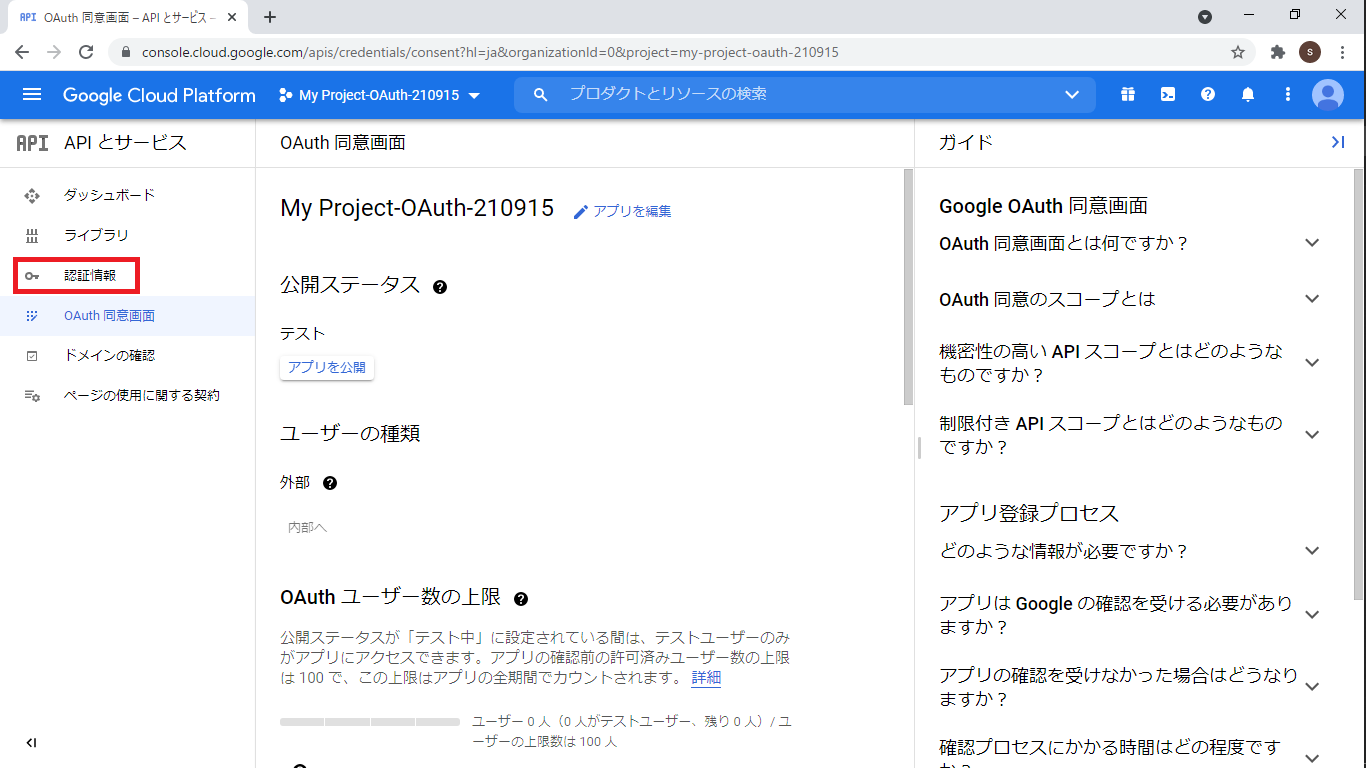
スクロールダウンし,"ダッシュボードに戻る"をクリックする.
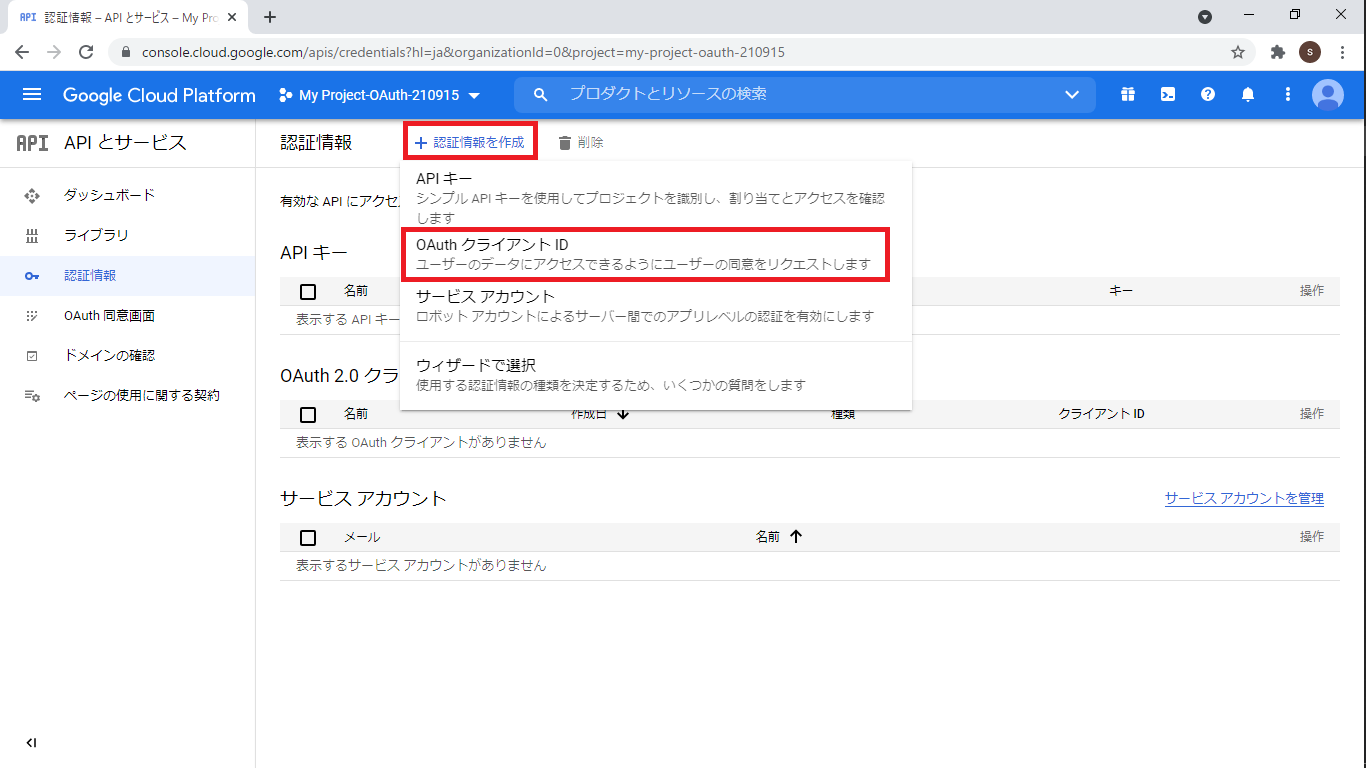
以下画面に遷移する."認証情報"をクリックする.
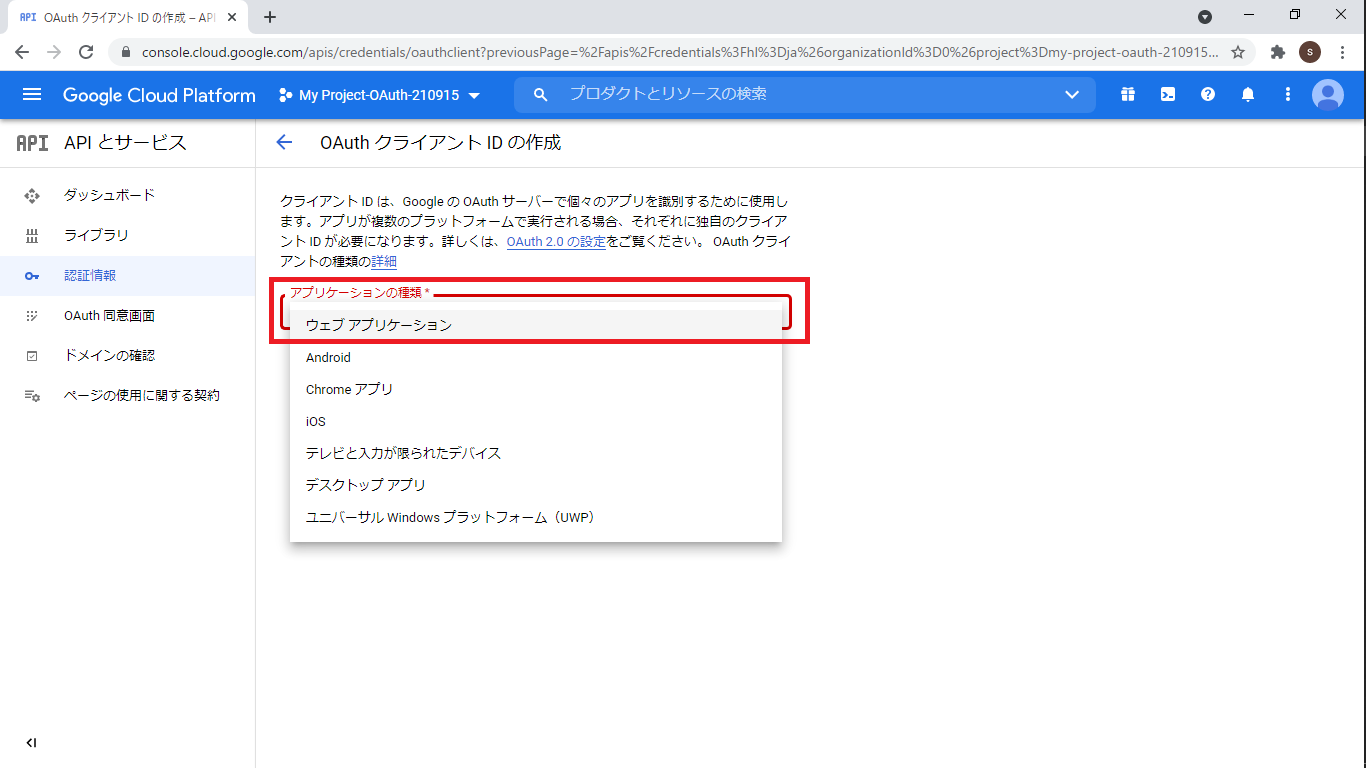
以下画面に遷移する."認証情報を作成"をクリックし,"OAuthクライアントID"をクリックする.
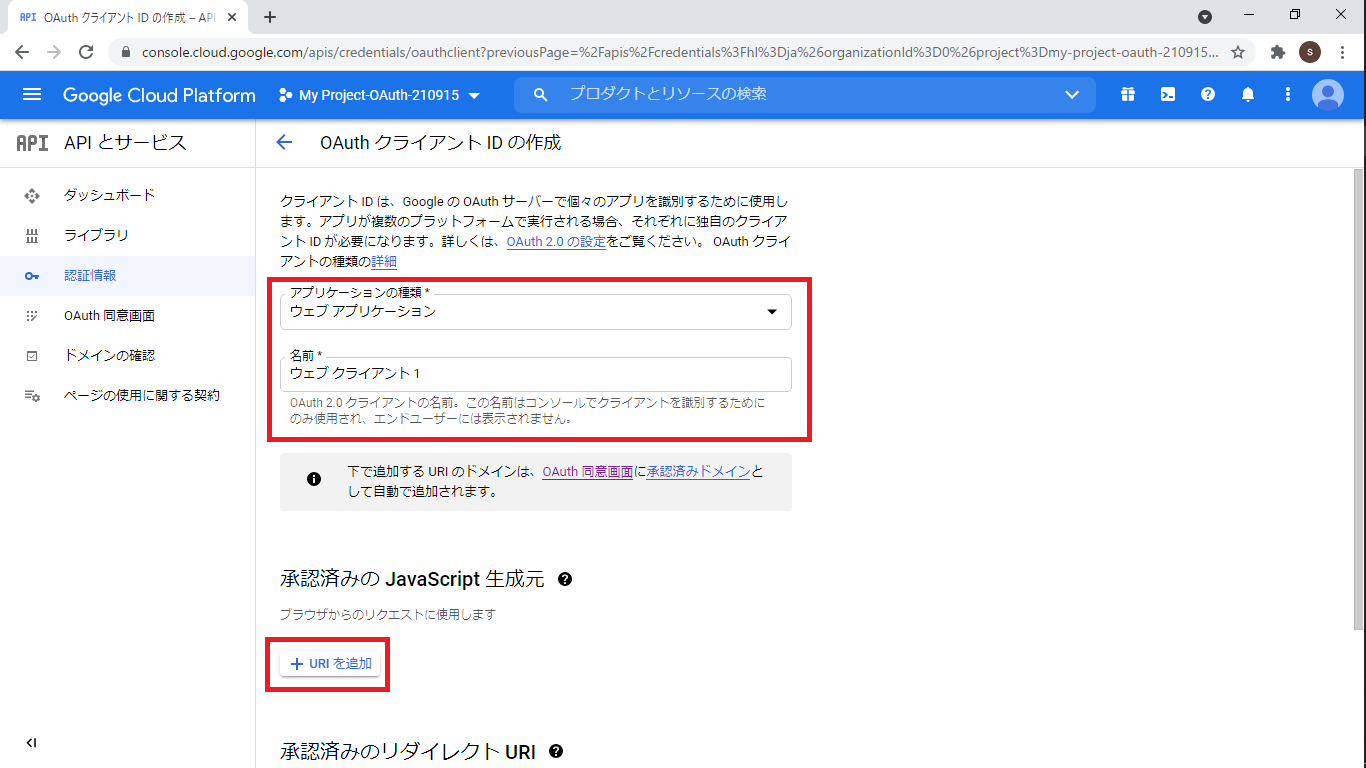
以下画面に遷移する."アプリケーションの種類"をクリックし,"ウェブアプリケーション"を選択する.
以下画面に遷移する.上記でアプリケーションの種類を"ウェブアプリケーション"としたので赤枠に選択されている.名前は変更しても問題ないが,デフォルトの"ウェブクライアント1″のままにした.承認済みのJavaScript生成元の欄の"URLを追加"をクリックする.
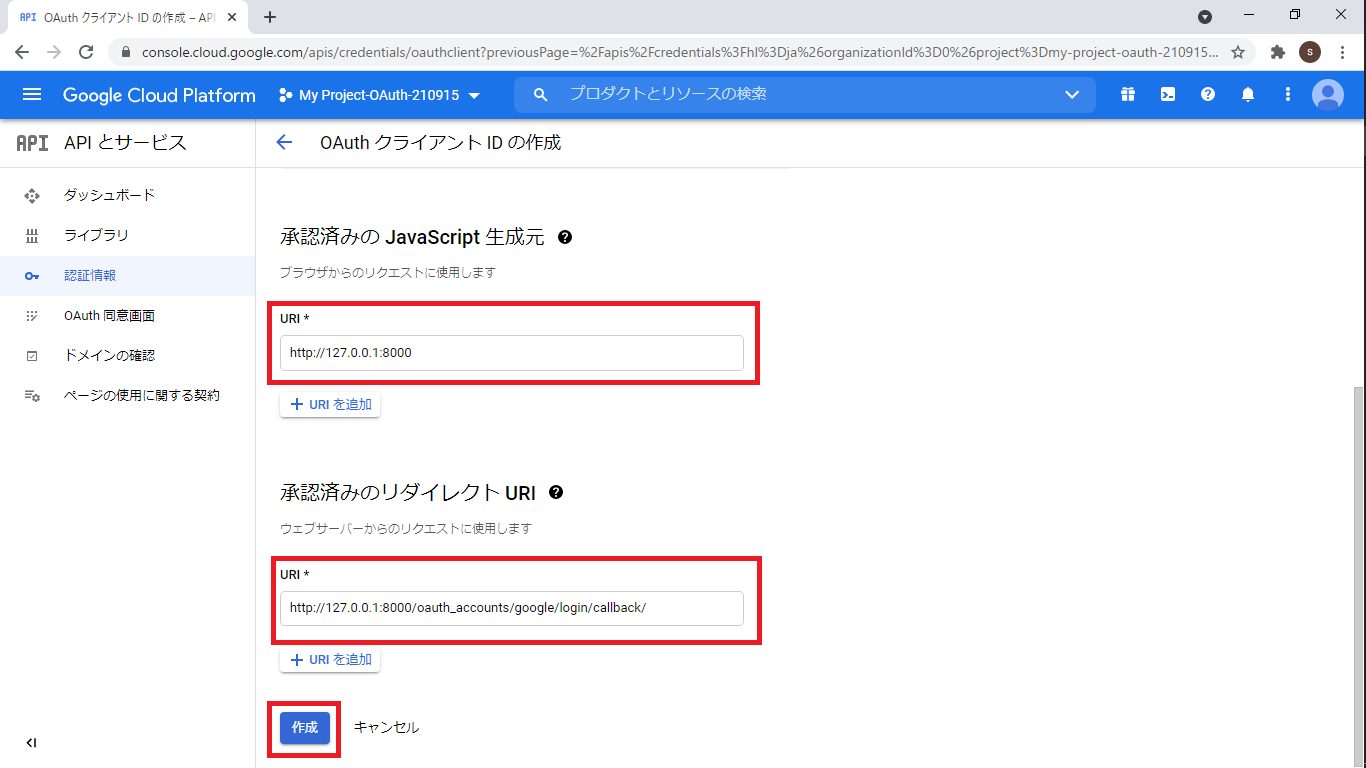
以下のように"承認済みのJavaScript生成元"と"承認済みのリダイレクトURL"にURLを記載し,"作成"をクリックする.
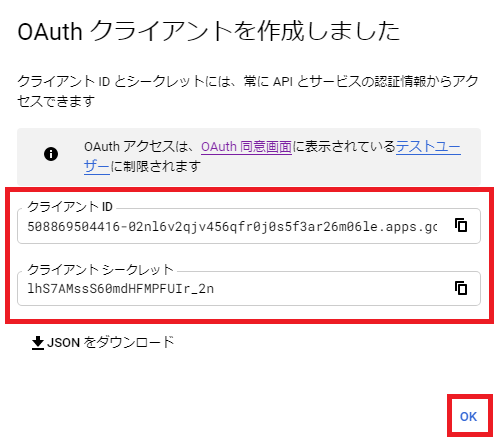
以下画面が出現するので,"クライアントID"と"クライアントシークレット"をコピーして,"OK"をクリックする.
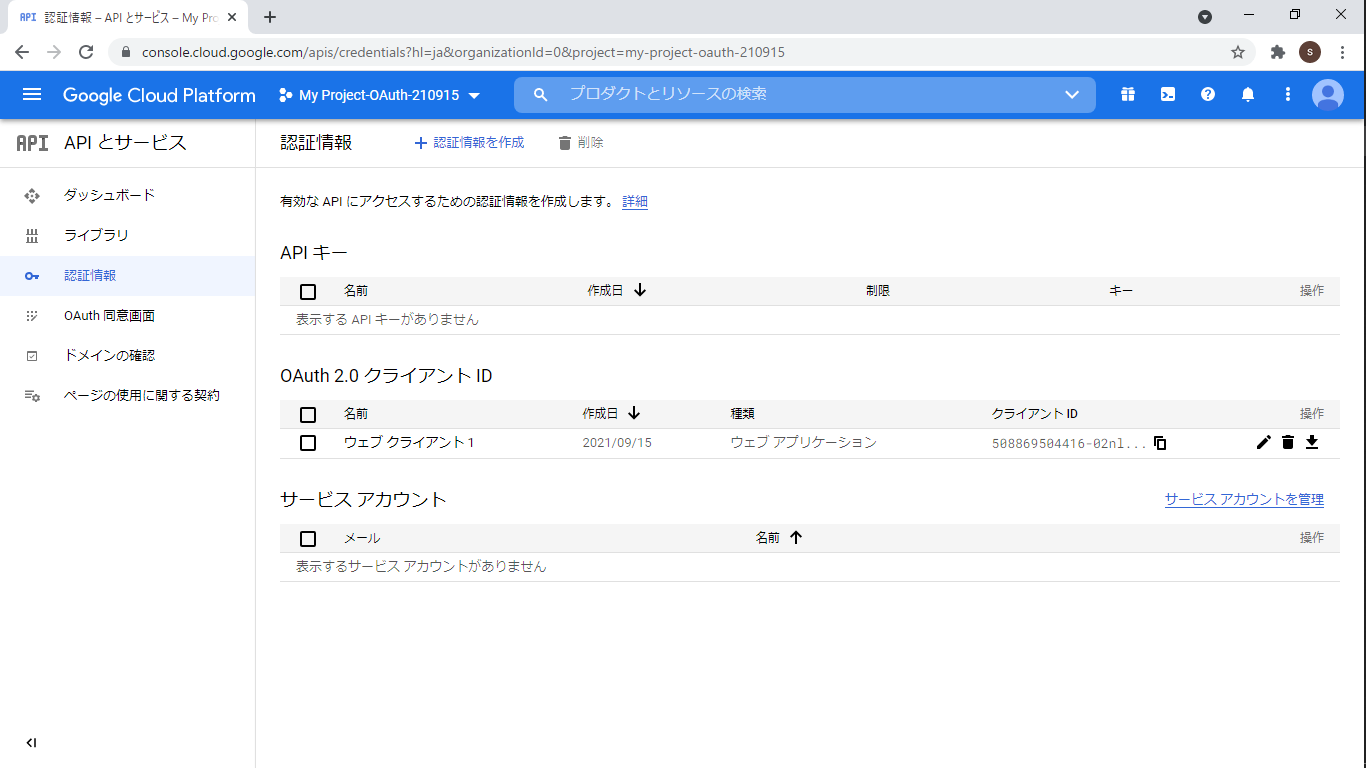
以下画面に遷移する.
VS Codeの"View"を開き,"Terminal"をクリックする.VS Codeの下部にターミナルが開くので,”conda activate 仮想環境名”を実行し,仮想環境に移行する(移行方法の詳細はこちら).ターミナルで"cd ec_site"(プロジェクト名)を入力し,ディレクトリを変更する.変更後,”python manage.py migrate”を実行する.以下が出力される.
(djangoenv) C:\Users\shiro\Desktop\210517_python development\myclassbasedviewslogintest\ec_site
>python manage.py migrate

Operations to perform: # 以下出力箇所
  Apply all migrations: account, admin, auth,
chem_store, contenttypes, myaccount, sessions, sites, socialaccount
Running migrations:
  Applying account.0001_initial... OK
  Applying account.0002_email_max_length... OK
  Applying sites.0001_initial... OK
  Applying sites.0002_alter_domain_unique... OK
  Applying socialaccount.0001_initial... OK
  Applying socialaccount.0002_token_max_lengths... OK
  Applying socialaccount.0003_extra_data_default_dict... OK
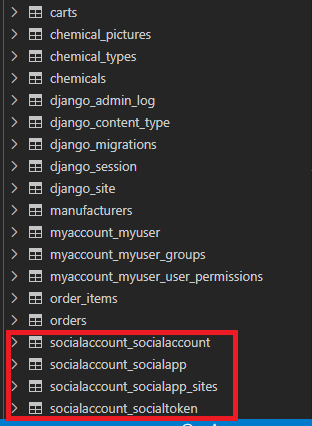
VS Codeにおいて,SQLiteをインストールし(詳細はこちら参照),"SQLITE EXPLORER"を開くと,以下テーブルを赤枠にて確認できる.
ターミナルを開き,"cd ec_site"(プロジェクト名)を入力し,ディレクトリを変更する.その後,”python manage.py createsuperuser”を実行する."superuser"を作成するため,以下内容が質問されるので,回答する.
(djangoenv) C:\Users\shiro\Desktop\210517_python
development\myclassbasedviewslogintest\ec_site
>python manage.py createsuperuser

Email: oauthtest@email.com # スーパーユーザー作成
Username: oauthtest
Password:
Password (again):
Superuser created successfully.
続けて,"python manage.py runserver"を実行する.
(djangoenv) C:\Users\shiro\Desktop\210517_python
development\myclassbasedviewslogintest\ec_site
>python manage.py runserver

Watching for file changes with StatReloader # 以下出力箇所
Performing system checks...

System check identified no issues (0 silenced).
September 19, 2021 - 18:26:22
Django version 3.2.3, using settings 'ec_site.settings'
Starting development server at http://127.0.0.1:8000/
Quit the server with CTRL-BREAK.
上記の"http://127.0.0.1:8000/"をクリックするとブラウザが開き,以下が出力される.
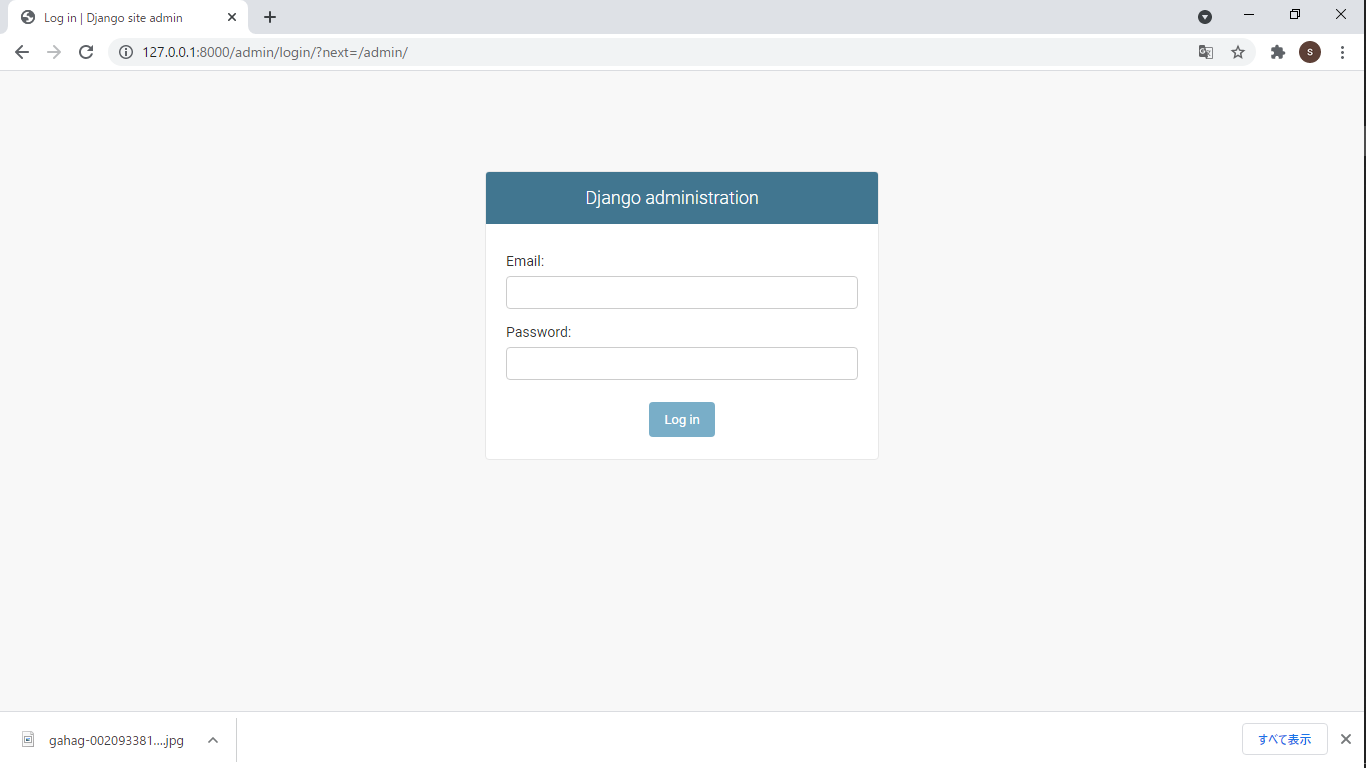
ブラウザのURLに"http://127.0.0.1:8000/admin"をクリックすると以下画面に遷移する.上記で作成した"superuser"の"Email"と"Password"を入力してログインをする.
ログインに成功すると以下画面に遷移する.
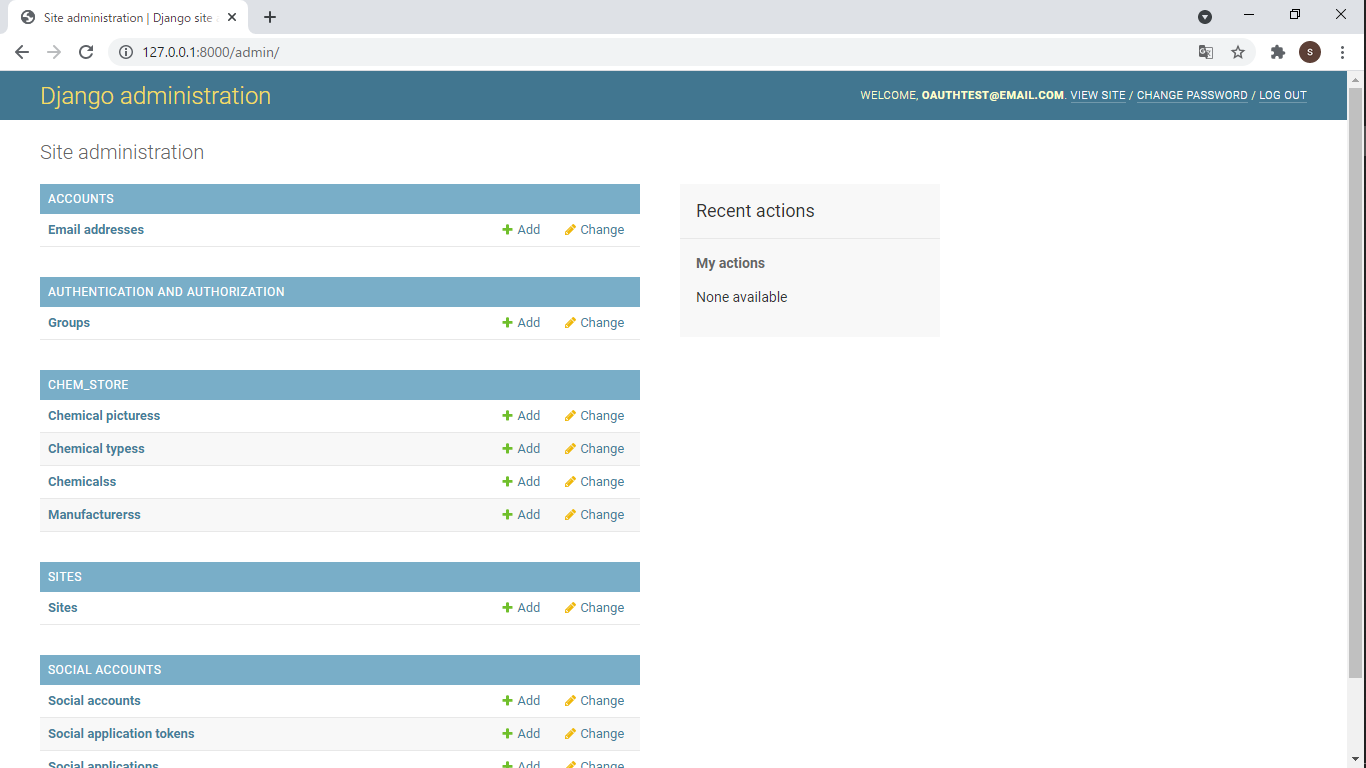
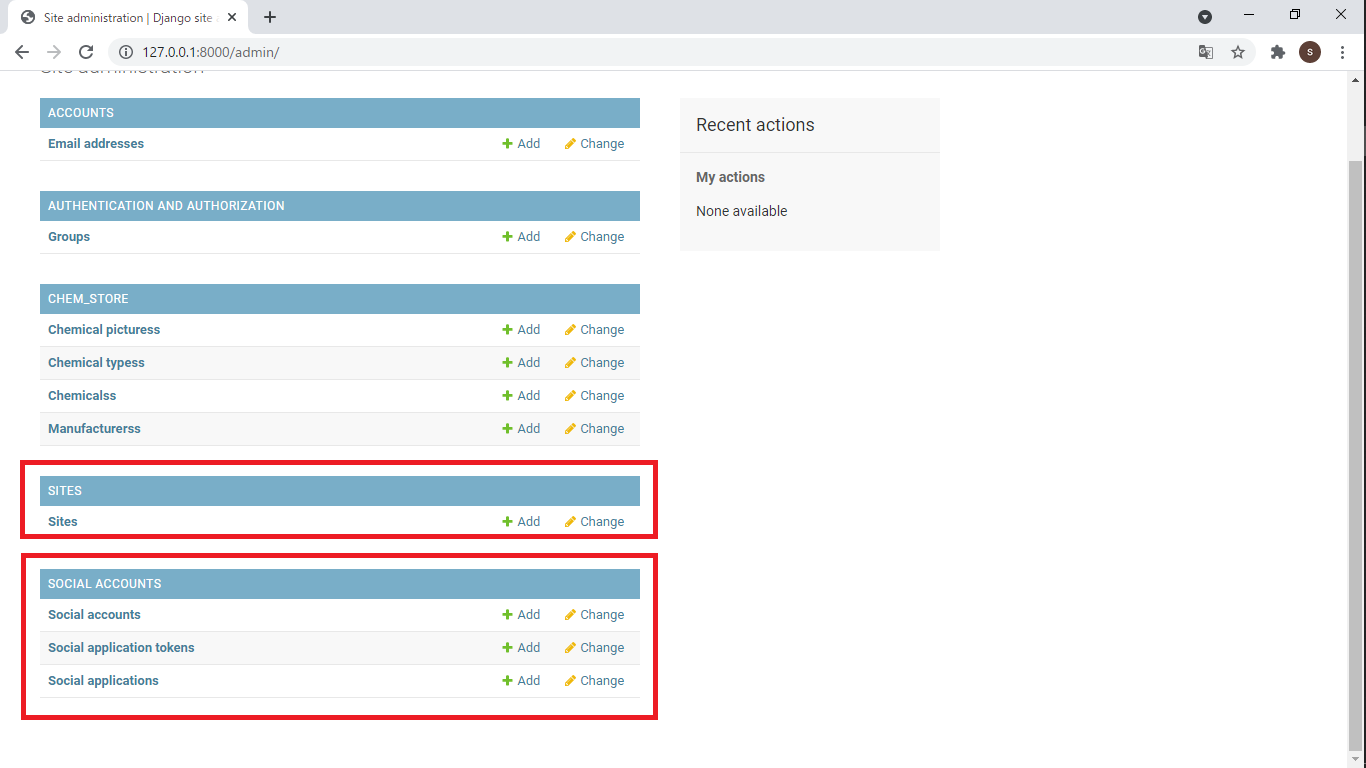
スクロールダウンすると,"Social accounts", “Social application tokens", “Social applications", “Sites"が作成されているのが赤枠にて確認できる.赤枠の"Sites"をクリックする.
上記の"Sites"をクリックすると以下画面に遷移する.赤枠の"example.com"をクリックする.
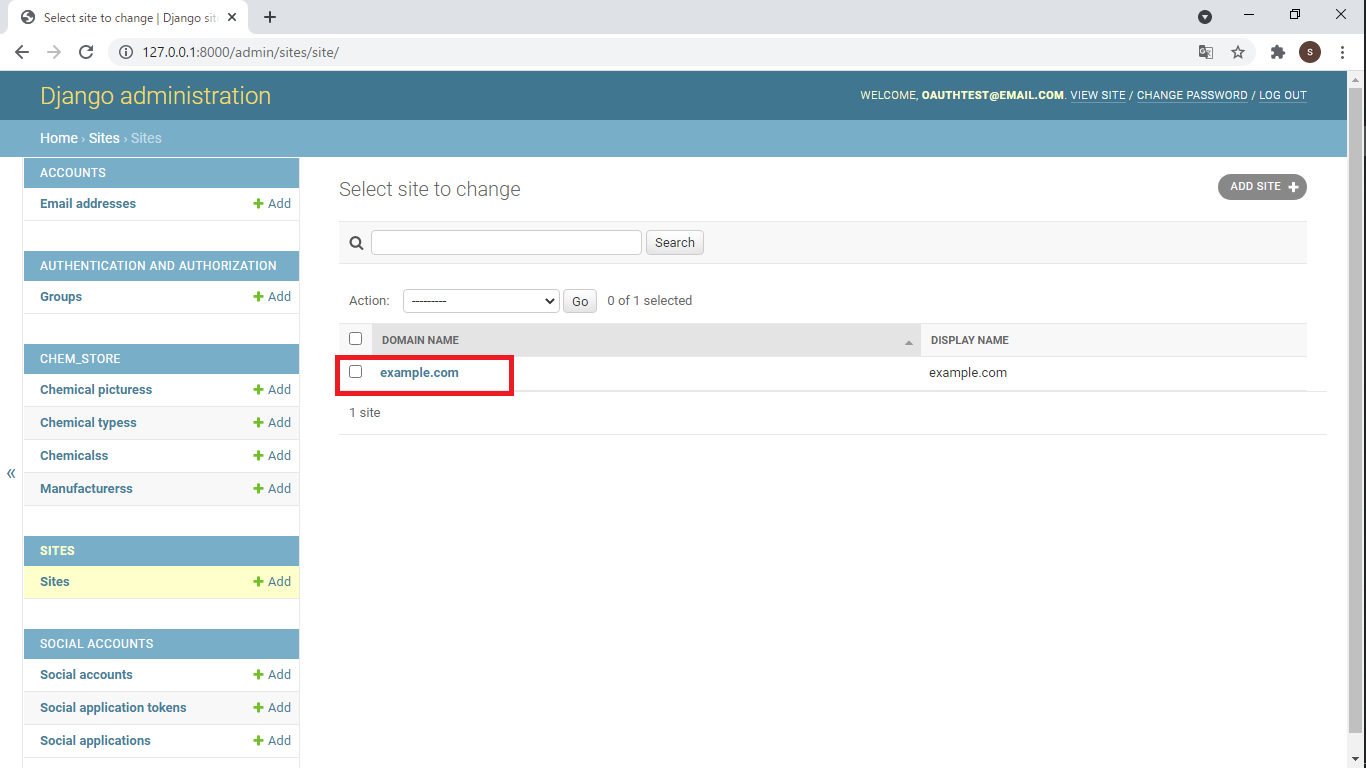
以下画面に遷移する.

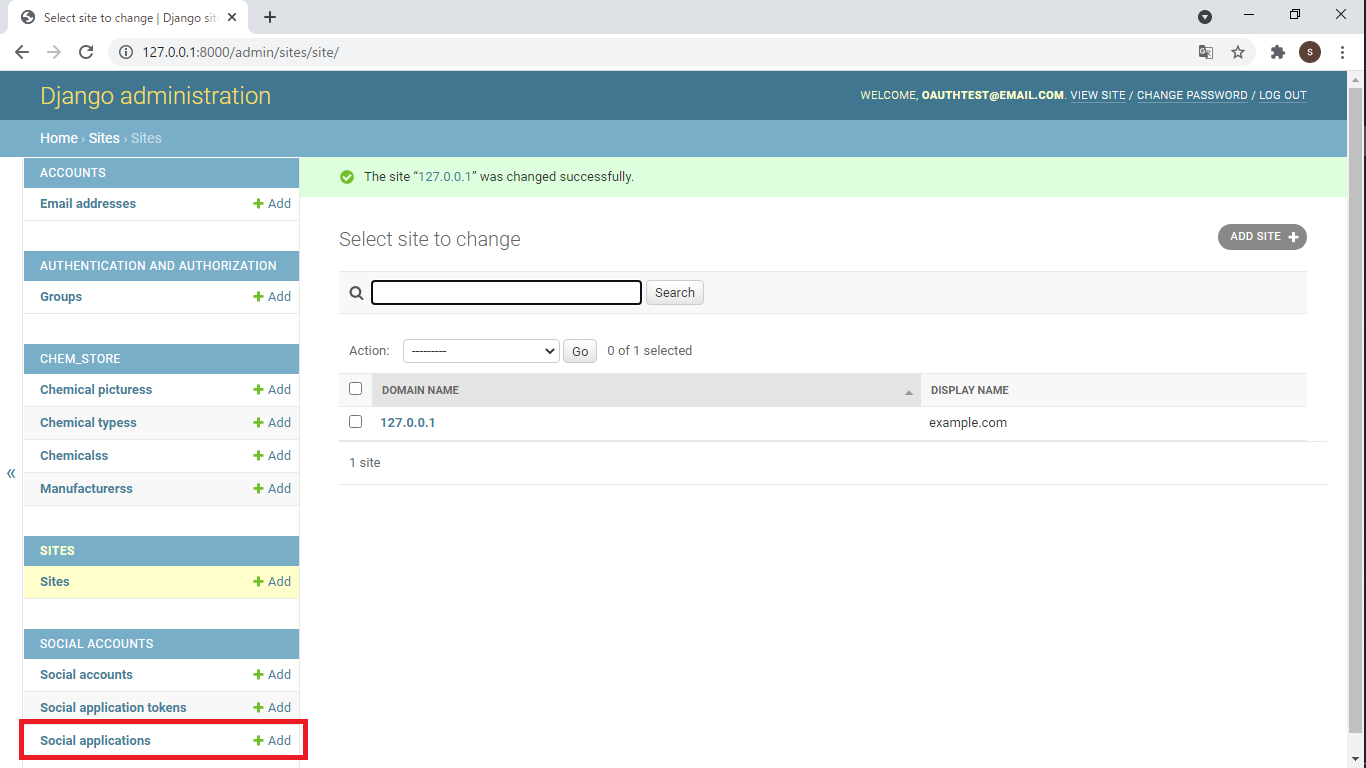
以下のように,"example.com"を"127.0.0.1″に変更し,"SAVE"をクリックする.

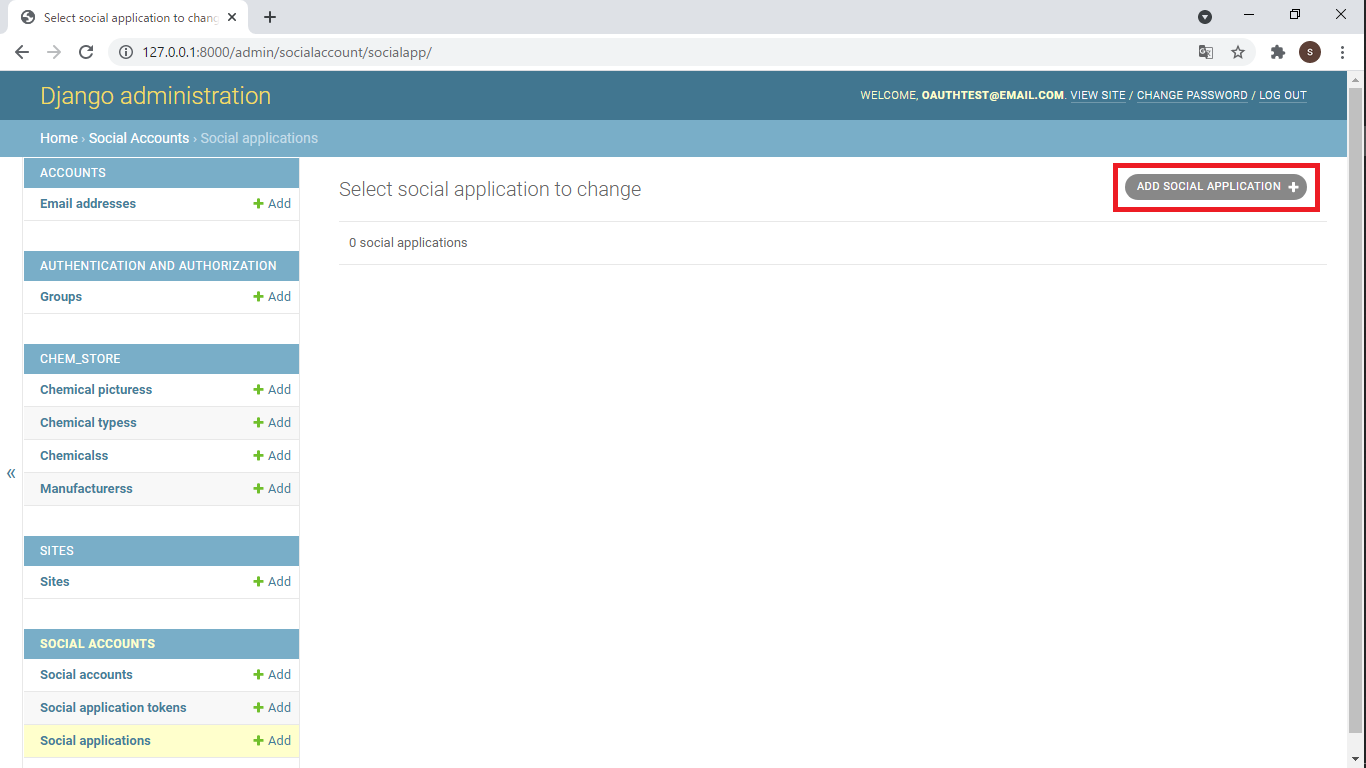
以下画面に遷移する.赤枠の"Social applications"をクリックする.
以下画面に遷移するので,赤枠のボタンをクリックする.
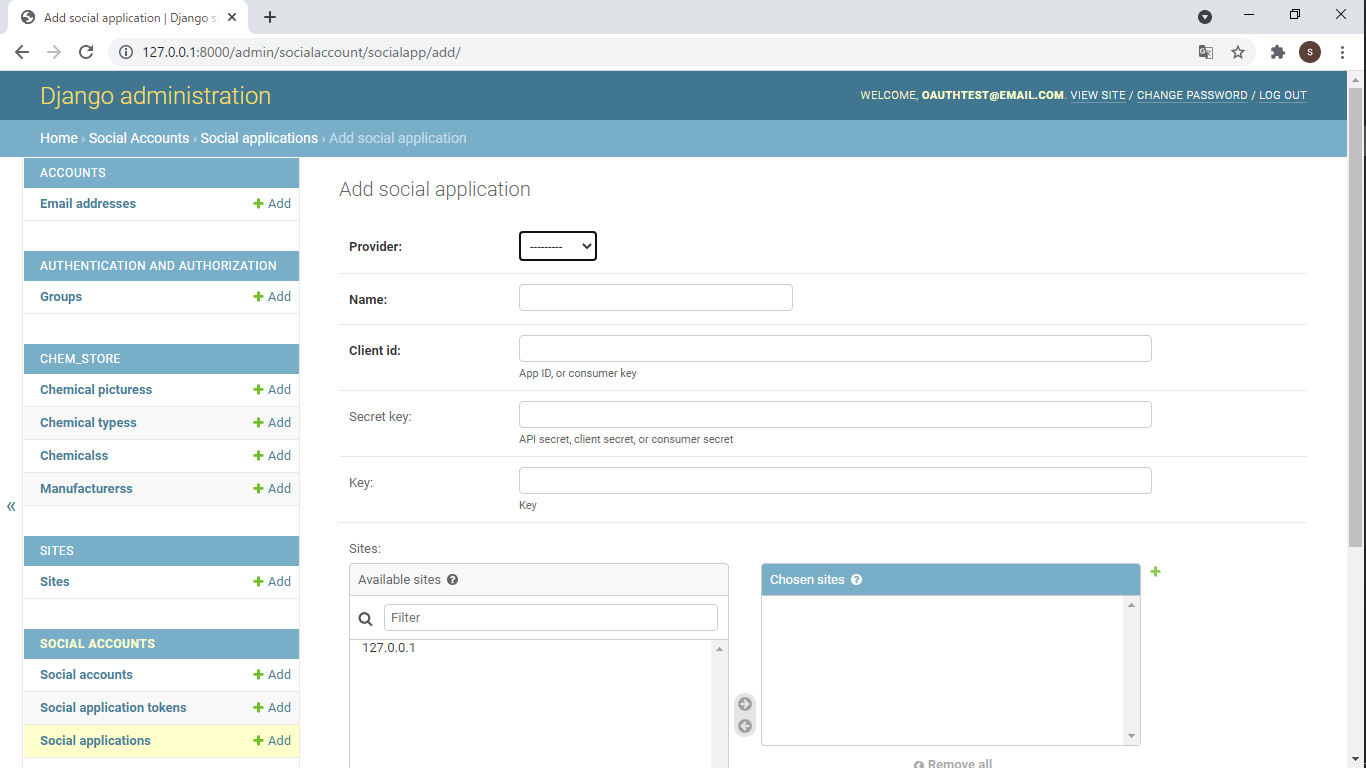
以下画面に遷移する.
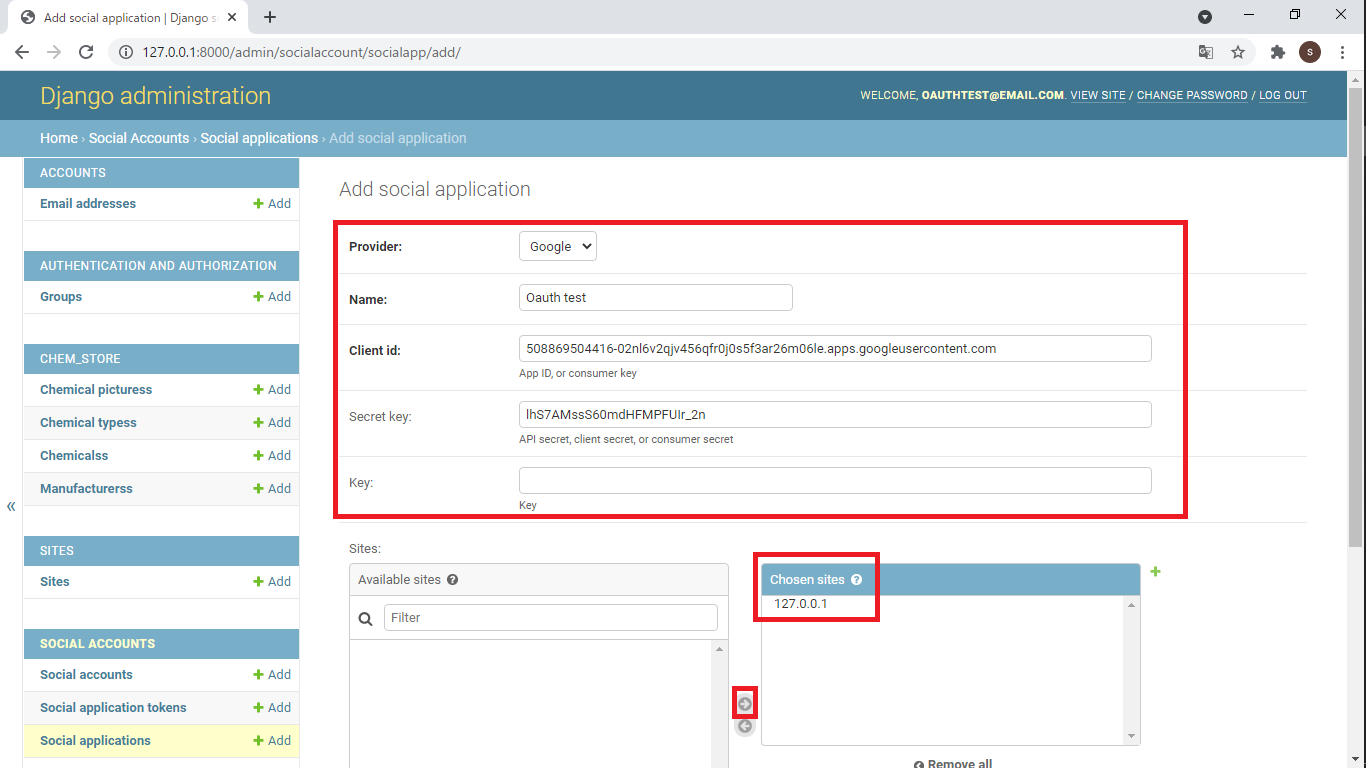
上記画面を以下のように記述する.Nameは自分で適切な名前を決定する."Client id"と"Secret key"は,上記でコピーした"クライアントID"と"クライアントシークレット"を貼り付ける."Key"は空白でよい."Sites"では,"127.0.0.1″が"Available sites"にあるので,クリックをして赤枠の右矢印をクリックすると,"Chosen sites"に"127.0.0.1″が以下のように移動する.
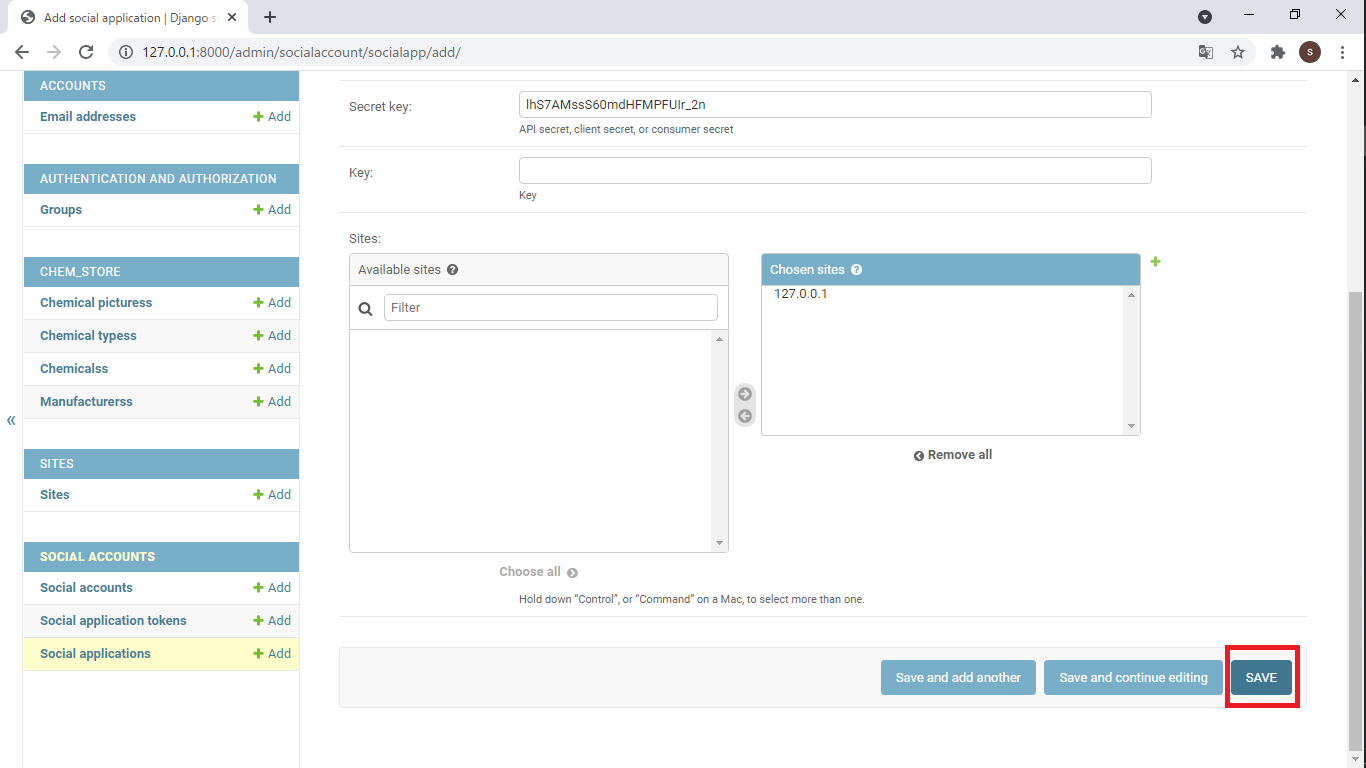
スクロールダウンをし,以下赤枠の"SAVE"をクリックする.
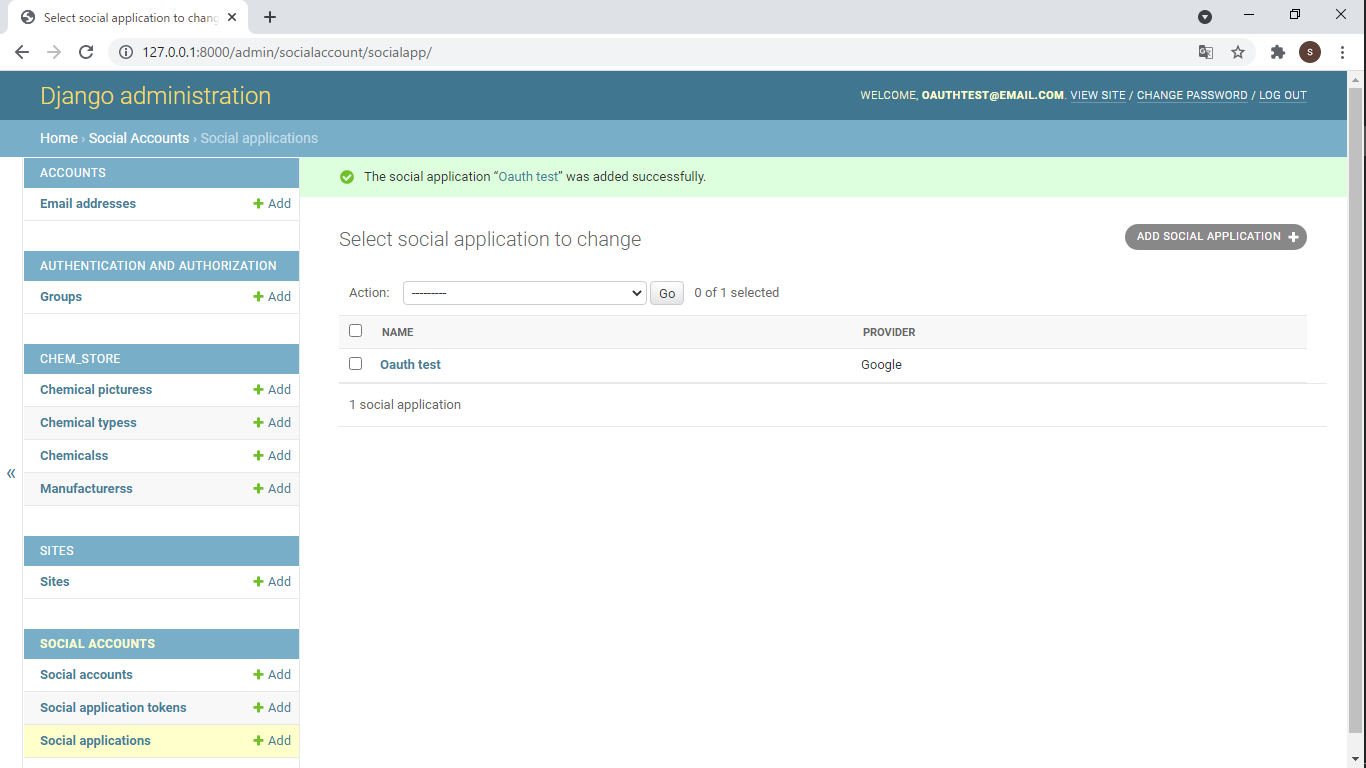
以下画面に遷移する.記載した"NAME"と"PROVIDER"を確認することができる.
“ec_site/ec_site/urls.py"に追記し,以下を編集する.
from django.contrib import admin
from django.urls import path, include
from . import settings
from django.contrib.staticfiles.urls import static

urlpatterns = [
    path('admin/', admin.site.urls),
    path('oauth_accounts/', include('allauth.urls')), # 追記箇所
    path('myaccount/', include('myaccount.urls')),
    path('chem_store/', include('chem_store.urls')),
]

if settings.DEBUG:
    urlpatterns += static(settings.MEDIA_URL, document_root=settings.MEDIA_ROOT)
“ec_site/templates/login.html"に追記し,以下のように編集する.
{% extends 'base.html' %}
{% load socialaccount %} # 追記箇所
{% block content %}
<form method="POST">
  {% csrf_token %}
  {{ form.as_p }}
  <input type="hidden" name="next" value="{{ request.GET.next }}">
  <input type="submit" value="Login">
</form>
<a href="{% provider_login_url 'google' %}">Google login</a> # 追記箇所
{% endblock %}
ターミナルを開き,"cd ec_site"(プロジェクト名)を入力し,ディレクトリを変更する.その後,”python manage.py runserver”を実行する.
(djangoenv) C:\Users\shiro\Desktop\210517_python development\myclassbasedviewslogintest\ec_site
>python manage.py runserver
Watching for file changes with StatReloader
Performing system checks...
System check identified no issues (0 silenced). # 以下出力箇所
September 20, 2021 - 03:34:59
Django version 3.2.3, using settings 'ec_site.settings'
Starting development server at http://127.0.0.1:8000/
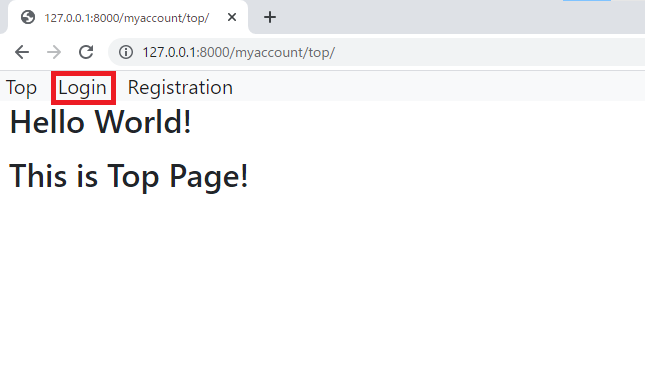
Quit the server with CTRL-BREAK.上記の"http://127.0.0.1:8000/"をクリックするとブラウザが開く.URLに"http://127.0.0.1:8000/myaccount/top"を入力すると以下画面に遷移する."Login"をクリックする.
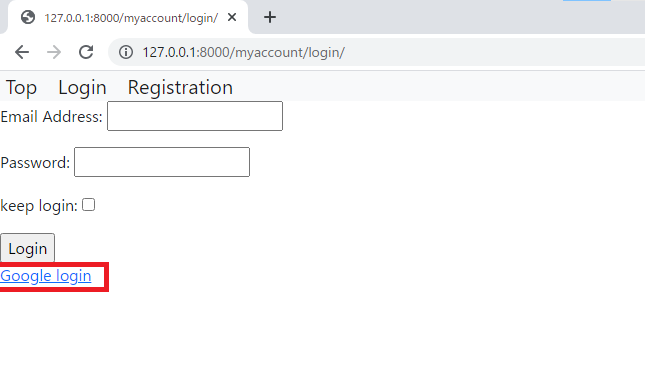
以下画面に遷移するので,"Google login"をクリックする.
以下画面に遷移する.アカウントを選択する.

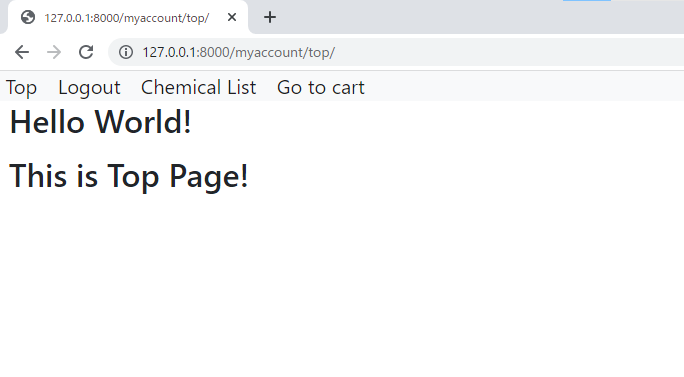
以下画面に遷移する.googleアカウントを利用して,ログインをすることができた.
VS Codeの"SQLITE EXPLORER"を開き,以下赤枠の"socialaccount_socialaccount"を右クリックし,"Show Table"をクリックする.
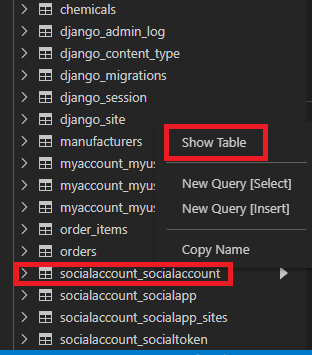
以下は一部ではあるが,ログイン情報を確認することができる.
![]()
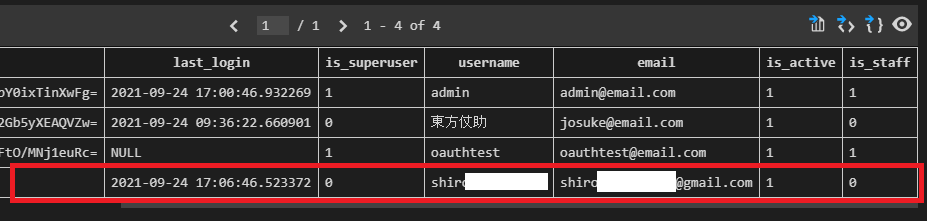
続けて,"myaccount_myuser"を右クリックし,"Show Table"をクリックする.
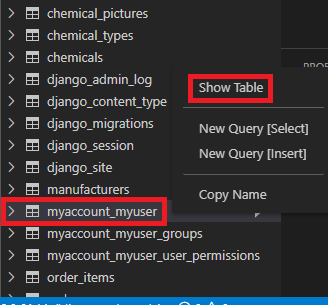
以下赤枠のようにgoogleのアカウントでログインした内容を確認することができる.
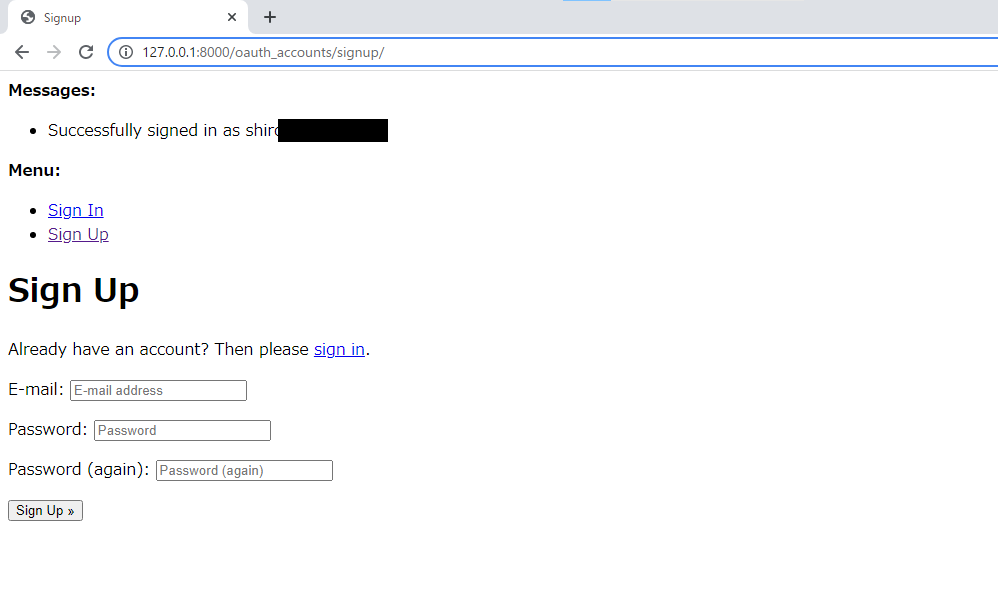
“http://127.0.0.1:8000/"をクリックし,ログアウトする.その後,URLに"http://127.0.0.1:8000/oauth_accounts/signup"を入力すると以下画面に遷移する.
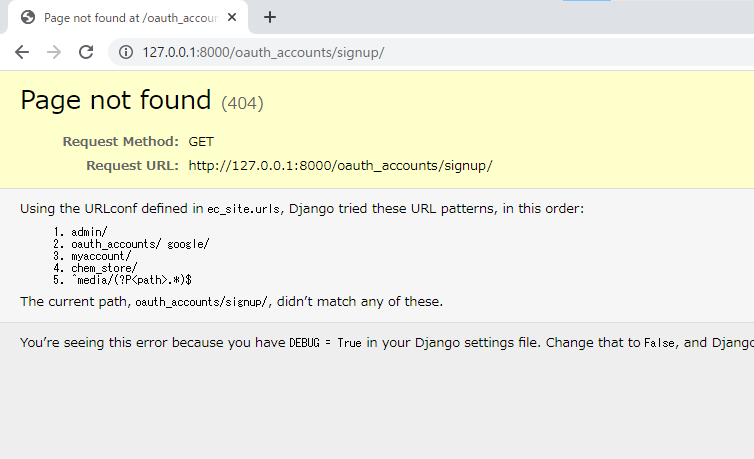
“ec_site/ec_site/urls.py"に追記し,以下のように編集する.
from django.contrib import admin
from django.urls import path, include
from . import settings
from django.contrib.staticfiles.urls import static
from allauth.socialaccount.providers.google.urls import urlpatterns as google_url # 追記箇所
urlpatterns = [
path('admin/', admin.site.urls),
path('oauth_accounts/', include(google_url)), # 変更箇所
path('myaccount/', include('myaccount.urls')),
path('chem_store/', include('chem_store.urls')),
]
if settings.DEBUG:
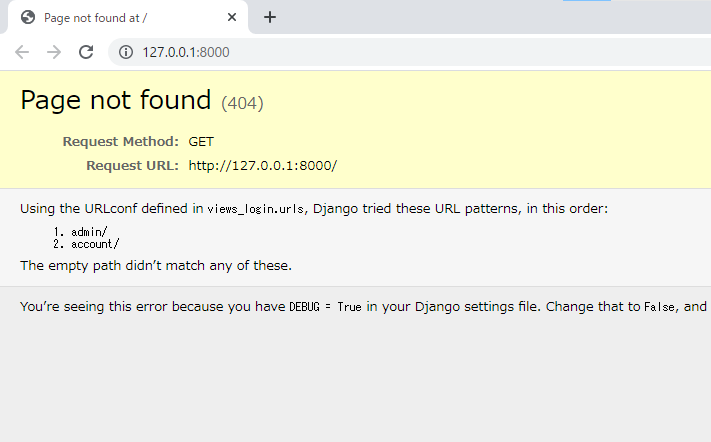
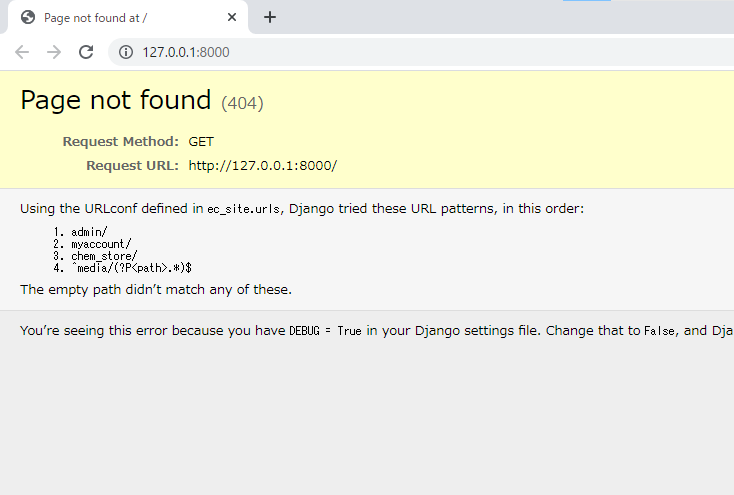
urlpatterns += static(settings.MEDIA_URL, document_root=settings.MEDIA_ROOT)上記を保存すると,"http://127.0.0.1:8000/oauth_accounts/signup"にアクセスしても"Page not found"が出力される.
https://django-allauth.readthedocs.io/en/latest/installation.html
https://django-allauth.readthedocs.io/en/latest/providers.html#google
https://console.cloud.google.com
https://django-allauth.readthedocs.io/en/latest/templates.html#social-account-tags
https://stackoverflow.com/questions/24882019/how-to-get-birthday-date-from-google-in-django-allauth
https://django-allauth.readthedocs.io/en/latest/configuration.html
以上