Python | Django | ログイン管理画面のカスタマイズ方法

公開日:2021/7/30
Pythonには,DjangoというWebアプリケーションフレームワークがある.フレームワークのため,Djangoを利用するとWebアプリを通常よりも短時間で開発することが可能になる.
本記事では,「ログイン管理画面のカスタマイズ方法」を以下にて記す.
- プロジェクトとアプリの作成
- 管理画面の基本カスタム
- 管理画面でユーザーの追加コード
- 管理画面で2ユーザーの追加コード
- 管理ページ内での様々な変更
(1) ユーザー名の表記変更
(2) 追加情報表記の変更
(3) 従業員入力ページの項目の並び変更
(4) 従業員一覧の表記変更
(5) 従業員一覧のデフォルトの並び順
(6) 従業員一覧での検索画面の追加
(7) 従業員一覧でのソート機能の追加
(8) 従業員一覧での直接編集機能の追加
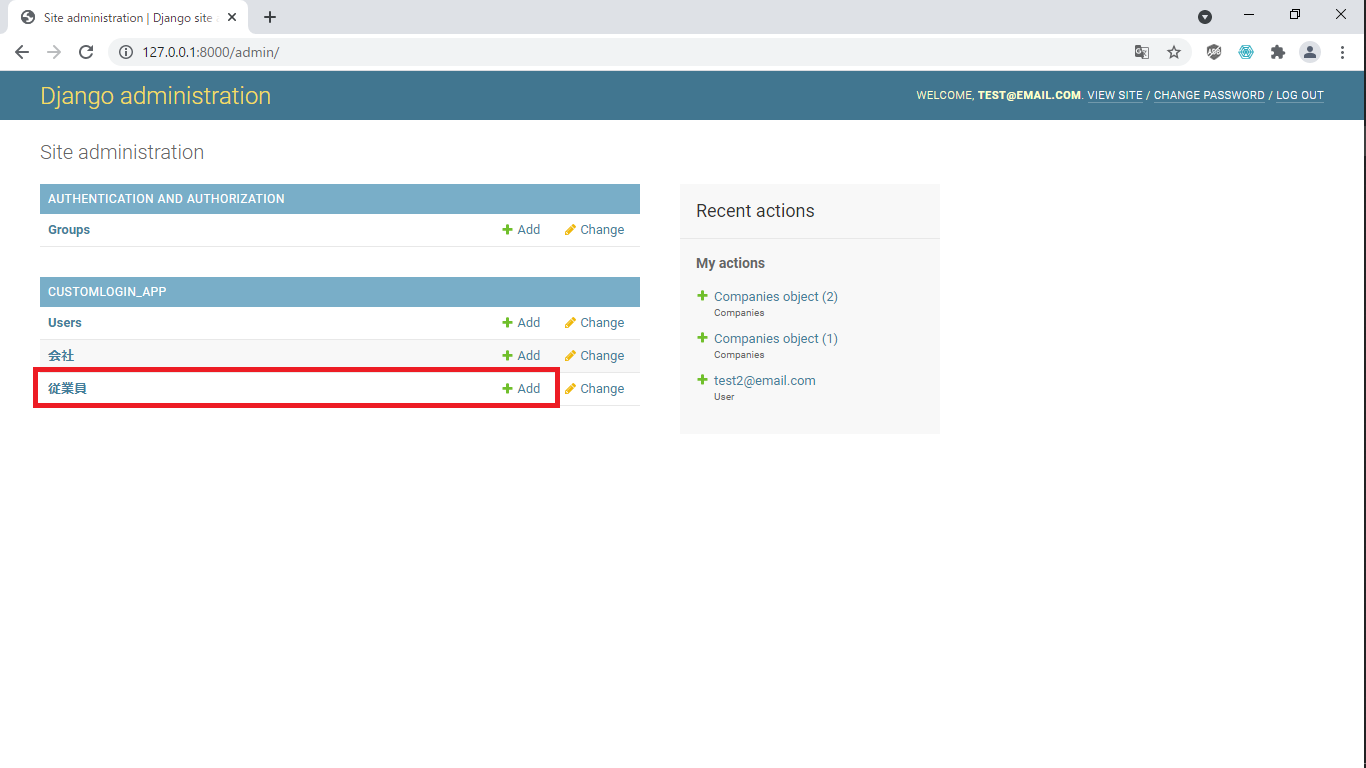
(9) 会社一覧での項目追加とラベル変更 - “templates"を利用した管理ページの変更
(1) トップページのサイト名変更
(2) トップページのリンク箇所の変更
◆実施環境
Python 3.8.8
Django 3.2.3
■ログイン管理画面のカスタマイズ方法
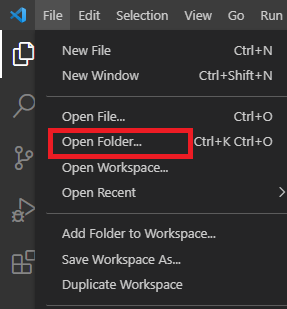
新たにフォルダを開く.VS Codeの"File"をクリックし,"Open Folder"からフォルダを選ぶ.
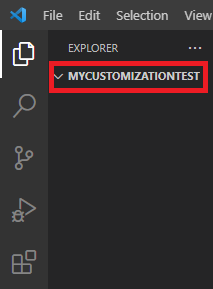
新たなフォルダは,"mycustomizationtest"とした.
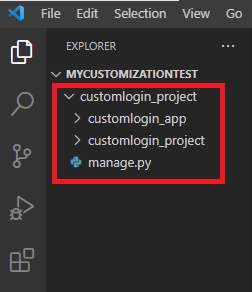
ターミナルを開き,”conda activate 仮想環境名”を実行し,仮想環境に移行する(移行方法の詳細はこちら).その後,プロジェクトを作成する(作成方法はこちら).プロジェクト名は,"customlogin_project"とした."cd customlogin_project"でディレクトリを変更し,アプリも作成する(作成方法はこちら).アプリ名は,"customlogin_app"とした.以下がプロジェクト構成となる.
“customlogin_project/settings.py"の"INSTALLED_APPS"に作成したアプリ名"cutomlogin_app"を以下のように追記する.また,"LANGUAGE_CODE"や"TIME_ZONE"も希望に応じて変更する.
INSTALLED_APPS = [
  'django.contrib.admin',
  'django.contrib.auth',
  'django.contrib.contenttypes',
  'django.contrib.sessions',
  'django.contrib.messages',
  'django.contrib.staticfiles',
  'customlogin_app' # 追記箇所
]

~省略~

LANGUAGE_CODE = 'en-us' # 日本語を希望の場合(en-us => ja)
TIME_ZONE = 'Asia/Tokyo' # 編集箇所(UTC => Asia/Tokyo)“customlogin_project/customlogin_app/models.py"を以下のように編集する.
from django.db import models
from django.contrib.auth.models import (
  BaseUserManager,
  AbstractBaseUser,
  PermissionsMixin
)

class UserManager(BaseUserManager):

  def create_user(self, username, email, date_of_birth, password=None):
    if not email:
      raise ValueError('Enter Email')
    user = self.model(
      username=username,
      email=email,
      date_of_birth=date_of_birth,
    )
    user.set_password(password)
    user.save(using=self._db)
    return user

  def create_superuser(self, username, email, date_of_birth, password=None):
    user = self.model(
      username=username,
      email=email,
      date_of_birth=date_of_birth
    )
    user.set_password(password)
    user.is_staff = True
    user.is_active = True
    user.is_superuser = True
    user.save(using=self._db)
    return user

class User(AbstractBaseUser, PermissionsMixin):
  username = models.CharField(max_length=100)
  email = models.EmailField(max_length=150, unique=True)
  date_of_birth = models.DateField()
  is_active = models.BooleanField(default=False)
  is_staff = models.BooleanField(default=False)
  website = models.URLField(null=True)
  picture = models.FileField(null=True)

  USERNAME_FIELD = 'email'
  REQUIRED_FIELDS = ['username', 'date_of_birth']

  objects = UserManager()

  def __str__(self):
    return self.email
“customlogin_project/settings.py"の"WSGI_APPLICATION"の下に"AUTH_USER_MODEL"を追記し,以下のように編集する.
WSGI_APPLICATION = 'customlogin_project.wsgi.application'

AUTH_USER_MODEL = 'customlogin_app.User' # 追記箇所
ターミナルを開き,”conda activate 仮想環境名”を実行し,仮想環境に移行し,"customlogin_project"のディレクトリにて,"python manage.py makemigrations customlogin_app"を実行する.実行後,以下が出力される.
(djangoenv) C:\Users\shiro\Desktop\210517_python development\mycustomizationtest\customlogin_project
>python manage.py makemigrations customlogin_app

Migrations for 'customlogin_app': # 出力箇所
  customlogin_app\migrations\0001_initial.py
    - Create model User
その後,"python manage.py migrate"を実行する.
(djangoenv) C:\Users\shiro\Desktop\210517_python development\mycustomizationtest\customlogin_project
>python manage.py migrate

Operations to perform: # 以下出力箇所
  Apply all migrations: admin, auth, contenttypes, customlogin_app, sessions
Running migrations:

Applying contenttypes.0001_initial... OK
Applying contenttypes.0002_remove_content_type_name... OK
Applying auth.0001_initial... OK
Applying auth.0002_alter_permission_name_max_length... OK
Applying auth.0003_alter_user_email_max_length... OK
Applying auth.0004_alter_user_username_opts... OK
Applying auth.0005_alter_user_last_login_null... OK
Applying auth.0006_require_contenttypes_0002... OK
Applying auth.0007_alter_validators_add_error_messages... OK
Applying auth.0008_alter_user_username_max_length... OK
Applying auth.0009_alter_user_last_name_max_length... OK
Applying auth.0010_alter_group_name_max_length... OK
Applying auth.0011_update_proxy_permissions... OK
Applying auth.0012_alter_user_first_name_max_length... OK
Applying customlogin_app.0001_initial... OK
Applying admin.0001_initial... OK
Applying admin.0002_logentry_remove_auto_add... OK
Applying admin.0003_logentry_add_action_flag_choices... OK
Applying sessions.0001_initial... OKSQLiteをインストールし(詳細はこちら参照),"SQLITE EXPLORER"を開くと,"customlogin_app_user"を以下赤枠にて確認できる.

ターミナルにて,"python manage.py createsuperuser"を実行する."superuser"を作成するため,以下が出力されるので,各々記述する."Superuser created successfully"と出力されると成功となる.
(djangoenv) C:\Users\shiro\Desktop\210517_python development\mycustomizationtest\customlogin_project
>python manage.py createsuperuser

Email: test@email.com # 以下出力箇所
Username: test
Date of birth: 1999-01-01
Password:
Password (again):
Superuser created successfully.
“python manage.py runserver"を実行する.以下が出力される.
(djangoenv) C:\Users\shiro\Desktop\210517_python development\mycustomizationtest\customlogin_project
>python manage.py runserver
System check identified no issues (0 silenced).July 26, 2021 - 17:08:30
Django version 3.2.3, using settings 'customlogin_project.settings'
Starting development server at http://127.0.0.1:8000/
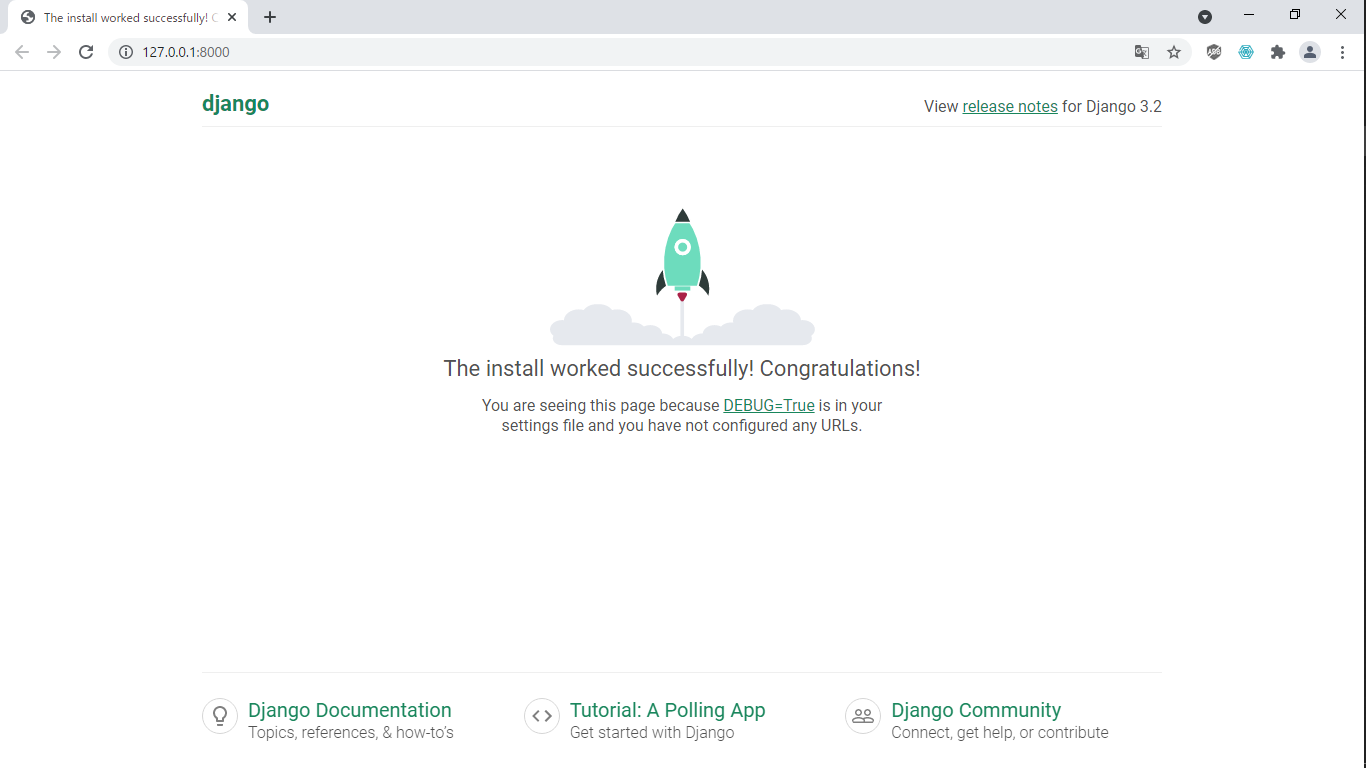
Quit the server with CTRL-BREAK.上記の"http://127.0.0.1:8000/"をクリックすると,ブラウザが立ち上がり,以下が表示される.
ブラウザのURLに"http://127.0.0.1:8000/admin"を入力すると,以下ページに遷移する.
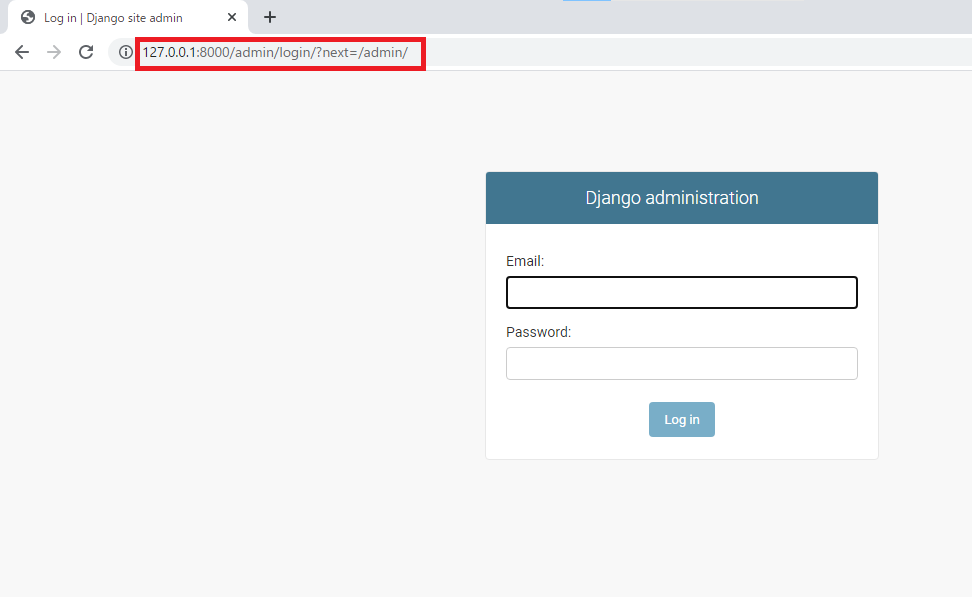
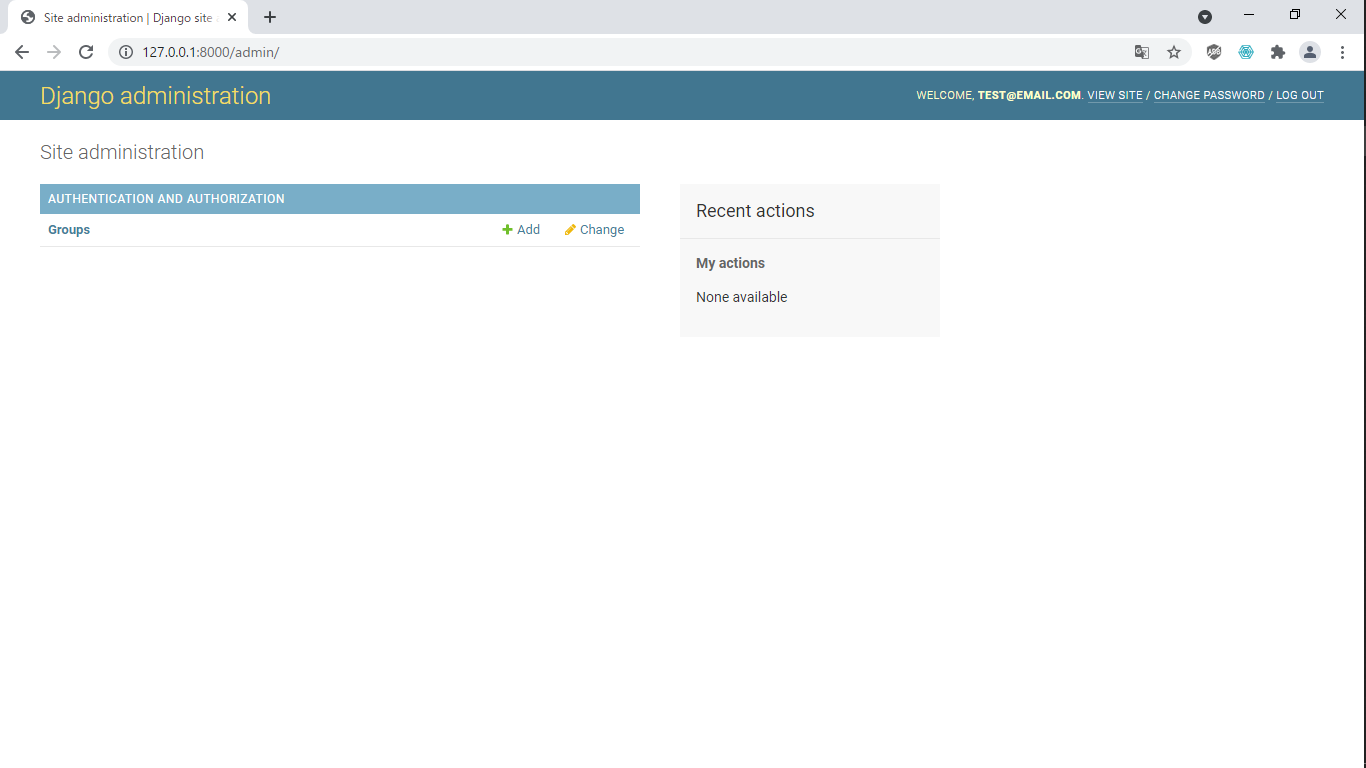
“superuser"を作成するための情報を入力し,"Login"をクリックすると,以下画面に遷移する.
アプリである"customlogin_app"に"forms.py"を以下のように作成する.
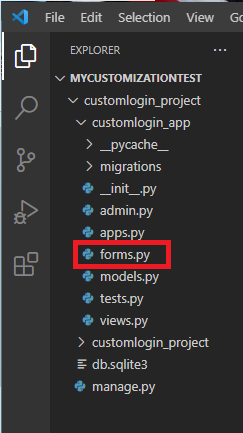
“customlogin_app/forms.py"を以下のように編集する.
from django import forms
from django.contrib.auth.forms import ReadOnlyPasswordHashField
from django.contrib.auth import get_user_model
from django.core.exceptions import ValidationError

User = get_user_model()

class UserCreationForm(forms.ModelForm):
  password = forms.CharField(label='パスワード', widget=forms.PasswordInput)
  reenter_password = forms.CharField(label='パスワード再入力', widget=forms.PasswordInput)

  class Meta:
    model = User
    fields = ('username', 'date_of_birth', 'email', 'password')

  def clean(self):
    cleaned_data = super().clean()
    password = cleaned_data.get('password')
    reenter_password = cleaned_data.get('reenter_password')
    if password != reenter_password:
      raise ValidationError('パスワードが一致しません')

  def save(self):
    user = super().save(commit=False)
    user.set_password(self.cleaned_data.get('password'))
    user.save()
    return user

class UserChangeForm(forms.ModelForm):
  password = ReadOnlyPasswordHashField()
  website = forms.URLField(required=False)
  picture = forms.FileField(required=False)

  class Meta:
    model = User
    fields = ('username', 'date_of_birth', 'email', 'password', 'is_staff', 'is_active', 'is_superuser','website', 'picture')

  def clean_password(self):
    return self.initial['password']
“customlogin_app/admin.py"を以下のように編集する.
from django.contrib import admin
from django.contrib.auth.admin import UserAdmin
from django.contrib.auth import get_user_model
from .forms import UserChangeForm, UserCreationForm

User = get_user_model()

class CustomizeUserAdmin(UserAdmin):
  form = UserChangeForm
  add_form = UserCreationForm

  list_display = ('username', 'date_of_birth', 'email', 'is_staff')

  fieldsets = (
    ('user info', {'fields': ('username', 'date_of_birth', 'email', 'password', 'website', 'picture')}),
    ('permission',{'fields': ('is_staff', 'is_active', 'is_superuser')}),
  )

  add_fieldsets = (
    ('user info', {'fields': ('username', 'date_of_birth', 'email', 'password', 'reenter_password'),})
  )

admin.site.register(User, CustomizeUserAdmin)
ターミナルを開き,仮想環境に移行し,"customlogin_project"のディレクトリにて,"python manage.py runserver"を実行する.
(djangoenv) C:\Users\shiro\Desktop\210517_python development\mycustomizationtest\customlogin_project
>python manage.py runserver

System check identified no issues (0 silenced).
July 28, 2021 - 14:54:06
Django version 3.2.3, using settings 'customlogin_project.settings'
Starting development server at http://127.0.0.1:8000/
Quit the server with CTRL-BREAK.
上記の"http://127.0.0.1:8000/"をクリックすると,ブラウザが立ち上がり,以下が表示される.
ブラウザのURLに"http://127.0.0.1:8000/admin"を入力すると,以下ページに遷移する.
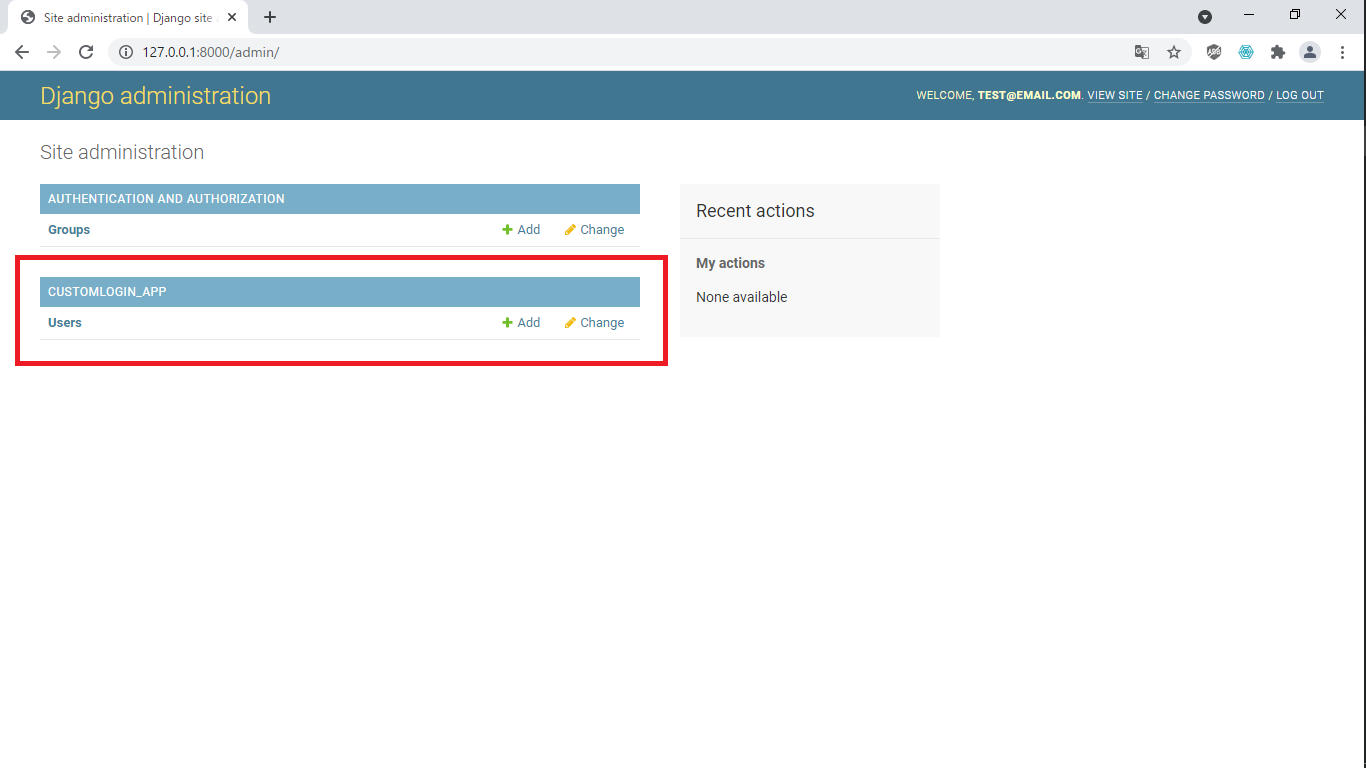
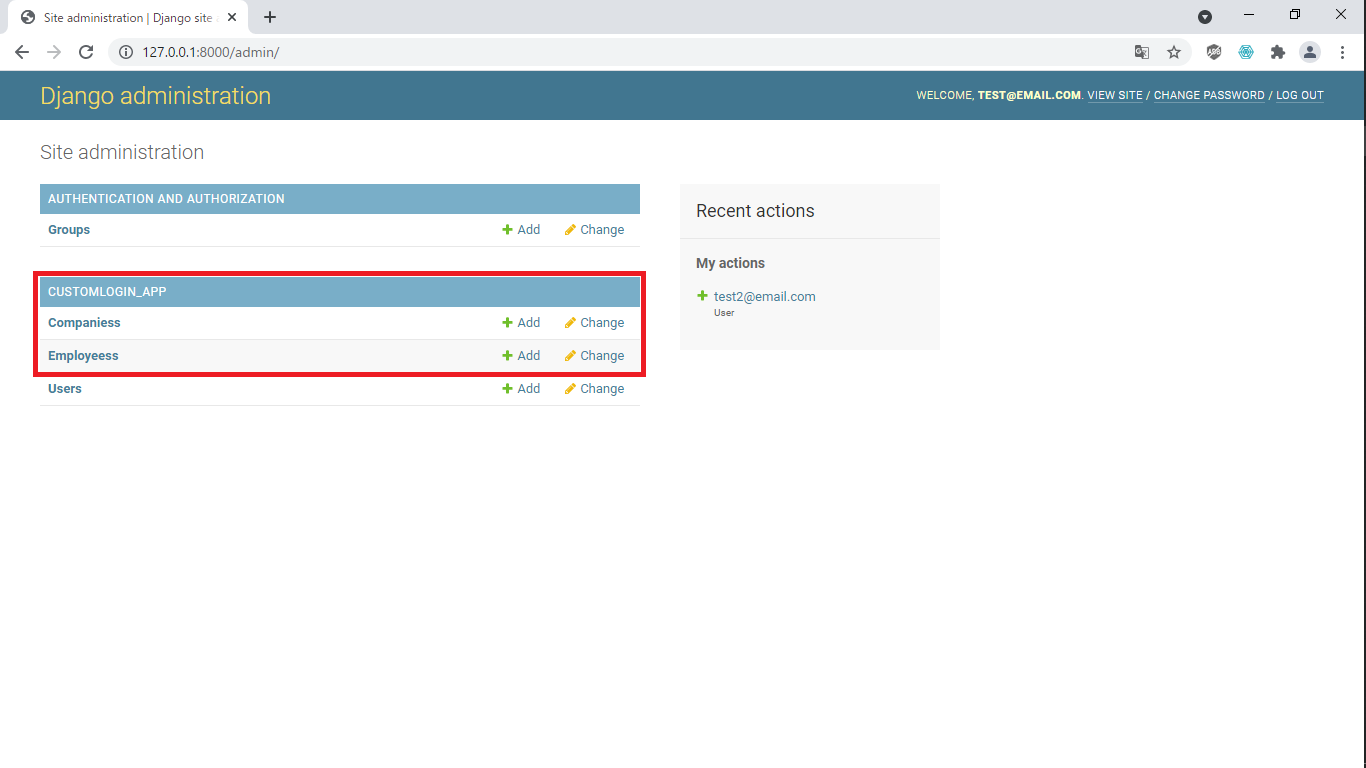
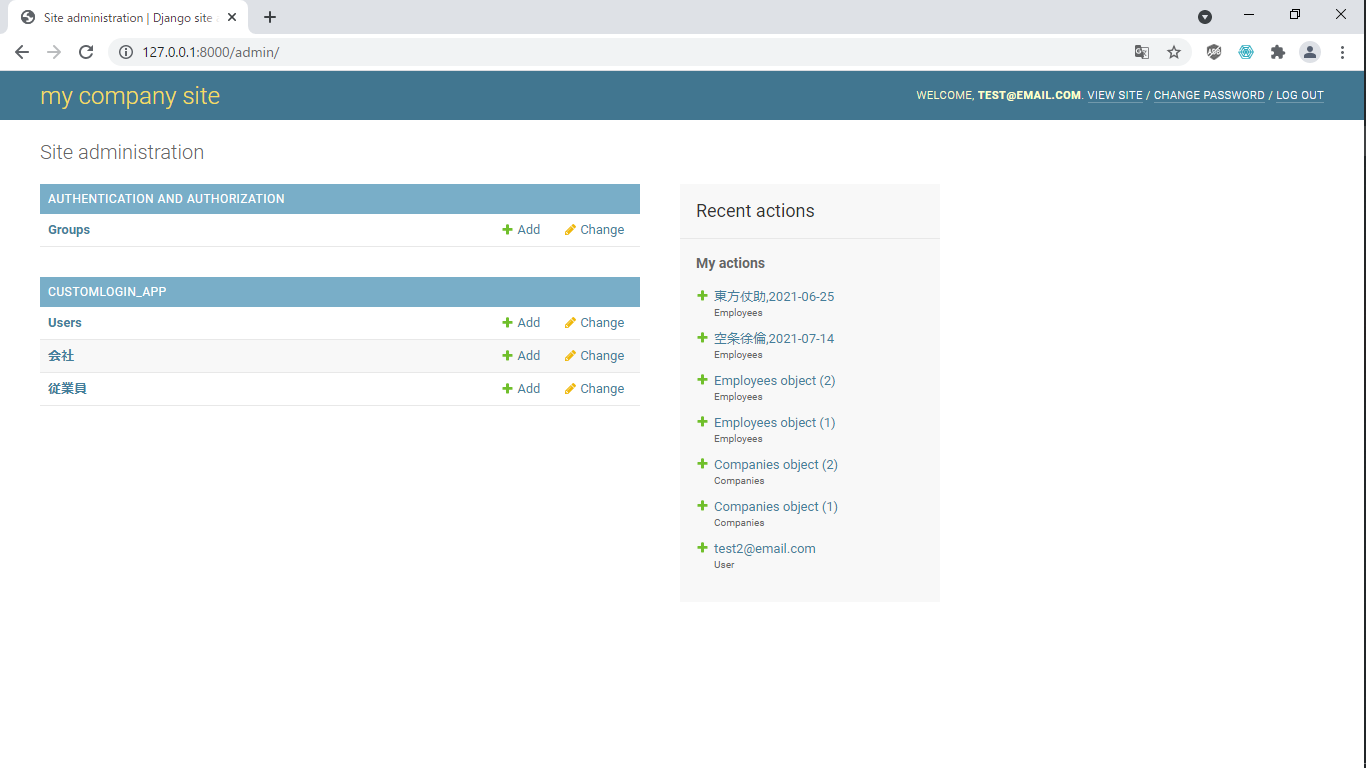
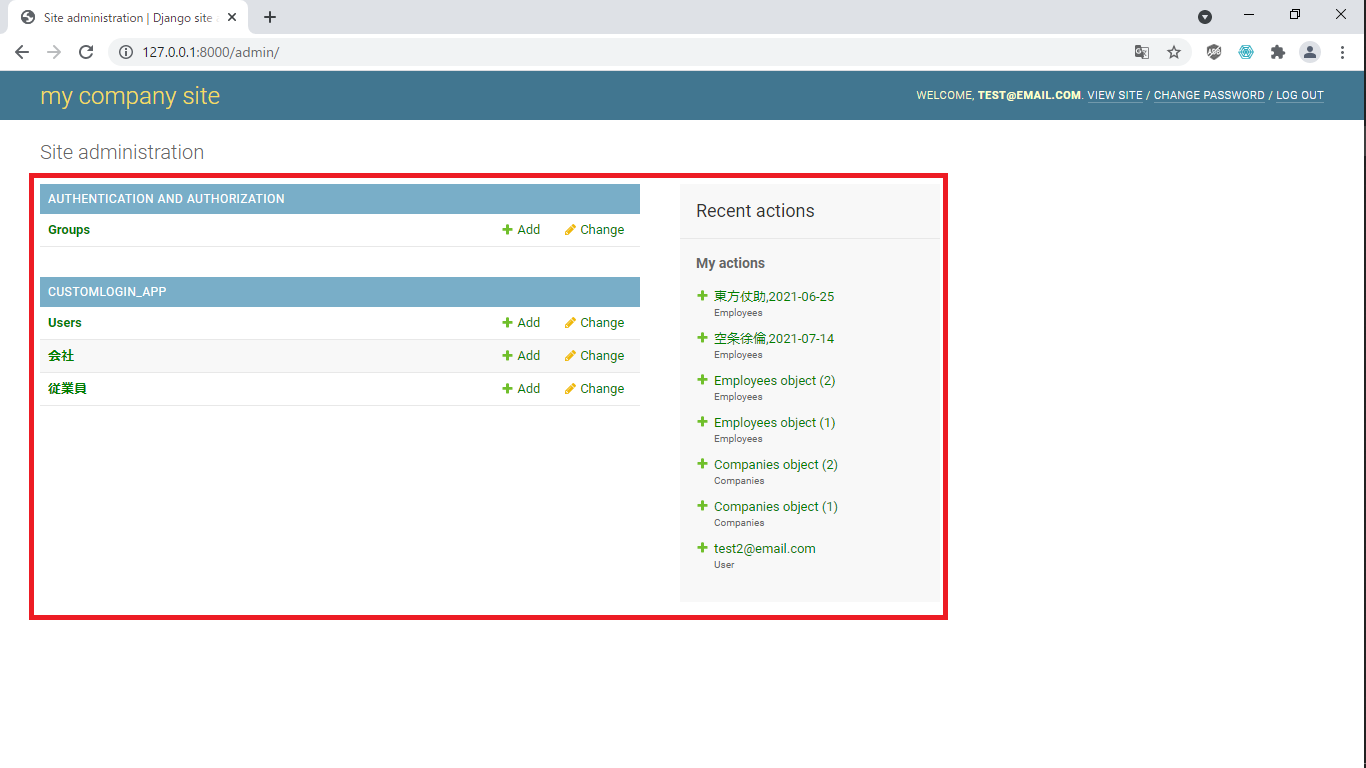
情報を入力し,"Login"をクリックすると,以下画面に遷移する.前回と違い,赤枠の"Users"が追加されている.
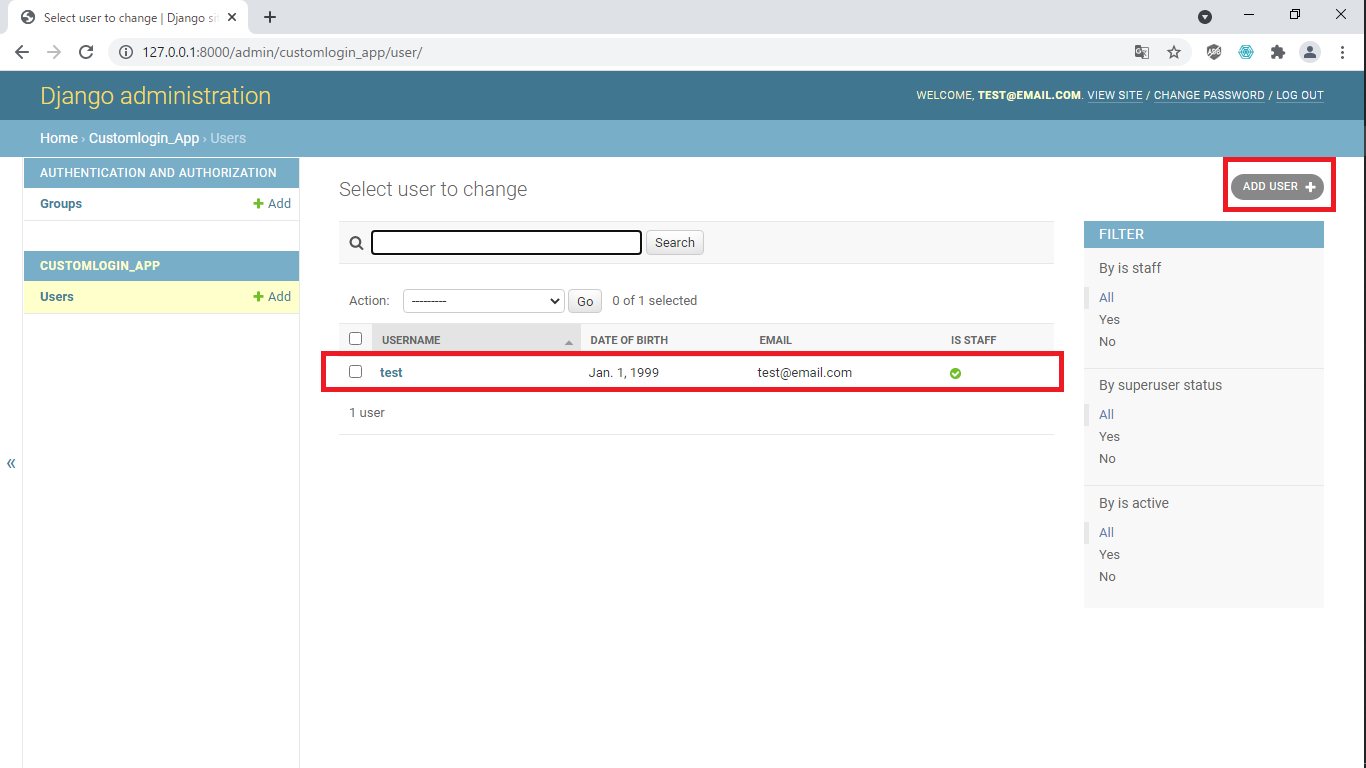
上記ページの"Users"をクリックすると,以下ページに遷移する.今回ログインした情報も含まれている.
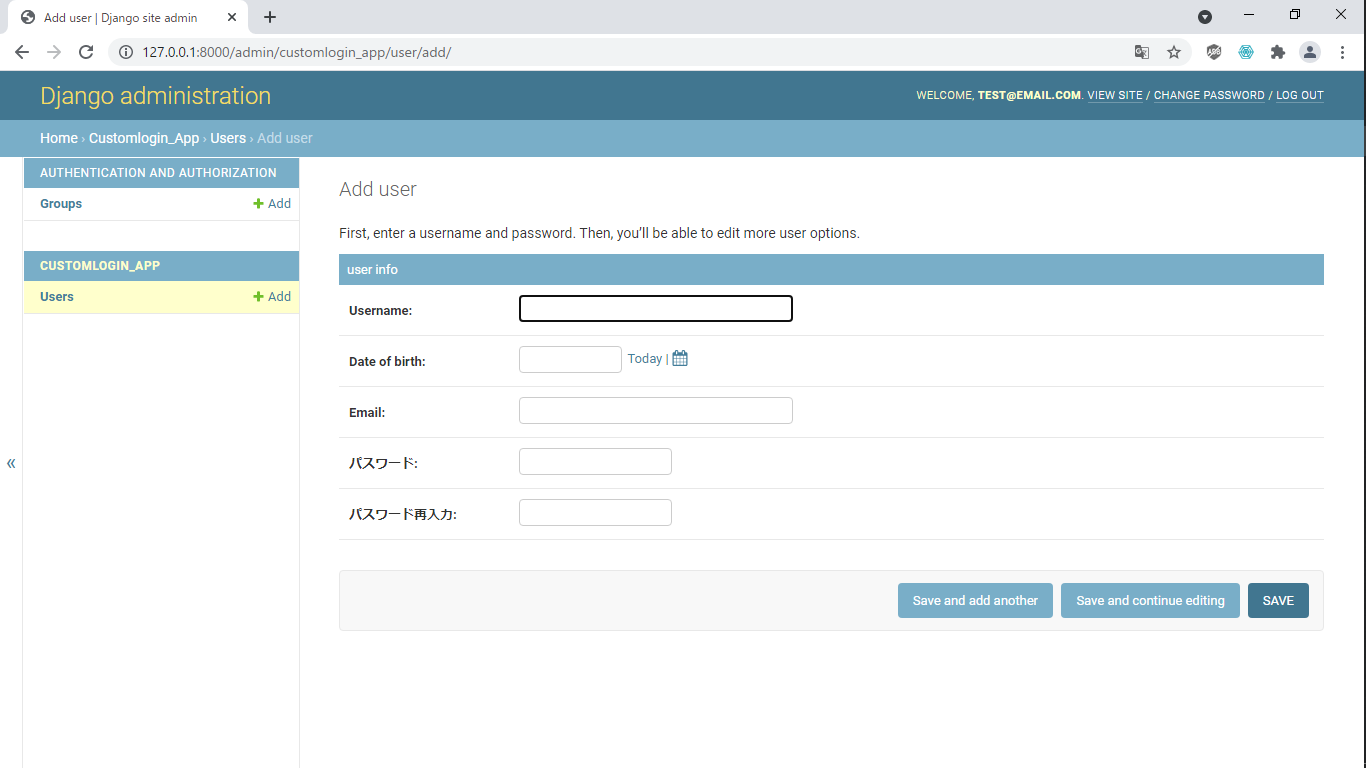
“ADD USER"をクリックすると以下ページに遷移する.当該ページにて"user"情報を追加することができる.
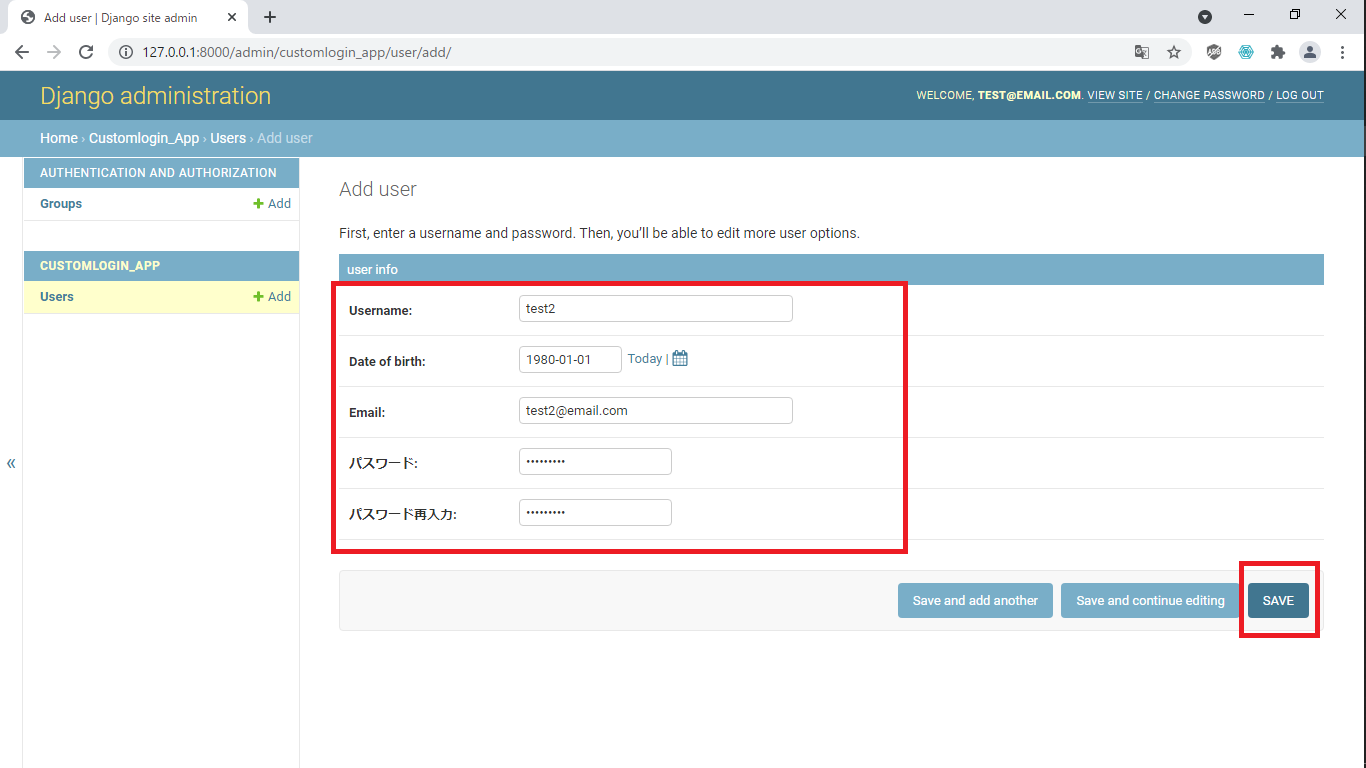
以下のようにuser infoに追記して,"Save"をクリックする
以下のようにuser infoを追加することができた.
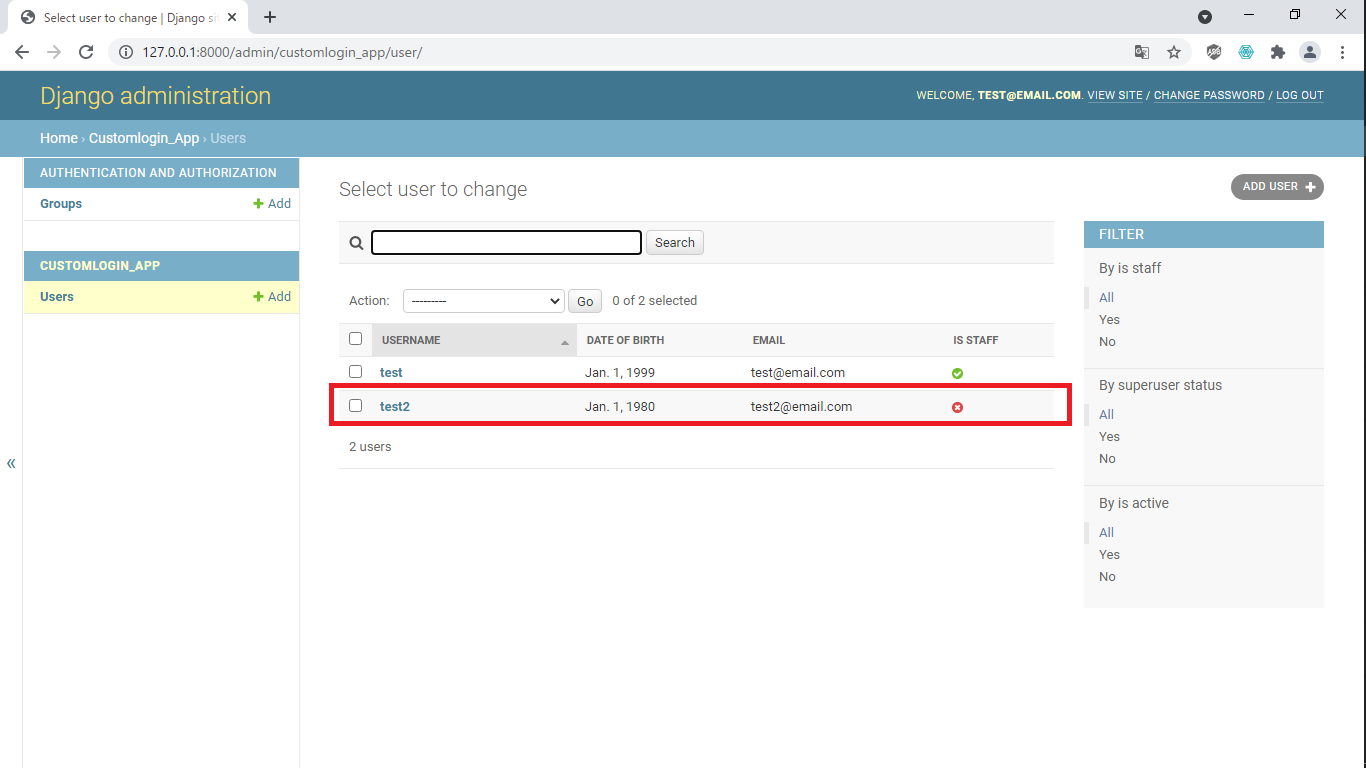
上記ページの"Users"をクリックすると,以下ページに遷移する.追記したuser infoが追加されていることが分かる.
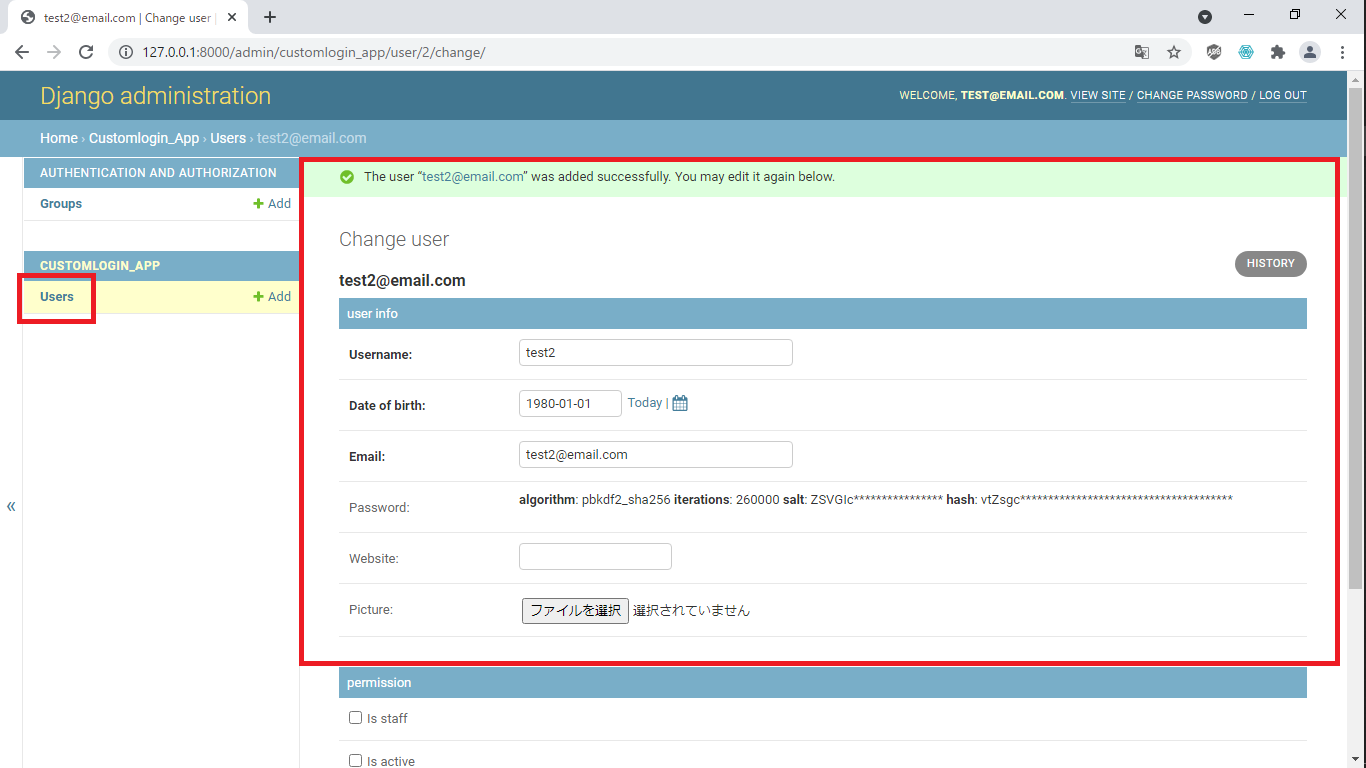
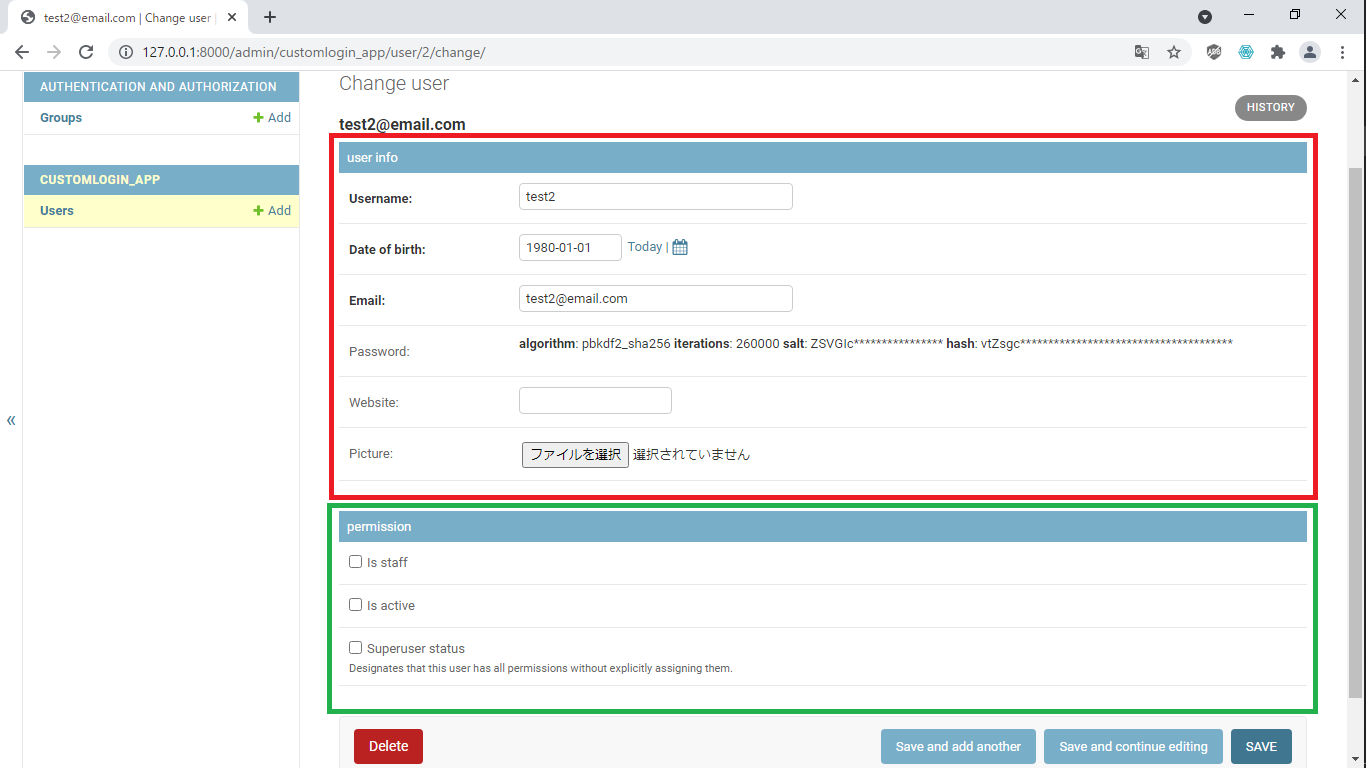
上記の"test2″をクリックすると,以下ページに遷移し,編集することができる.この画面は,"customlogin_app/admin.py"のfieldsで設定した内容になっており,赤枠は"user info",緑枠は"permission"の項目である.
“customlogin_app/models.py"に追記し,以下のように編集する.
from django.db import models
from django.contrib.auth.models import (
  BaseUserManager,
  AbstractBaseUser,
  PermissionsMixin
)

class UserManager(BaseUserManager):

  def create_user(self, username, email, date_of_birth, password=None):
    if not email:
      raise ValueError('Enter Email')
    user = self.model(
      username=username,
      email=email,
      date_of_birth=date_of_birth,
    )
    user.set_password(password)
    user.save(using=self._db)
    return user

  def create_superuser(self, username, email, date_of_birth, password=None):
    user = self.model(
      username=username,
      email=email,
      date_of_birth=date_of_birth
    )
    user.set_password(password)
    user.is_staff = True
    user.is_active = True
    user.is_superuser = True
    user.save(using=self._db)
    return user

class User(AbstractBaseUser, PermissionsMixin):
  username = models.CharField(max_length=100)
  email = models.EmailField(max_length=150, unique=True)
  date_of_birth = models.DateField()
  is_active = models.BooleanField(default=False)
  is_staff = models.BooleanField(default=False)
  website = models.URLField(null=True)
  picture = models.FileField(null=True)

  USERNAME_FIELD = 'email'
  REQUIRED_FIELDS = ['username', 'date_of_birth']

  objects = UserManager()

  def __str__(self):
    return self.email

class Employees(models.Model): # 以下追記箇所

  name = models.CharField(max_length=50)
  age = models.IntegerField()
  join_date = models.DateField()
  company = models.ForeignKey(
    'Companies', on_delete=models.CASCADE
  )

  class Meta:
    db_table = 'employees'

class Companies(models.Model):
  name = models.CharField(max_length=50)

  class Meta:
    db_table = 'companies'
ターミナルを開き,”conda activate 仮想環境名”を実行し,仮想環境に移行し,"customlogin_project"のディレクトリにて,"python manage.py makemigrations customlogin_app"を実行する.実行後,以下が出力される.
(djangoenv) C:\Users\shiro\Desktop\210517_python development\mycustomizationtest\customlogin_project
>python manage.py makemigrations customlogin_app

Migrations for 'customlogin_app': # 以下出力箇所
  customlogin_app\migrations\0002_companies_employees.py
    - Create model Companies
    - Create model Employees
ターミナルにて,続けて,"python manage.py migrate customlogin_app"を実行する.実行後,以下が出力される.
(djangoenv) C:\Users\shiro\Desktop\210517_python development\mycustomizationtest\customlogin_project
>python manage.py migrate customlogin_app

Operations to perform: # 以下出力箇所
  Apply all migrations: customlogin_app
Running migrations:
  Applying customlogin_app.0002_companies_employees... OK
“customlogin_app/admin.py"を追記し,以下のように編集する.
from django.contrib import admin
from django.contrib.auth.admin import UserAdmin
from django.contrib.auth import get_user_model
from .forms import UserChangeForm, UserCreationForm
from .models import Employees, Companies # 追記箇所

User = get_user_model()

class CustomizeUserAdmin(UserAdmin):
  form = UserChangeForm
  add_form = UserCreationForm

  list_display = ('username', 'date_of_birth', 'email', 'is_staff')

  fieldsets = (
    ('user info', {'fields': ('username', 'date_of_birth', 'email', 'password', 'website', 'picture')}),
    ('permission',{'fields': ('is_staff', 'is_active', 'is_superuser')}),
  )

  add_fieldsets = (
    ('user info', {'fields': ('username', 'date_of_birth', 'email', 'password', 'reenter_password'),})
  )

admin.site.register(User, CustomizeUserAdmin)

admin.site.register(Employees) # 以下追記箇所
admin.site.register(Companies)
ターミナルを開き,仮想環境に移行し,"customlogin_project"のディレクトリにて,"python manage.py runserver"を実行する.実行後,以下が出力される.
(djangoenv) C:\Users\shiro\Desktop\210517_python development\mycustomizationtest\customlogin_project
>python manage.py runserver

System check identified no issues (0 silenced). # 以下出力箇所
July 28, 2021 - 17:16:08
Django version 3.2.3, using settings 'customlogin_project.settings'
Starting development server at http://127.0.0.1:8000/
Quit the server with CTRL-BREAK.
上記の"http://127.0.0.1:8000/"をクリックするとブラウザが立ち上がる.URLに"http://127.0.0.1:8000/admin"を入力する.以下画面に遷移するので,"Log in"を行う.
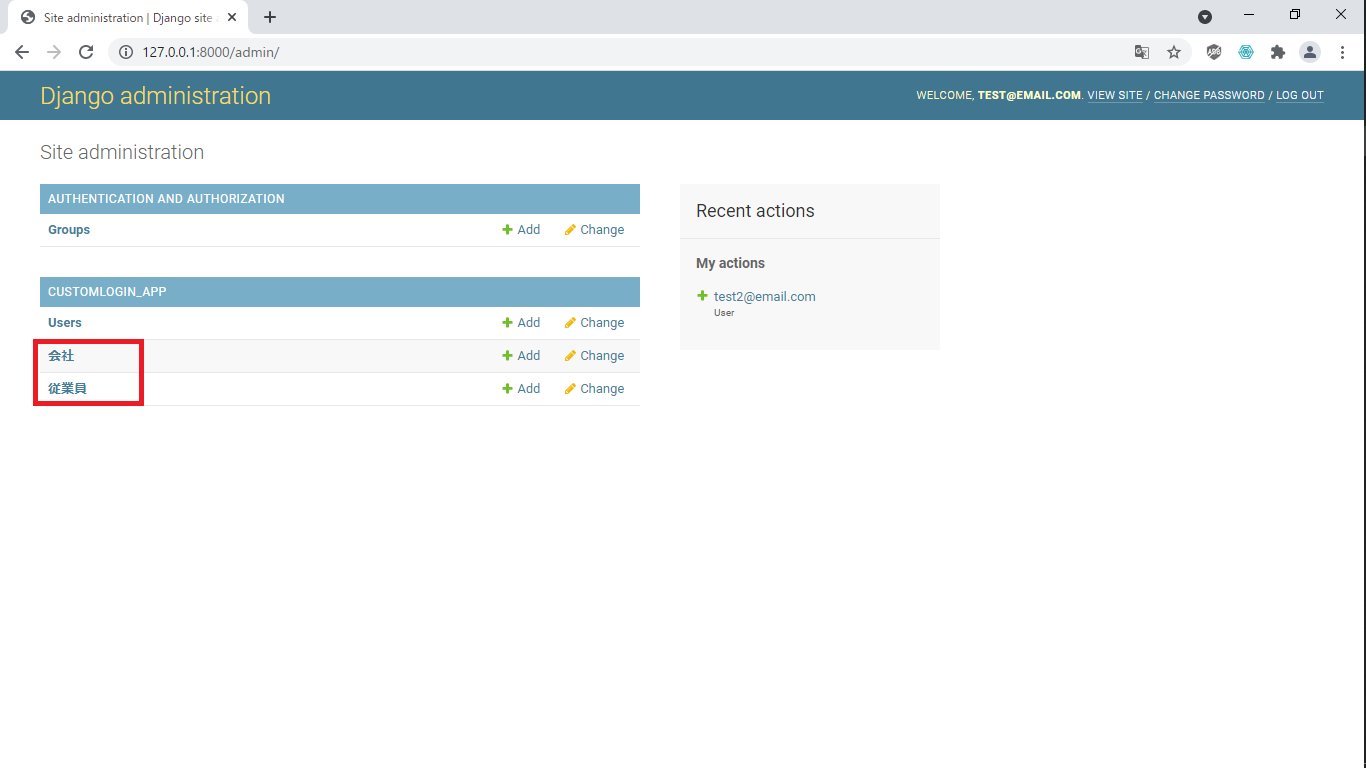
“Log in"を行うと以下画面に遷移する.今回追加した内容を赤枠にて確認できる.
“customlogin_app/models.py"に追記し,以下のように編集する.
from django.db import models
from django.contrib.auth.models import (
  BaseUserManager,
  AbstractBaseUser,
  PermissionsMixin
)

class UserManager(BaseUserManager):

  def create_user(self, username, email, date_of_birth, password=None):
    if not email:
      raise ValueError('Enter Email')
    user = self.model(
      username=username,
      email=email,
      date_of_birth=date_of_birth,
    )
    user.set_password(password)
    user.save(using=self._db)
    return user

  def create_superuser(self, username, email, date_of_birth, password=None):
    user = self.model(
      username=username,
      email=email,
      date_of_birth=date_of_birth
    )
    user.set_password(password)
    user.is_staff = True
    user.is_active = True
    user.is_superuser = True
    user.save(using=self._db)
    return user

class User(AbstractBaseUser, PermissionsMixin):
  username = models.CharField(max_length=100)
  email = models.EmailField(max_length=150, unique=True)
  date_of_birth = models.DateField()
  is_active = models.BooleanField(default=False)
  is_staff = models.BooleanField(default=False)
  website = models.URLField(null=True)
  picture = models.FileField(null=True)

  USERNAME_FIELD = 'email'
  REQUIRED_FIELDS = ['username', 'date_of_birth']

  objects = UserManager()

  def __str__(self):
    return self.email

class Employees(models.Model):

  name = models.CharField(max_length=50)
  age = models.IntegerField()
  join_date = models.DateField()
  company = models.ForeignKey(
    'Companies', on_delete=models.CASCADE
  )

  class Meta:
    db_table = 'employees'
    verbose_name_plural = '従業員' # 追記箇所

class Companies(models.Model):
  name = models.CharField(max_length=50)

  class Meta:
    db_table = 'companies'
    verbose_name_plural = '会社' # 追記箇所
“http://127.0.0.1:8000/admin"での"Log in"後,英語だった赤枠の表記が日本語に変更された.
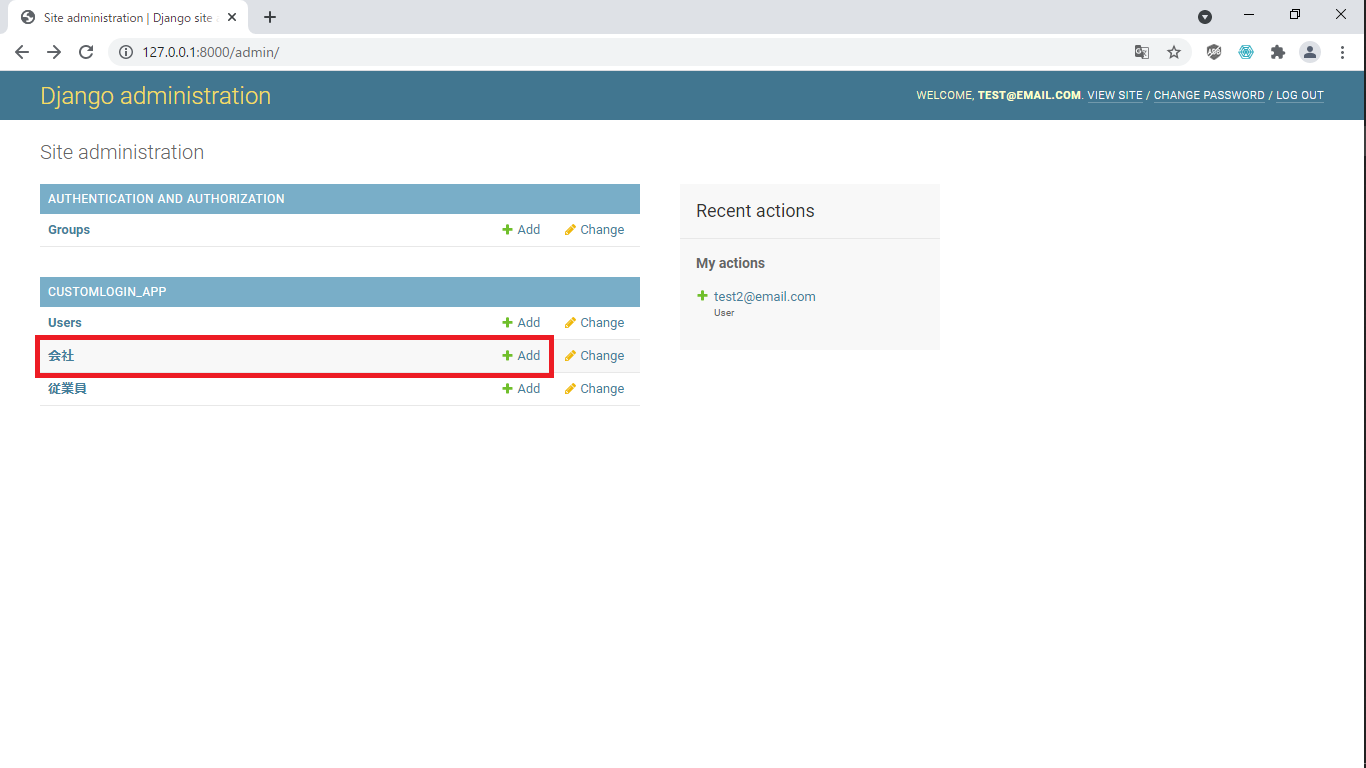
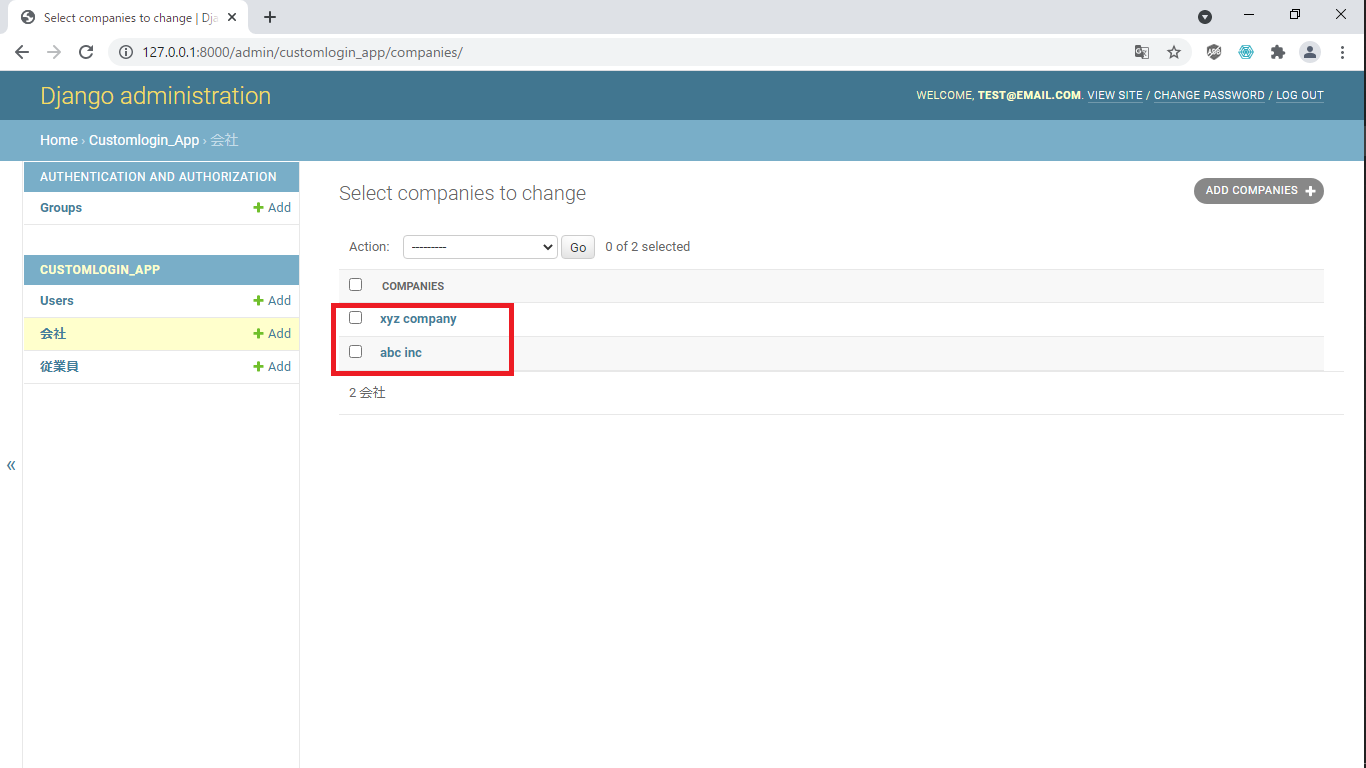
“会社"項目の"Add"をクリックする
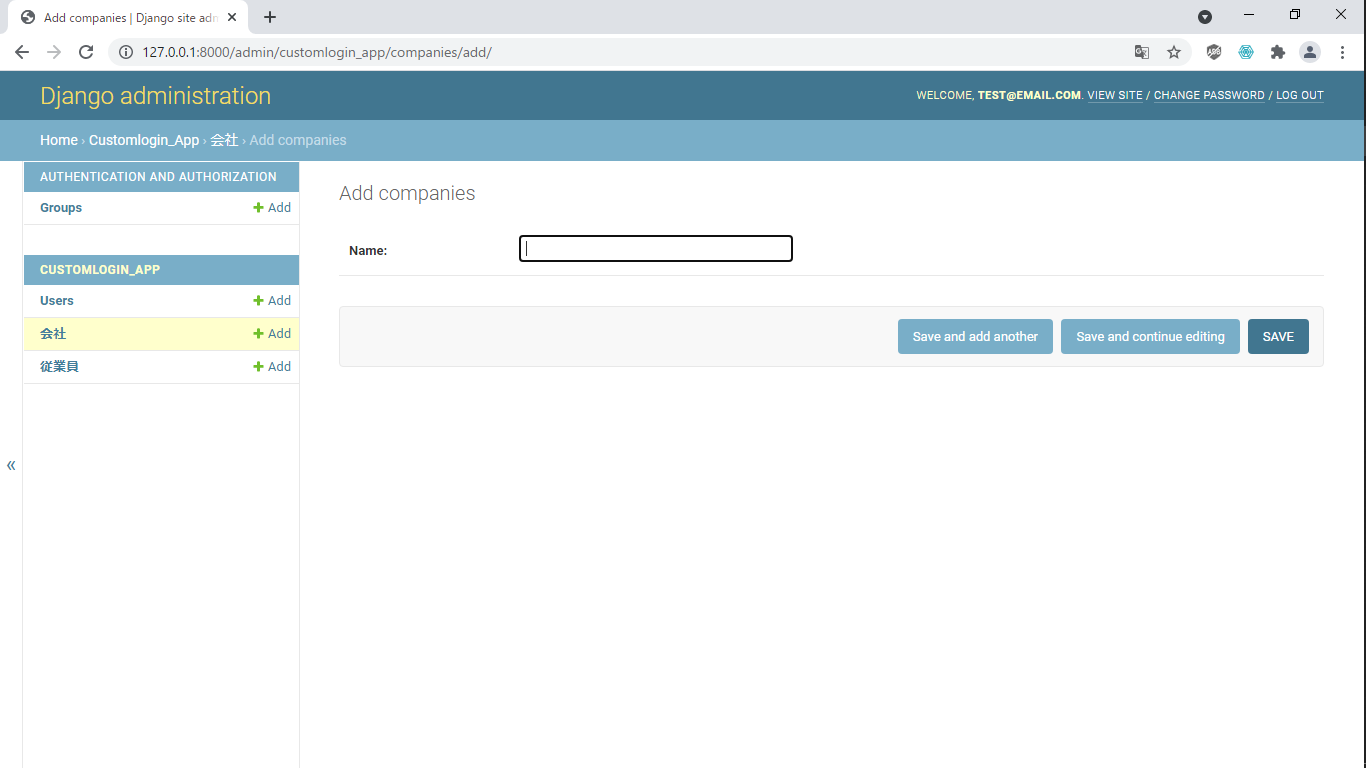
以下ページに遷移し,会社名を入力することができる.
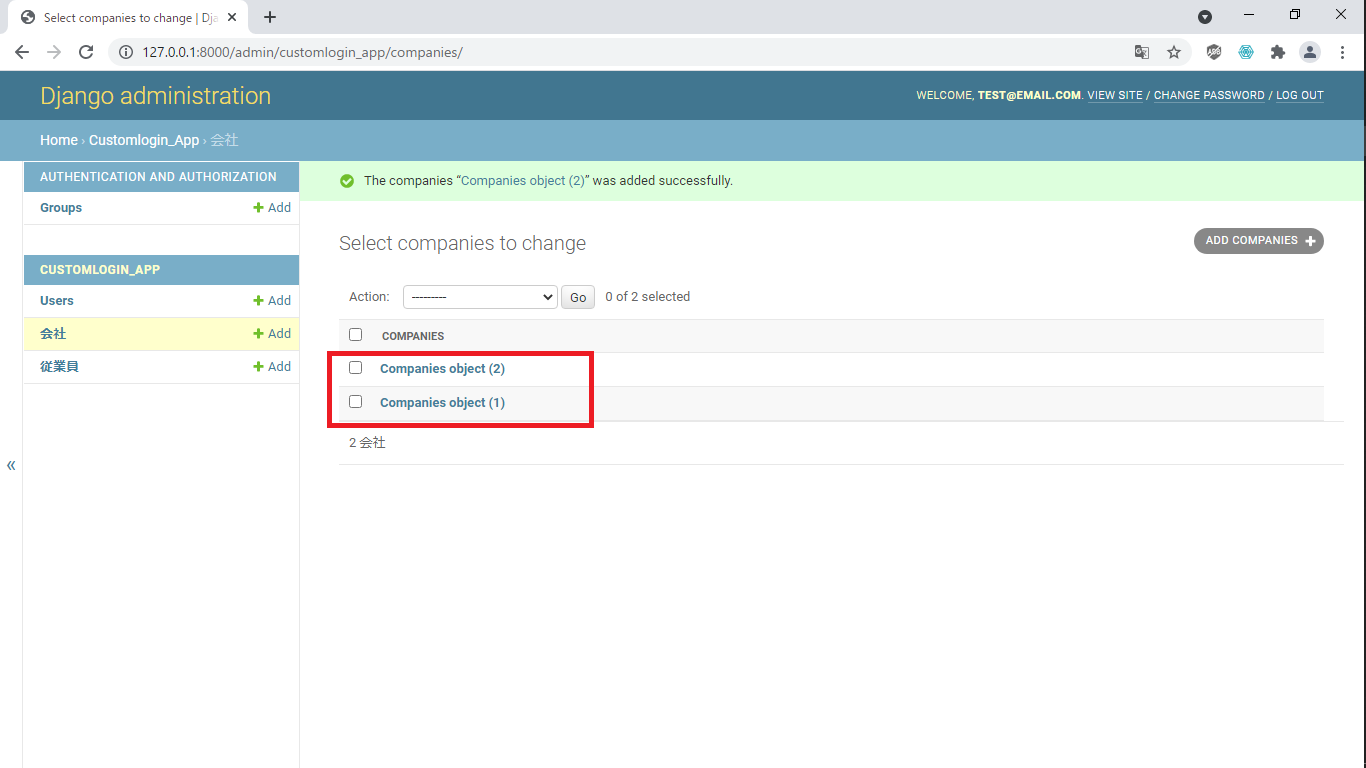
2つの会社情報を入力すると,以下のように表記される.
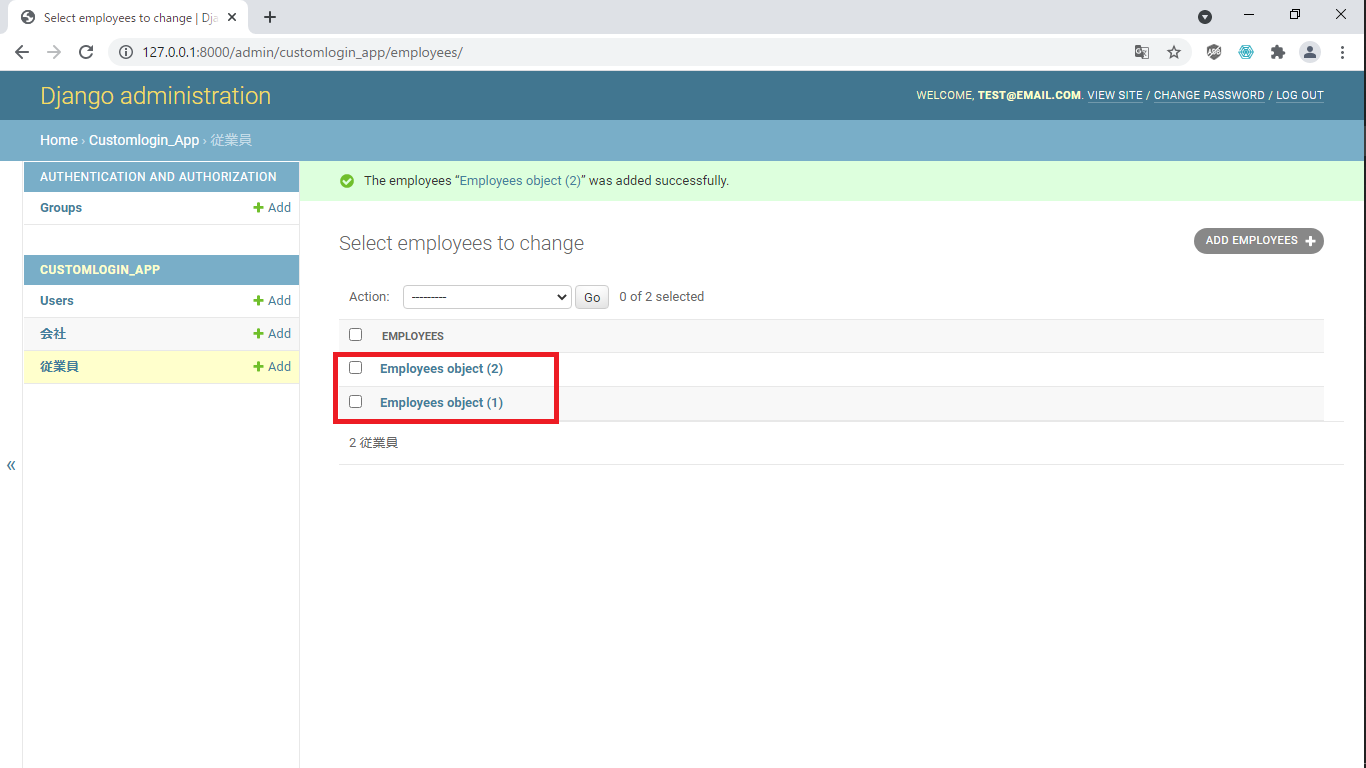
“従業員"項目の"Add"をクリックする
以下ページに遷移し,従業員情報を入力することができる.

2つの従業員情報を入力すると,以下のように表記される.
“customlogin_app/models.py"に追記し,以下のように編集する.
from django.db import models
from django.contrib.auth.models import (
BaseUserManager,
AbstractBaseUser,
PermissionsMixin
)
class UserManager(BaseUserManager):
def create_user(self, username, email, date_of_birth, password=None):
if not email:
raise ValueError('Enter Email')
user = self.model(
username=username,
email=email,
date_of_birth=date_of_birth,
)
user.set_password(password)
user.save(using=self._db)
return user
def create_superuser(self, username, email, date_of_birth, password=None):
user = self.model(
username=username,
email=email,
date_of_birth=date_of_birth
)
user.set_password(password)
user.is_staff = True
user.is_active = True
user.is_superuser = True
user.save(using=self._db)
return user
class User(AbstractBaseUser, PermissionsMixin):
username = models.CharField(max_length=100)
email = models.EmailField(max_length=150, unique=True)
date_of_birth = models.DateField()
is_active = models.BooleanField(default=False)
is_staff = models.BooleanField(default=False)
website = models.URLField(null=True)
picture = models.FileField(null=True)
USERNAME_FIELD = 'email'
REQUIRED_FIELDS = ['username', 'date_of_birth']
objects = UserManager()
def __str__(self):
return self.email
class Employees(models.Model):
name = models.CharField(max_length=50)
age = models.IntegerField()
join_date = models.DateField()
company = models.ForeignKey(
'Companies', on_delete=models.CASCADE
)
class Meta:
db_table = 'employees'
verbose_name_plural = '従業員'
def __str__(self): # 追記箇所(65~66行目)
return self.name + ',' + str(self.join_date)
class Companies(models.Model):
name = models.CharField(max_length=50)
class Meta:
db_table = 'companies'
verbose_name_plural = '会社'
def __str__(self): # 以下追記箇所
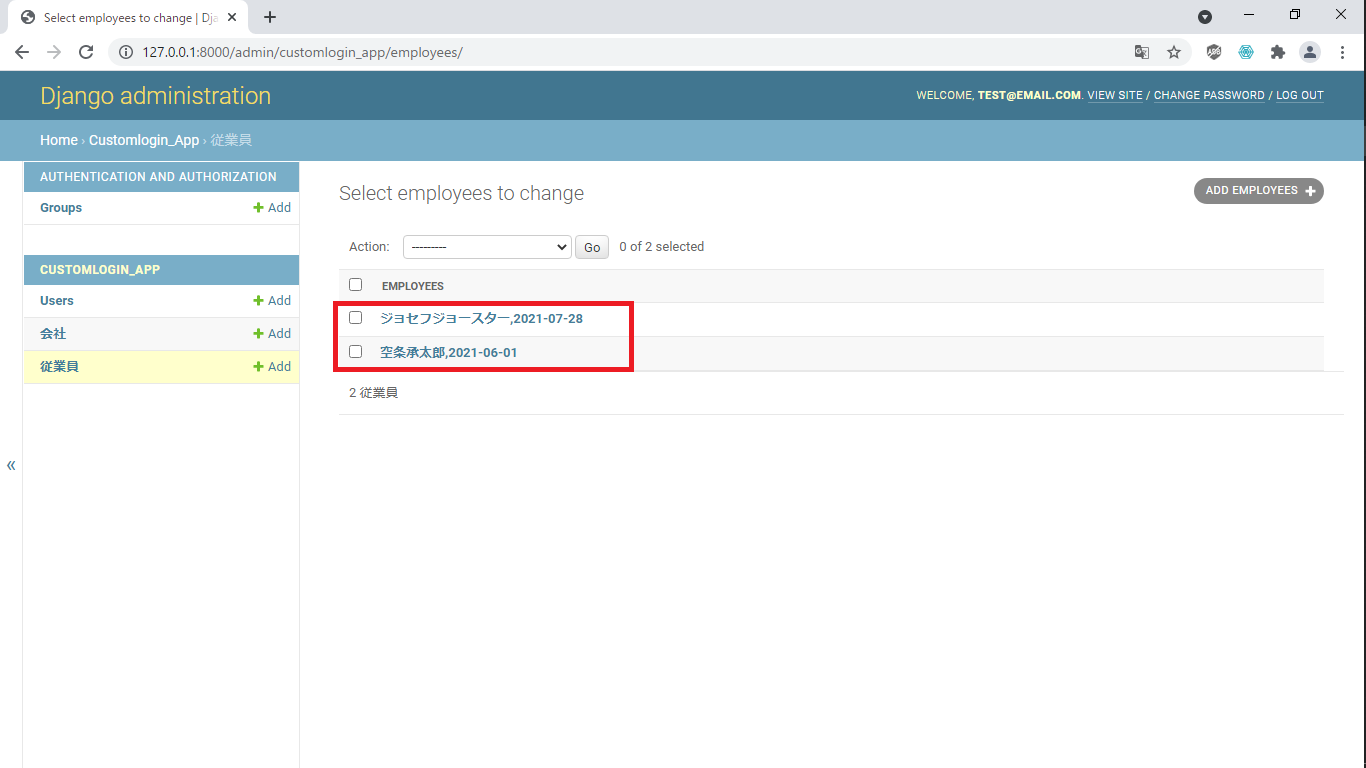
return self.name上記を保存し,"http://127.0.0.1:8000/admin"での"Log in"後,2つの会社情報は,以下のように会社名が表記される.
2つの従業員情報は,以下のように従業員名と入社日が表記される.
現状,従業員入力ページの項目は以下の並びとなっている.
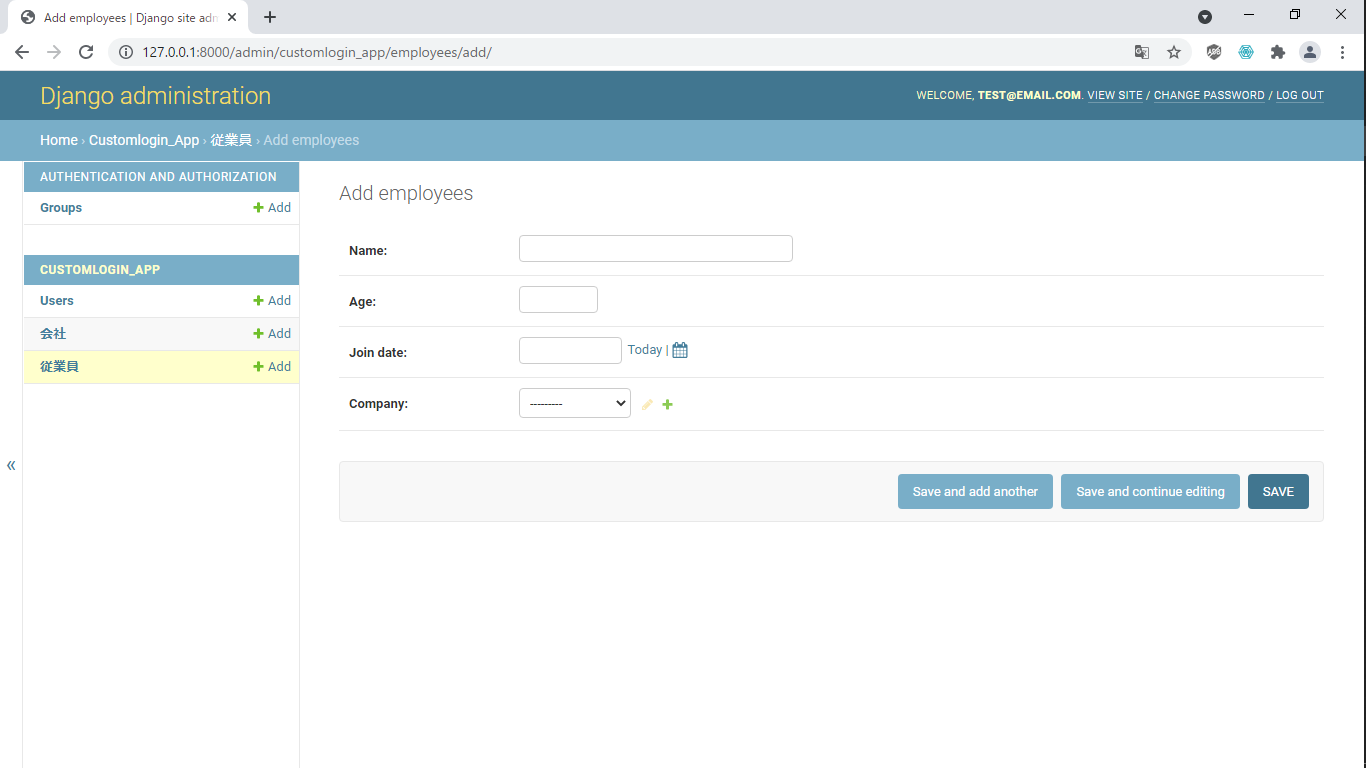
“customlogin_app/admin.py"を追記し,以下のように編集する.
from django.contrib import admin
from django.contrib.auth.admin import UserAdmin
from django.contrib.auth import get_user_model
from .forms import UserChangeForm, UserCreationForm
from .models import Employees, Companies
User = get_user_model()
class CustomizeUserAdmin(UserAdmin):
form = UserChangeForm
add_form = UserCreationForm
list_display = ('username', 'date_of_birth', 'email', 'is_staff')
fieldsets = (
('user info', {'fields': ('username', 'date_of_birth', 'email', 'password', 'website', 'picture')}),
('permission',{'fields': ('is_staff', 'is_active', 'is_superuser')}),
)
add_fieldsets = (
('user info', {'fields': ('username', 'date_of_birth', 'email', 'password', 'reenter_password'),})
)
admin.site.register(User, CustomizeUserAdmin)
admin.site.register(Companies)
@admin.register(Employees) # 以下追記箇所
class EmployeeAdmin(admin.ModelAdmin):
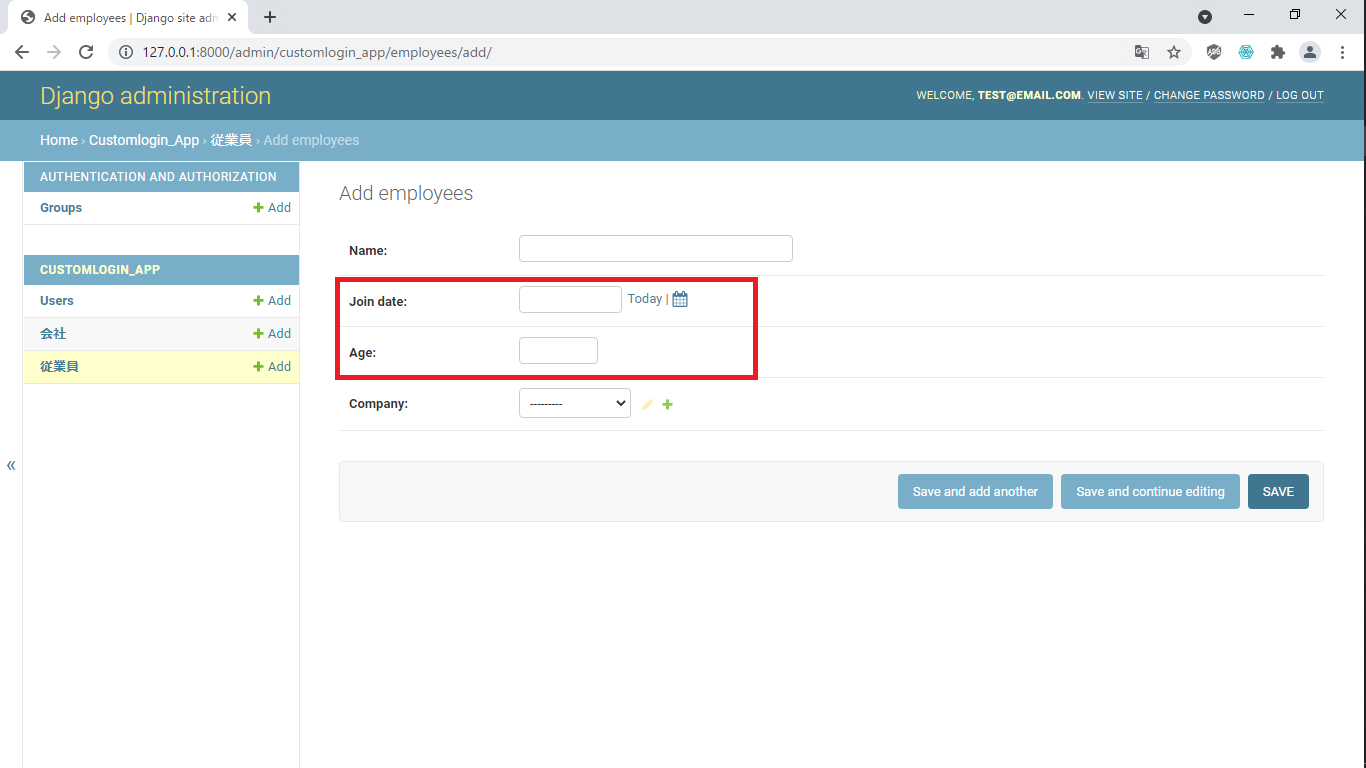
fields = ('name', 'join_date', 'age', 'company')上記を保存し,従業員入力ページに遷移すると,以下のように"Age"と"Join date"の並びが入れ替わった.
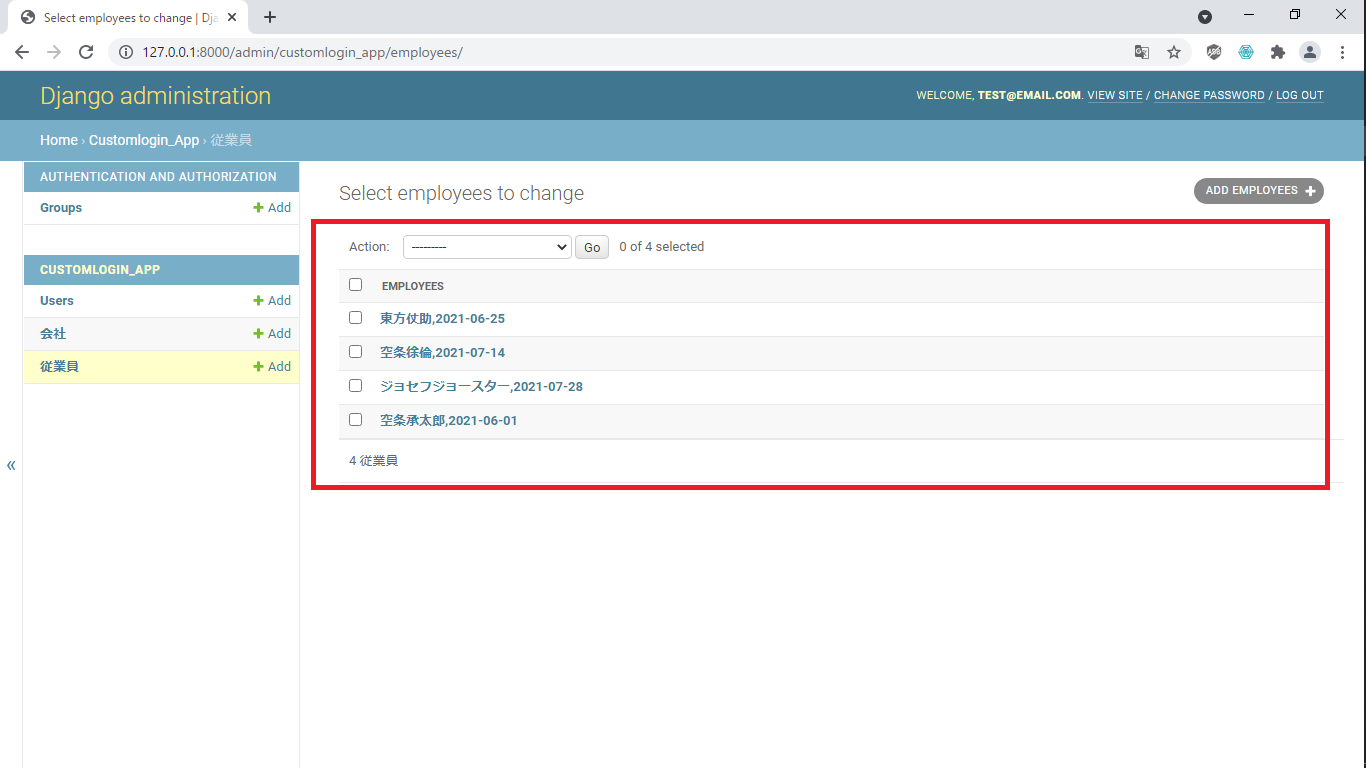
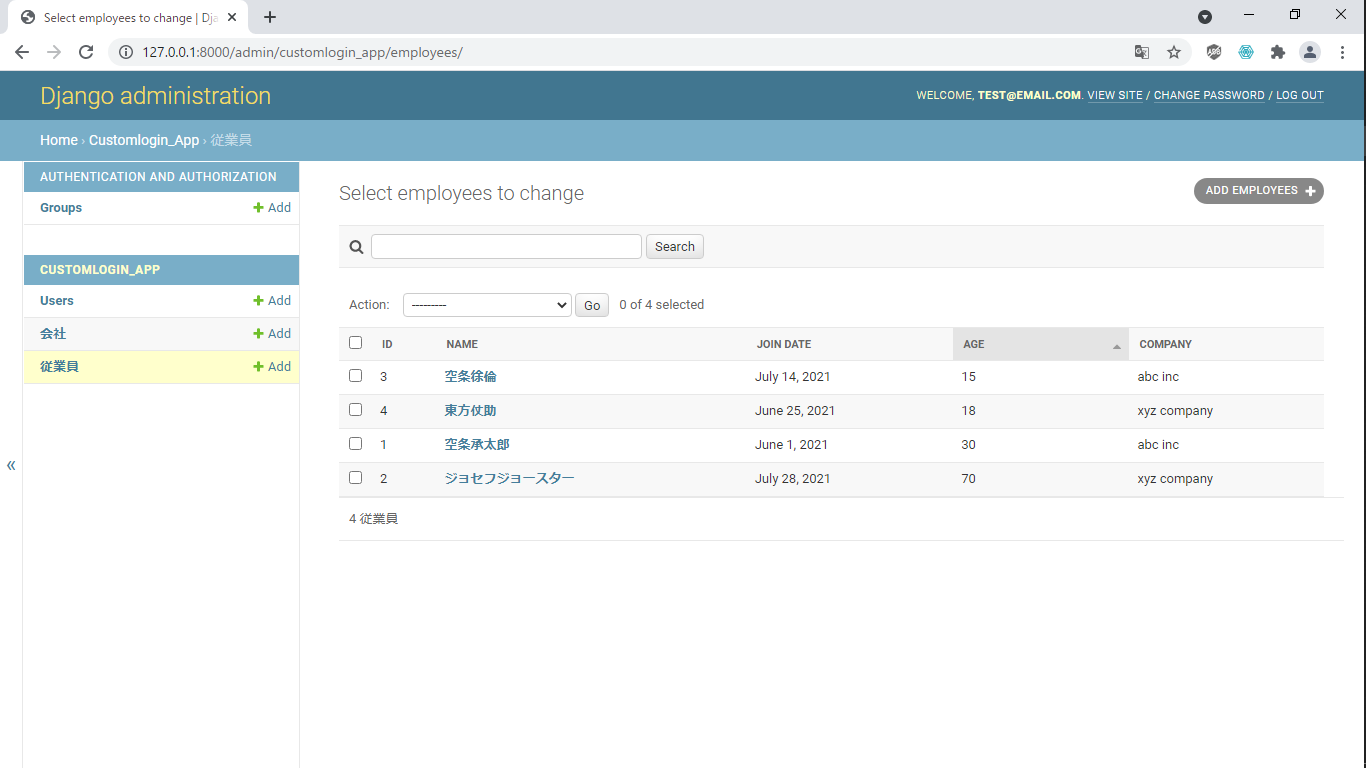
従業員を追加し,現状,従業員一覧の表記は以下になっている.
“customlogin_app/admin.py"を追記し,以下のように編集する.
from django.contrib import admin
from django.contrib.auth.admin import UserAdmin
from django.contrib.auth import get_user_model
from .forms import UserChangeForm, UserCreationForm
from .models import Employees, Companies
User = get_user_model()
class CustomizeUserAdmin(UserAdmin):
form = UserChangeForm
add_form = UserCreationForm
list_display = ('username', 'date_of_birth', 'email', 'is_staff')
fieldsets = (
('user info', {'fields': ('username', 'date_of_birth', 'email', 'password', 'website', 'picture')}),
('permission',{'fields': ('is_staff', 'is_active', 'is_superuser')}),
)
add_fieldsets = (
('user info', {'fields': ('username', 'date_of_birth', 'email', 'password', 'reenter_password'),})
)
admin.site.register(User, CustomizeUserAdmin)
admin.site.register(Companies)
@admin.register(Employees)
class EmployeeAdmin(admin.ModelAdmin):
fields = ('name', 'join_date', 'age', 'company')
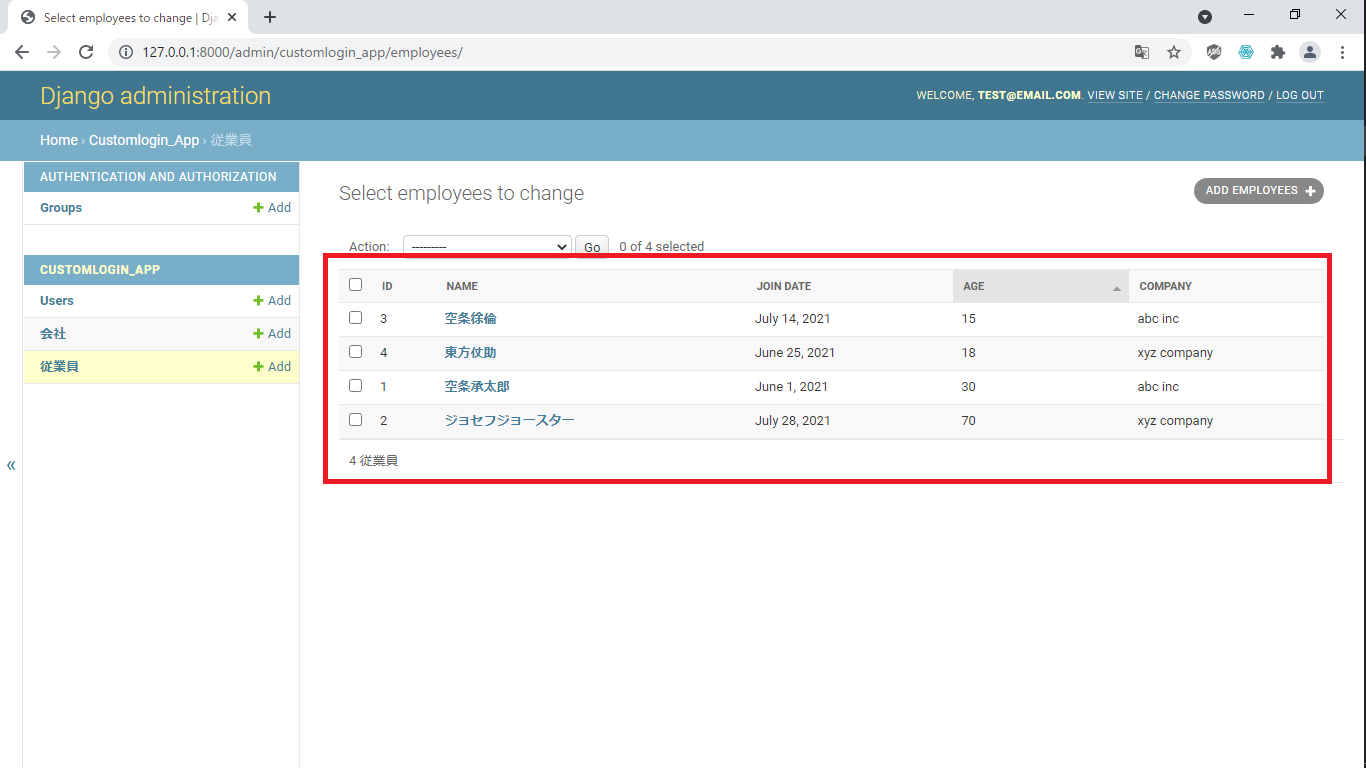
list_display = ('id', 'name', 'join_date', 'age', 'company') # 以下追記箇所
list_display_links = ('name',)上記を保存し,従業員一覧ページを更新すると以下表記に変わる."id", “name"などでソートすることも可能になる."name"をクリックすることによって,編集画面に遷移することもできる.

現状,従業員一覧の並び順は"id"の降順がデフォルトとなっている.
“customlogin_app/models.py"に追記し,以下のように編集する."class Employee"の"class Meta"に"age"の昇順になるようにコードを追記した.
from django.db import models
from django.contrib.auth.models import (
  BaseUserManager,
  AbstractBaseUser,
  PermissionsMixin
)

class UserManager(BaseUserManager):

  def create_user(self, username, email, date_of_birth, password=None):
    if not email:
      raise ValueError('Enter Email')
    user = self.model(
      username=username,
      email=email,
      date_of_birth=date_of_birth,
    )
    user.set_password(password)
    user.save(using=self._db)
    return user

  def create_superuser(self, username, email, date_of_birth, password=None):
    user = self.model(
      username=username,
      email=email,
      date_of_birth=date_of_birth
    )
    user.set_password(password)
    user.is_staff = True
    user.is_active = True
    user.is_superuser = True
    user.save(using=self._db)
    return user

class User(AbstractBaseUser, PermissionsMixin):
  username = models.CharField(max_length=100)
  email = models.EmailField(max_length=150, unique=True)
  date_of_birth = models.DateField()
  is_active = models.BooleanField(default=False)
  is_staff = models.BooleanField(default=False)
  website = models.URLField(null=True)
  picture = models.FileField(null=True)

  USERNAME_FIELD = 'email'
  REQUIRED_FIELDS = ['username', 'date_of_birth']

  objects = UserManager()

  def __str__(self):
    return self.email

class Employees(models.Model):

  name = models.CharField(max_length=50)
  age = models.IntegerField()
  join_date = models.DateField()
  company = models.ForeignKey(
    'Companies', on_delete=models.CASCADE
  )

  class Meta:
    db_table = 'employees'
    verbose_name_plural = '従業員'
    ordering = ('age',) # 追記箇所

  def __str__(self):
    return self.name + ',' + str(self.join_date)

class Companies(models.Model):
  name = models.CharField(max_length=50)

  class Meta:
    db_table = 'companies'
    verbose_name_plural = '会社'

  def __str__(self):
    return self.name
上記を保存し,従業員一覧ページを更新すると,"age"の昇順がページのデフォルトになっている.
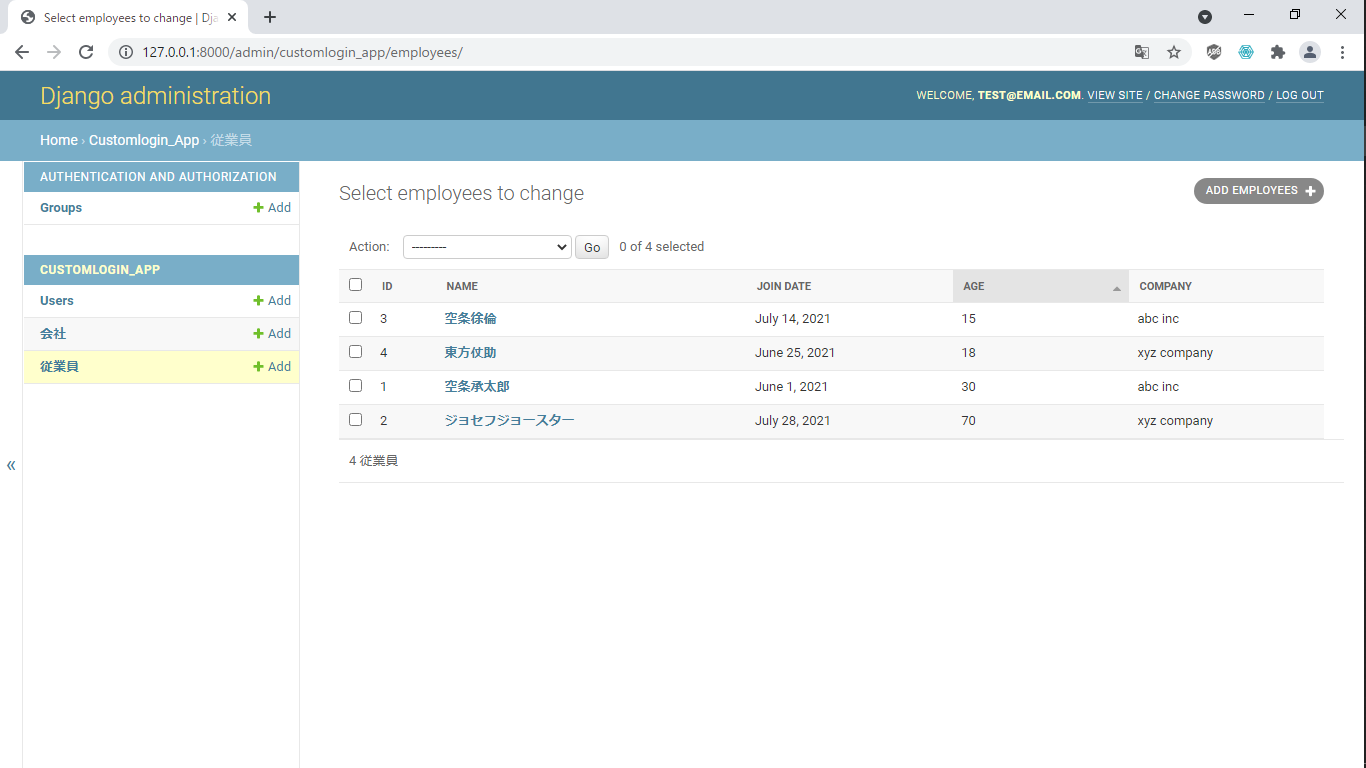
現在,従業員一覧ページは以下のように検索画面がない表記となっている.
“customlogin_app/admin.py"を追記し,以下のように編集する.
from django.contrib import admin
from django.contrib.auth.admin import UserAdmin
from django.contrib.auth import get_user_model
from .forms import UserChangeForm, UserCreationForm
from .models import Employees, Companies
User = get_user_model()
class CustomizeUserAdmin(UserAdmin):
form = UserChangeForm
add_form = UserCreationForm
list_display = ('username', 'date_of_birth', 'email', 'is_staff')
fieldsets = (
('user info', {'fields': ('username', 'date_of_birth', 'email', 'password', 'website', 'picture')}),
('permission',{'fields': ('is_staff', 'is_active', 'is_superuser')}),
)
add_fieldsets = (
('user info', {'fields': ('username', 'date_of_birth', 'email', 'password', 'reenter_password'),})
)
admin.site.register(User, CustomizeUserAdmin)
admin.site.register(Companies)
@admin.register(Employees)
class EmployeeAdmin(admin.ModelAdmin):
fields = ('name', 'join_date', 'age', 'company')
list_display = ('id', 'name', 'join_date', 'age', 'company')
list_display_links = ('name',)
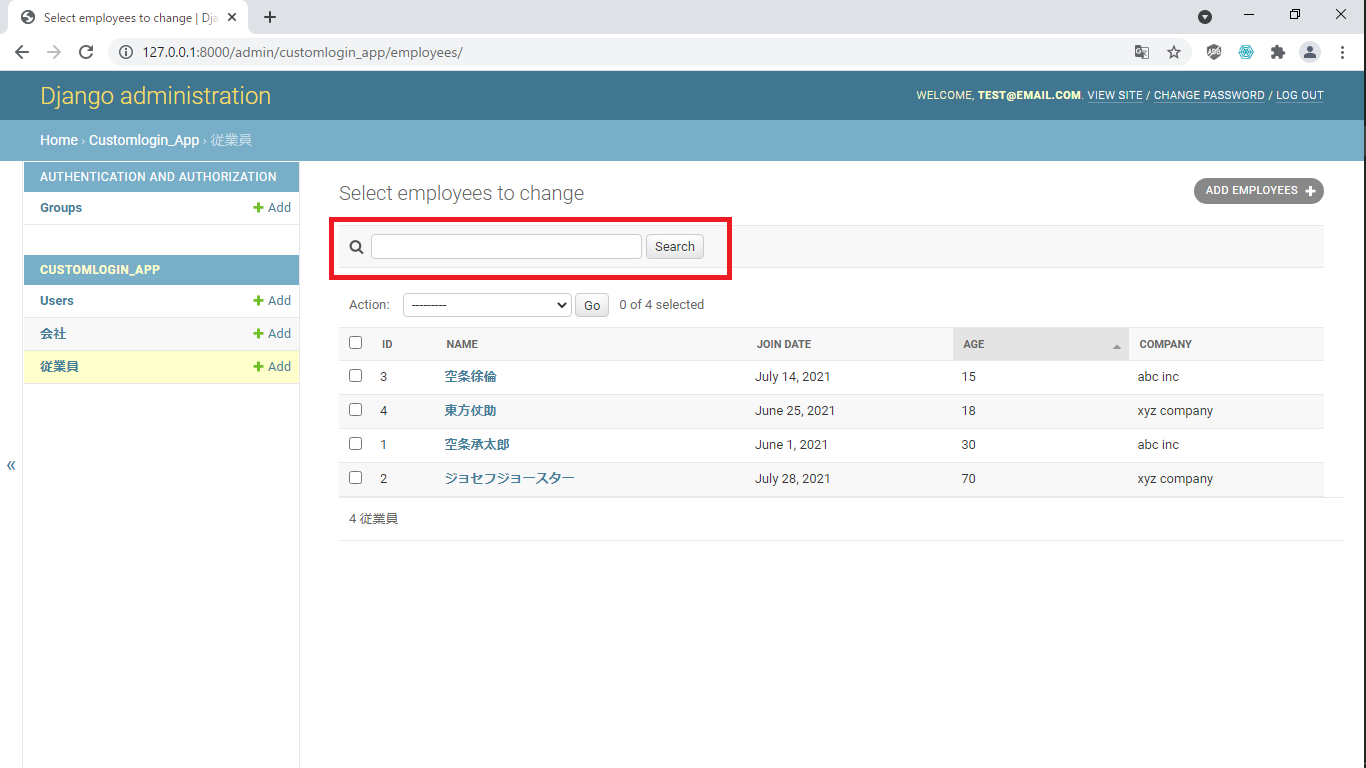
search_fields = ('name',) # 追記箇所上記を保存し,従業員一覧ページを更新すると以下のように検索画面が備わる.
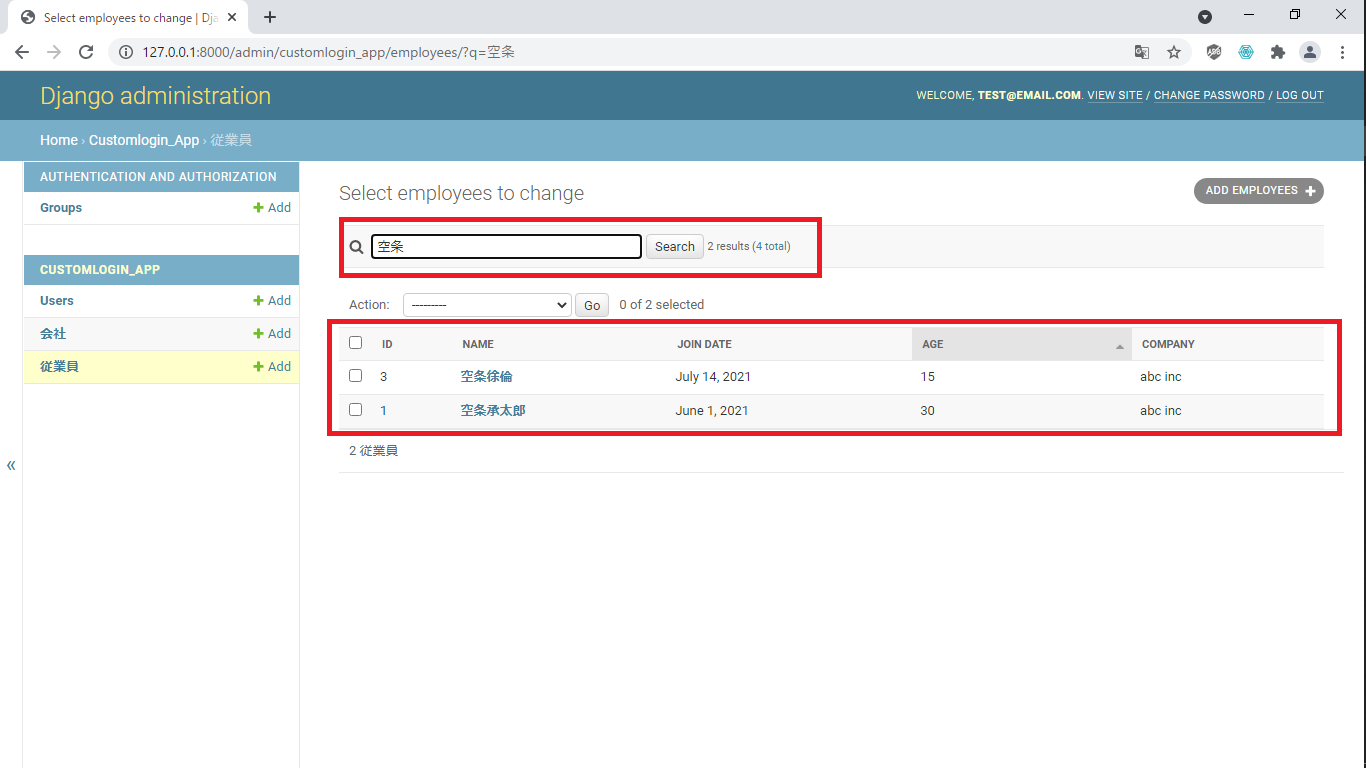
検索画面で"空条"と入力すると,"空条"の名前を持つ従業員2名がヒットする.
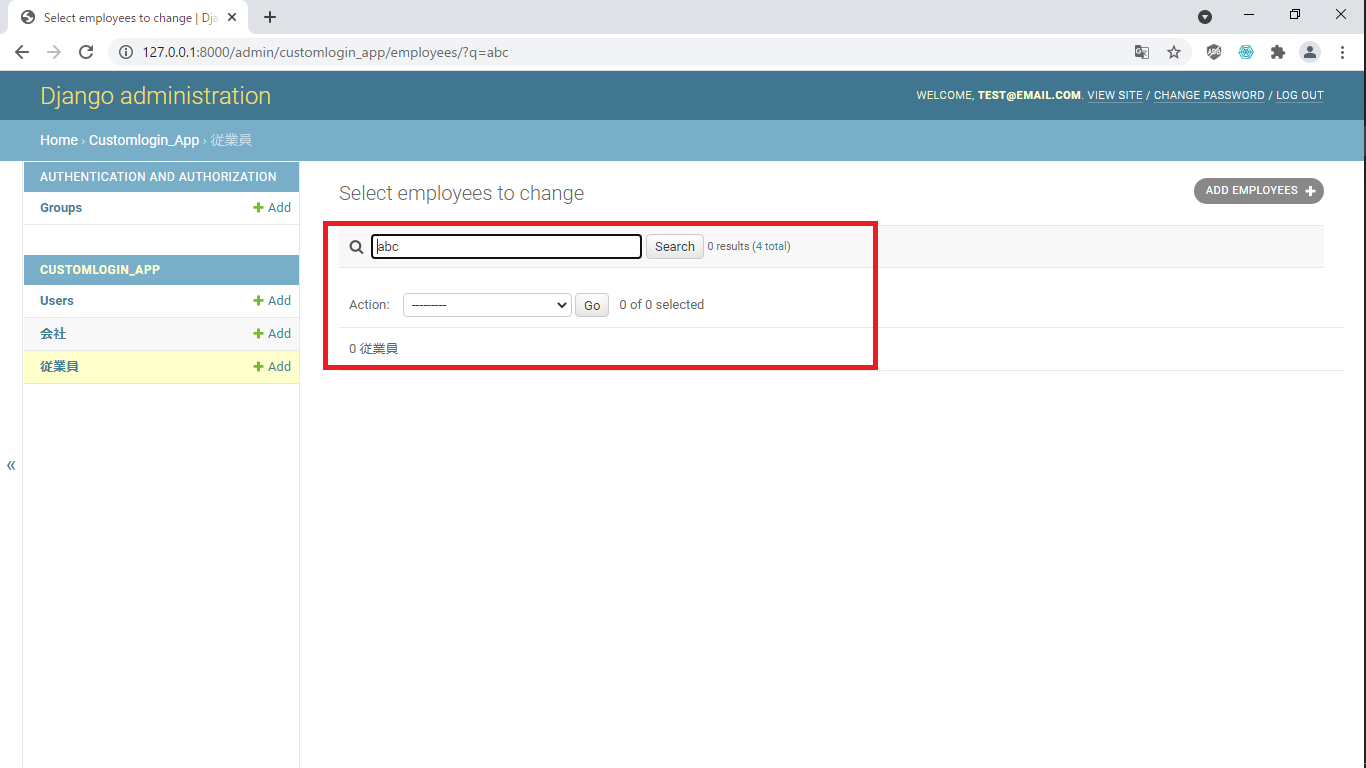
検索画面の対象は名前のみなので,会社名に含まれる"abc"を入力しても検索ヒットしない.従業員名だけでなく,会社名も検索に含めたい場合には,「search_fields = ('name’, 'company’)」と記述する必要がある.
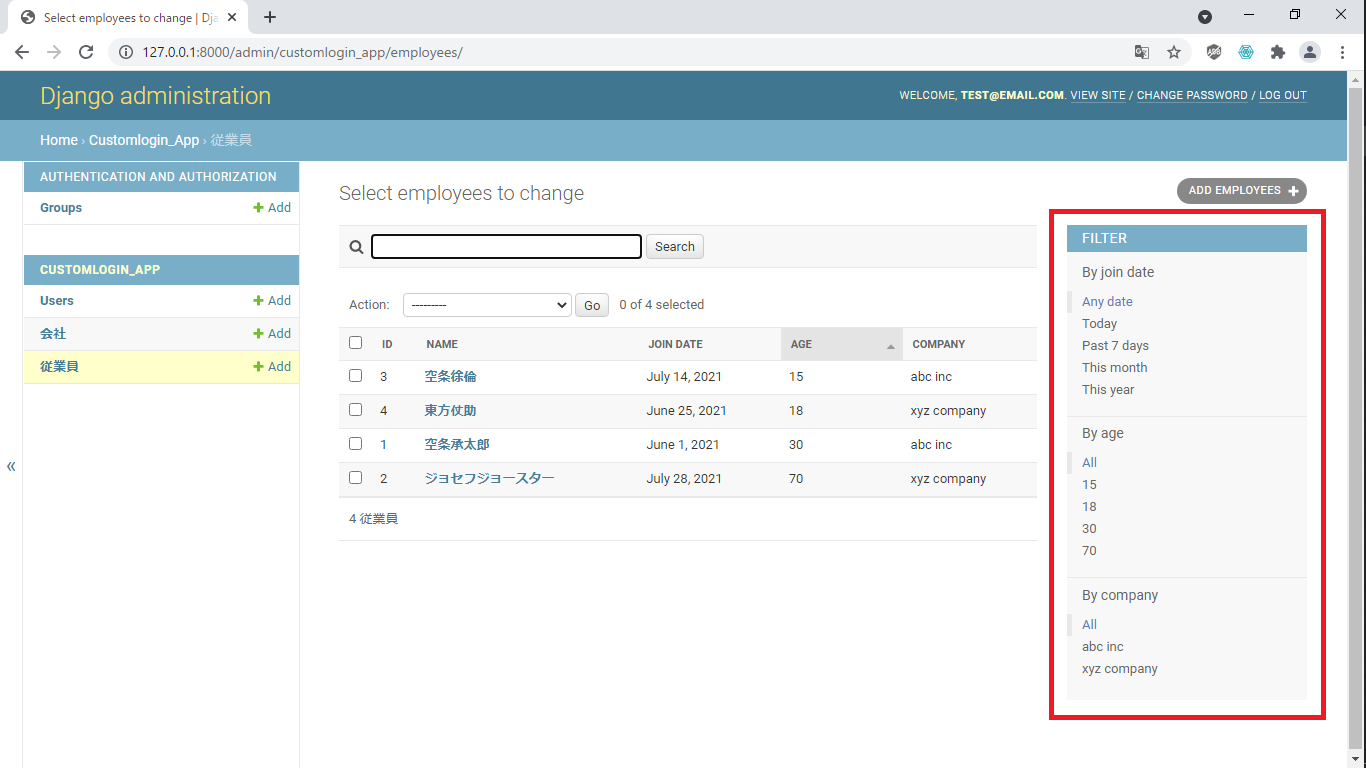
現在,従業員一覧ページは以下のようにソート機能がない状態となっている.
“customlogin_app/admin.py"を追記し,以下のように編集する.
from django.contrib import admin
from django.contrib.auth.admin import UserAdmin
from django.contrib.auth import get_user_model
from .forms import UserChangeForm, UserCreationForm
from .models import Employees, Companies
User = get_user_model()
class CustomizeUserAdmin(UserAdmin):
form = UserChangeForm
add_form = UserCreationForm
list_display = ('username', 'date_of_birth', 'email', 'is_staff')
fieldsets = (
('user info', {'fields': ('username', 'date_of_birth', 'email', 'password', 'website', 'picture')}),
('permission',{'fields': ('is_staff', 'is_active', 'is_superuser')}),
)
add_fieldsets = (
('user info', {'fields': ('username', 'date_of_birth', 'email', 'password', 'reenter_password'),})
)
admin.site.register(User, CustomizeUserAdmin)
admin.site.register(Companies)
@admin.register(Employees)
class EmployeeAdmin(admin.ModelAdmin):
fields = ('name', 'join_date', 'age', 'company')
list_display = ('id', 'name', 'join_date', 'age', 'company')
list_display_links = ('name',)
search_fields = ('name',)
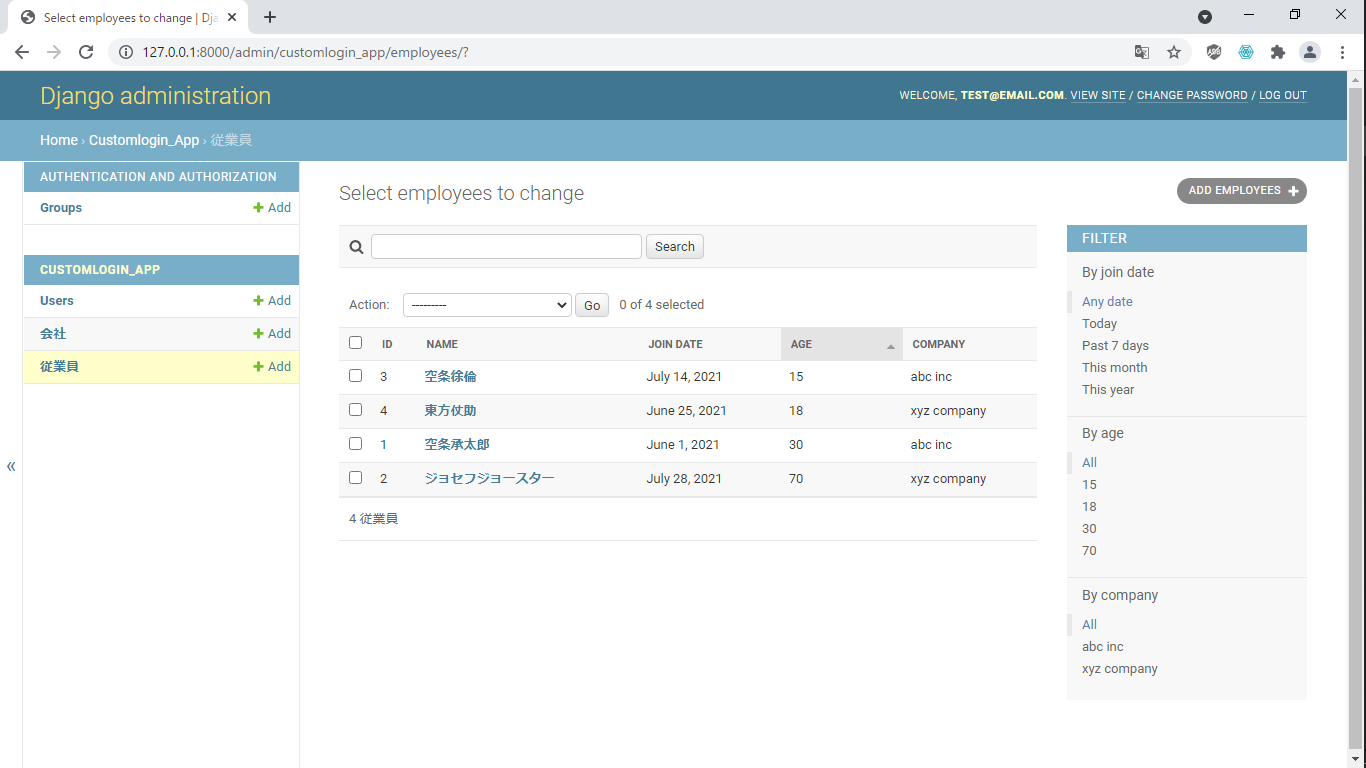
list_filter = ('join_date', 'age', 'company') # 追記箇所上記を保存し,従業員一覧ページを更新すると以下のようにソート機能が備わる.
現在,従業員一覧ページは以下のように直接編集機能がない状態となっている.
“customlogin_app/admin.py"を追記し,以下のように編集する.
from django.contrib import admin
from django.contrib.auth.admin import UserAdmin
from django.contrib.auth import get_user_model
from .forms import UserChangeForm, UserCreationForm
from .models import Employees, Companies
User = get_user_model()
class CustomizeUserAdmin(UserAdmin):
form = UserChangeForm
add_form = UserCreationForm
list_display = ('username', 'date_of_birth', 'email', 'is_staff')
fieldsets = (
('user info', {'fields': ('username', 'date_of_birth', 'email', 'password', 'website', 'picture')}),
('permission',{'fields': ('is_staff', 'is_active', 'is_superuser')}),
)
add_fieldsets = (
('user info', {'fields': ('username', 'date_of_birth', 'email', 'password', 'reenter_password'),})
)
admin.site.register(User, CustomizeUserAdmin)
admin.site.register(Companies)
@admin.register(Employees)
class EmployeeAdmin(admin.ModelAdmin):
fields = ('name', 'join_date', 'age', 'company')
list_display = ('id', 'name', 'join_date', 'age', 'company')
list_display_links = ('name',)
search_fields = ('name',)
list_filter = ('join_date', 'age', 'company')
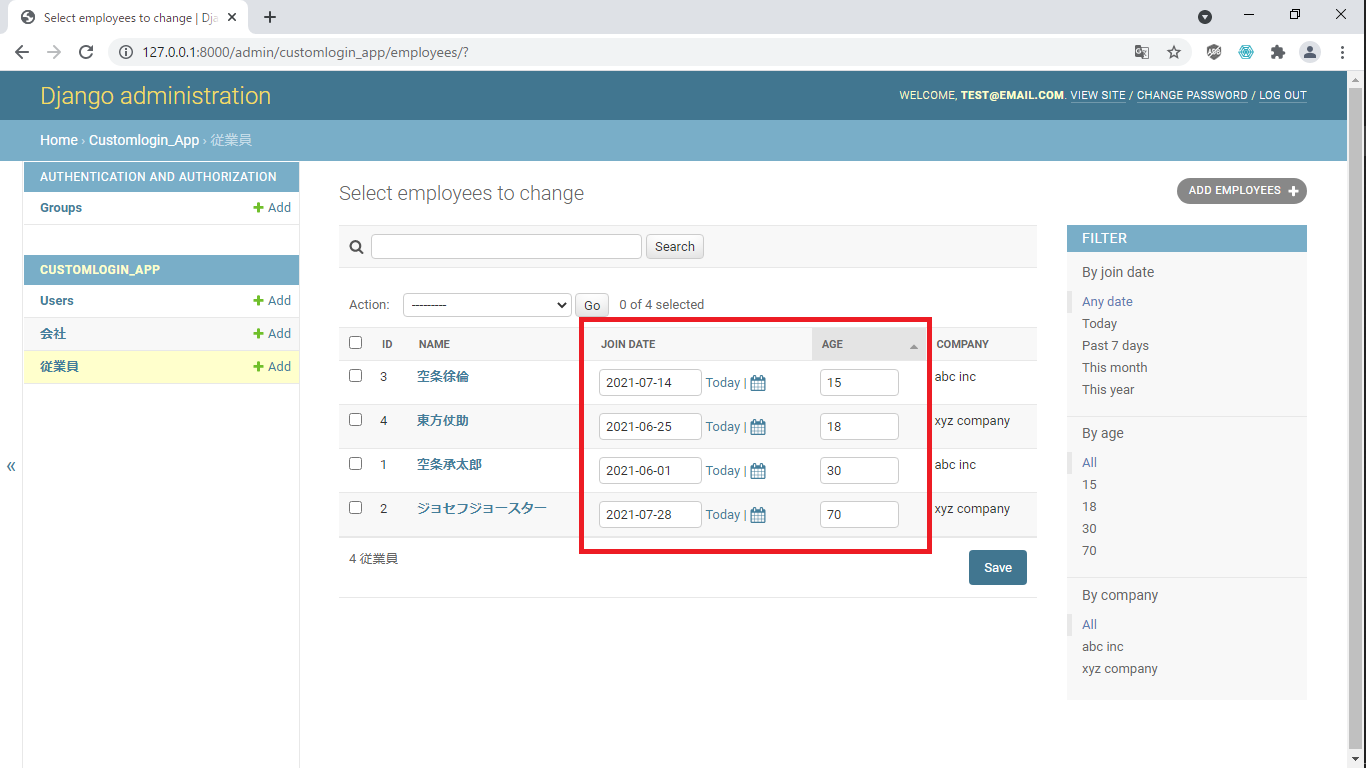
list_editable = ('join_date', 'age',) # 追記箇所上記を保存し,従業員一覧ページを更新すると以下のように直接編集機能が備わる.
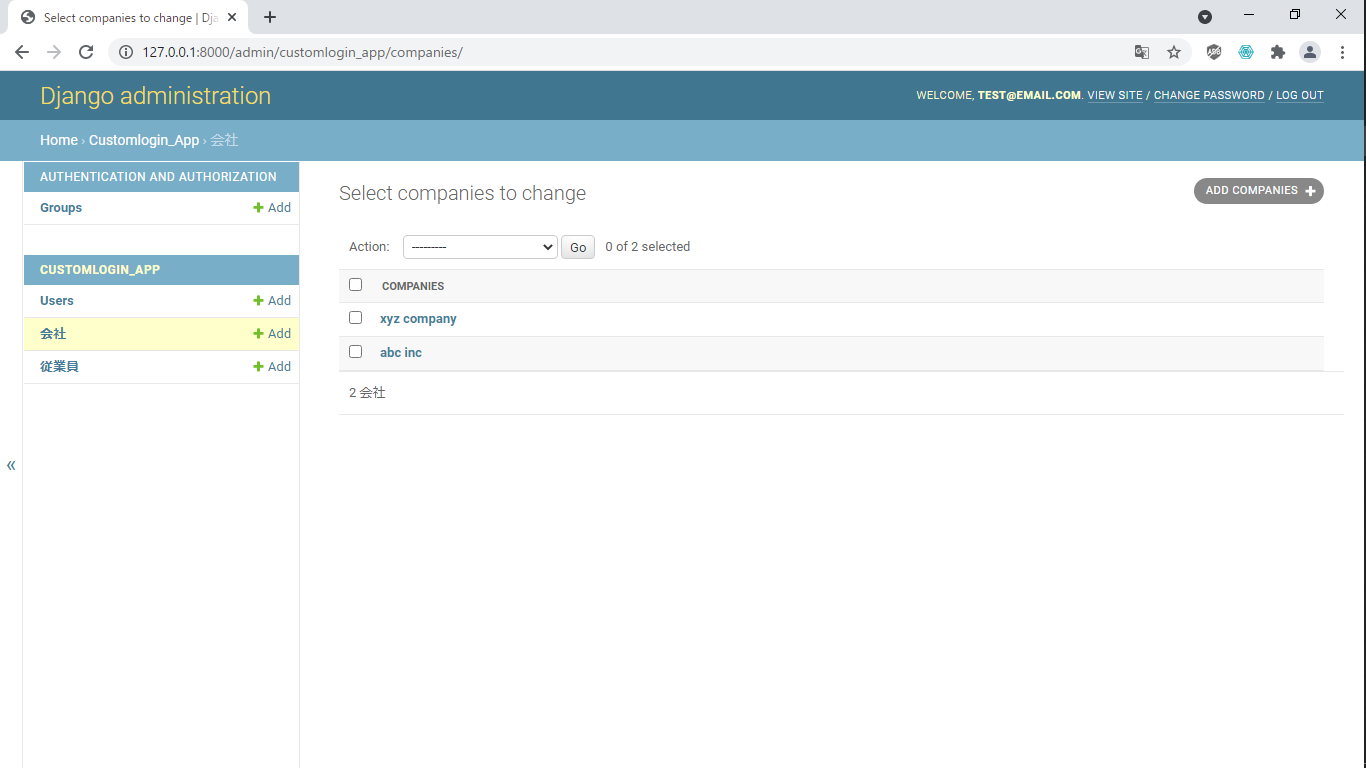
現在,会社一覧ページは以下のように"company name"のみ表記されている状態となっている.
“customlogin_app/admin.py"を追記し,以下のように編集する.なお,"admin.site.register(Companies)"は削除した.
from django.contrib import admin
from django.contrib.auth.admin import UserAdmin
from django.contrib.auth import get_user_model
from .forms import UserChangeForm, UserCreationForm
from .models import Employees, Companies

User = get_user_model()

class CustomizeUserAdmin(UserAdmin):
  form = UserChangeForm
  add_form = UserCreationForm

  list_display = ('username', 'date_of_birth', 'email', 'is_staff')

  fieldsets = (
    ('user info', {'fields': ('username', 'date_of_birth', 'email', 'password', 'website', 'picture')}),
    ('permission',{'fields': ('is_staff', 'is_active', 'is_superuser')}),
  )

  add_fieldsets = (
    ('user info', {'fields': ('username', 'date_of_birth', 'email', 'password', 'reenter_password'),})
  )

admin.site.register(User, CustomizeUserAdmin)

@admin.register(Employees)
class EmployeeAdmin(admin.ModelAdmin):

  fields = ('name', 'join_date', 'age', 'company')
  list_display = ('id', 'name', 'join_date', 'age', 'company')
  list_display_links = ('name',)
  search_fields = ('name',)
  list_filter = ('join_date', 'age', 'company')
  list_editable = ('join_date', 'age',)

@admin.register(Companies) # 以下追記箇所
class CompanyAdmin(admin.ModelAdmin):
  list_display = ('name', 'employee_count')

  def employee_count(self, obj):
    count = obj.employees_set.count()
    return count

  employee_count.short_description = '従業員数'
“customlogin_app/models.py"に追記し,以下のように編集する.
from django.db import models
from django.contrib.auth.models import (
BaseUserManager,
AbstractBaseUser,
PermissionsMixin
)
class UserManager(BaseUserManager):
def create_user(self, username, email, date_of_birth, password=None):
if not email:
raise ValueError('Enter Email')
user = self.model(
username=username,
email=email,
date_of_birth=date_of_birth,
)
user.set_password(password)
user.save(using=self._db)
return user
def create_superuser(self, username, email, date_of_birth, password=None):
user = self.model(
username=username,
email=email,
date_of_birth=date_of_birth
)
user.set_password(password)
user.is_staff = True
user.is_active = True
user.is_superuser = True
user.save(using=self._db)
return user
class User(AbstractBaseUser, PermissionsMixin):
username = models.CharField(max_length=100)
email = models.EmailField(max_length=150, unique=True)
date_of_birth = models.DateField()
is_active = models.BooleanField(default=False)
is_staff = models.BooleanField(default=False)
website = models.URLField(null=True)
picture = models.FileField(null=True)
USERNAME_FIELD = 'email'
REQUIRED_FIELDS = ['username', 'date_of_birth']
objects = UserManager()
def __str__(self):
return self.email
class Employees(models.Model):
name = models.CharField(max_length=50)
age = models.IntegerField()
join_date = models.DateField()
company = models.ForeignKey(
'Companies', on_delete=models.CASCADE
)
class Meta:
db_table = 'employees'
verbose_name_plural = '従業員'
ordering = ('age',)
def __str__(self):
return self.name + ',' + str(self.join_date)
class Companies(models.Model):
name = models.CharField(max_length=50, verbose_name='会社名') # 変更箇所
class Meta:
db_table = 'companies'
verbose_name_plural = '会社'
def __str__(self):
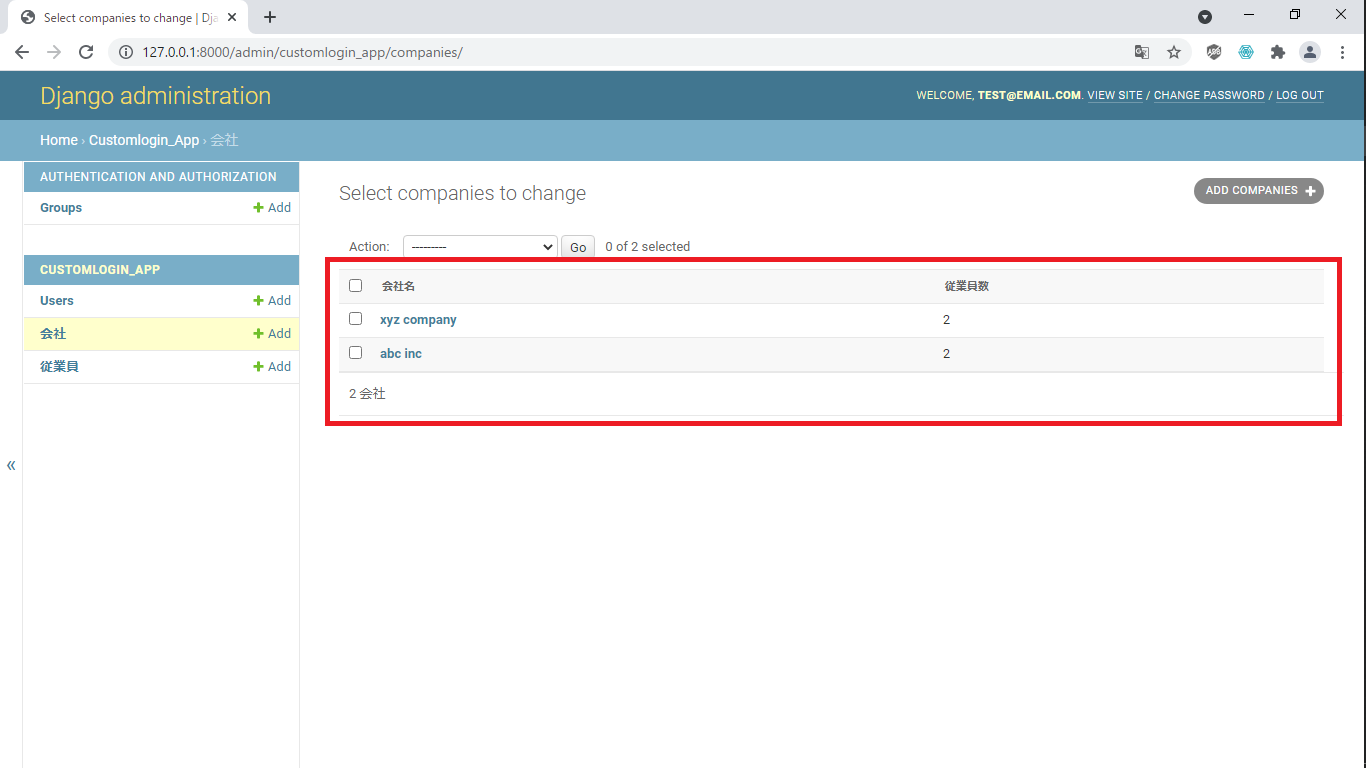
return self.name上記を保存し,会社一覧ページを更新すると以下のように,従業員数が追加となり,項目名は日本語に変わった.
現在,トップページは以下のように"Django administration"が表示されている.

“customlogin_project/settings.py"に以下コードを追記し,編集する.
from pathlib import Path
import os # 追記箇所
BASE_DIR = Path(__file__).resolve().parent.parent
TEMPLATE_DIR = os.path.join(BASE_DIR, 'templates') # 以下追記箇所
STATIC_DIR = os.path.join(BASE_DIR, 'static')
~省略~
TEMPLATES = [
{
'BACKEND': 'django.template.backends.django.DjangoTemplates',
'DIRS': [TEMPLATE_DIR], # 変更箇所
'APP_DIRS': True,
'OPTIONS': {
'context_processors': [
'django.template.context_processors.debug',
'django.template.context_processors.request',
'django.contrib.auth.context_processors.auth',
'django.contrib.messages.context_processors.messages',
],
},
},
]
~省略~
STATIC_URL = '/static/'
STATICFILES_DIRS = ( # 以下追記箇所
STATIC_DIR,
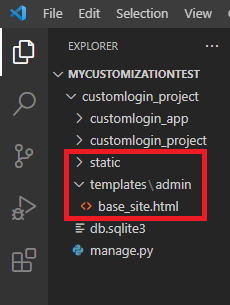
)プロジェクト名"customlogin_project"に以下のように"static"フォルダと"templates"フォルダを作成する."templates"フォルダには"admin"フォルダを作成し,その中に"base_site.html"を作成する.
以下URLに移行し,記述されているコードを"customlogin_project/templates/admin/base_site.html"に貼り付け,以下のように編集する.
https://github.com/django/django/blob/main/django/contrib/admin/templates/admin/base_site.html
{% extends "admin/base.html" %}
{% block title %}{% if subtitle %}{{ subtitle }} | {% endif %}{{ title }} | {{ site_title|default:_('Django site admin') }}{% endblock %}
{% block branding %}
<h1 id="site-name"><a href="{% url 'admin:index' %}">my company site</a></h1> # 変更箇所
{% endblock %}
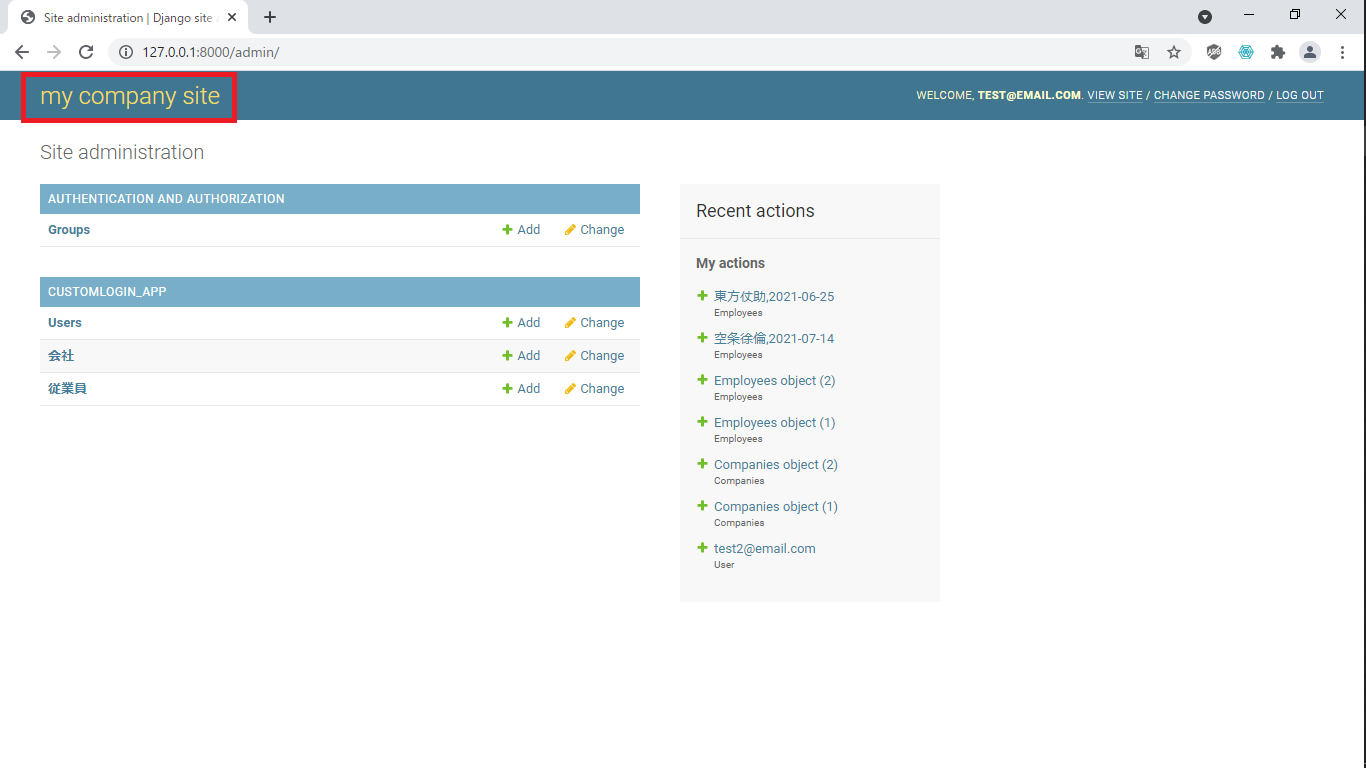
{% block nav-global %}{% endblock %}上記を保存し,トップページを確認すると,以下のように"Django administration"から"my company site"へ変更されている.
現在,トップページのリンク箇所は以下のように青色にて表示されている.
“customlogin_project/static"フォルダに"admin"フォルダを作成し,その中に"css"フォルダを作成する."css"フォルダに"base.css"を作成する.

以下URLに移行し,記述されているコードを"customlogin_project/static/admin/css/base.css"に貼り付け,以下箇所を編集する.
https://github.com/django/django/blob/main/django/contrib/admin/static/admin/css/base.css
/* LINKS */

a:link, a:visited {
color: green; # 変更箇所
text-decoration: none;
transition: color 0.15s, background 0.15s;
}
上記を保存し,トップページを更新(ctrl + F5)すると,以下のようにリンク箇所は青色から緑色へ変更された.
■参照
https://docs.djangoproject.com/ja/3.1/topics/auth/customizing/
https://docs.djangoproject.com/ja/3.1/ref/contrib/auth/#user-model
https://docs.djangoproject.com/ja/3.1/topics/auth/customizing/#custom-users-and-permissions
https://docs.djangoproject.com/ja/3.1/topics/auth/customizing/#a-full-example
https://github.com/django/django/tree/main/django/contrib/admin/templates
以上